
On this page
- Who can do this
- Before you start
- Open Menu & packages
- Create a section
- Edit an existing section
- Enter the reusable item's details
- Set the price and charging method
- Choose the tax and fee flags
- Choose availability and client visibility
- Add optional item details
- Save before adding choices
- Add a choice or add-on
- Choose whether to offer the option
- Find an item in a longer library
- Put sections and items in order
- Retire an item while keeping its history
- Delete only records you no longer need
- Expected result
- If something does not save
- Related tasks
Who can do this
Your club needs Rental Management. Staff with permission to view the rental library can read it; changes require permission to manage the library. If the section says View only, ask a club administrator for the access you need.
Before you start
Step 1 of 15
Open Menu & packages
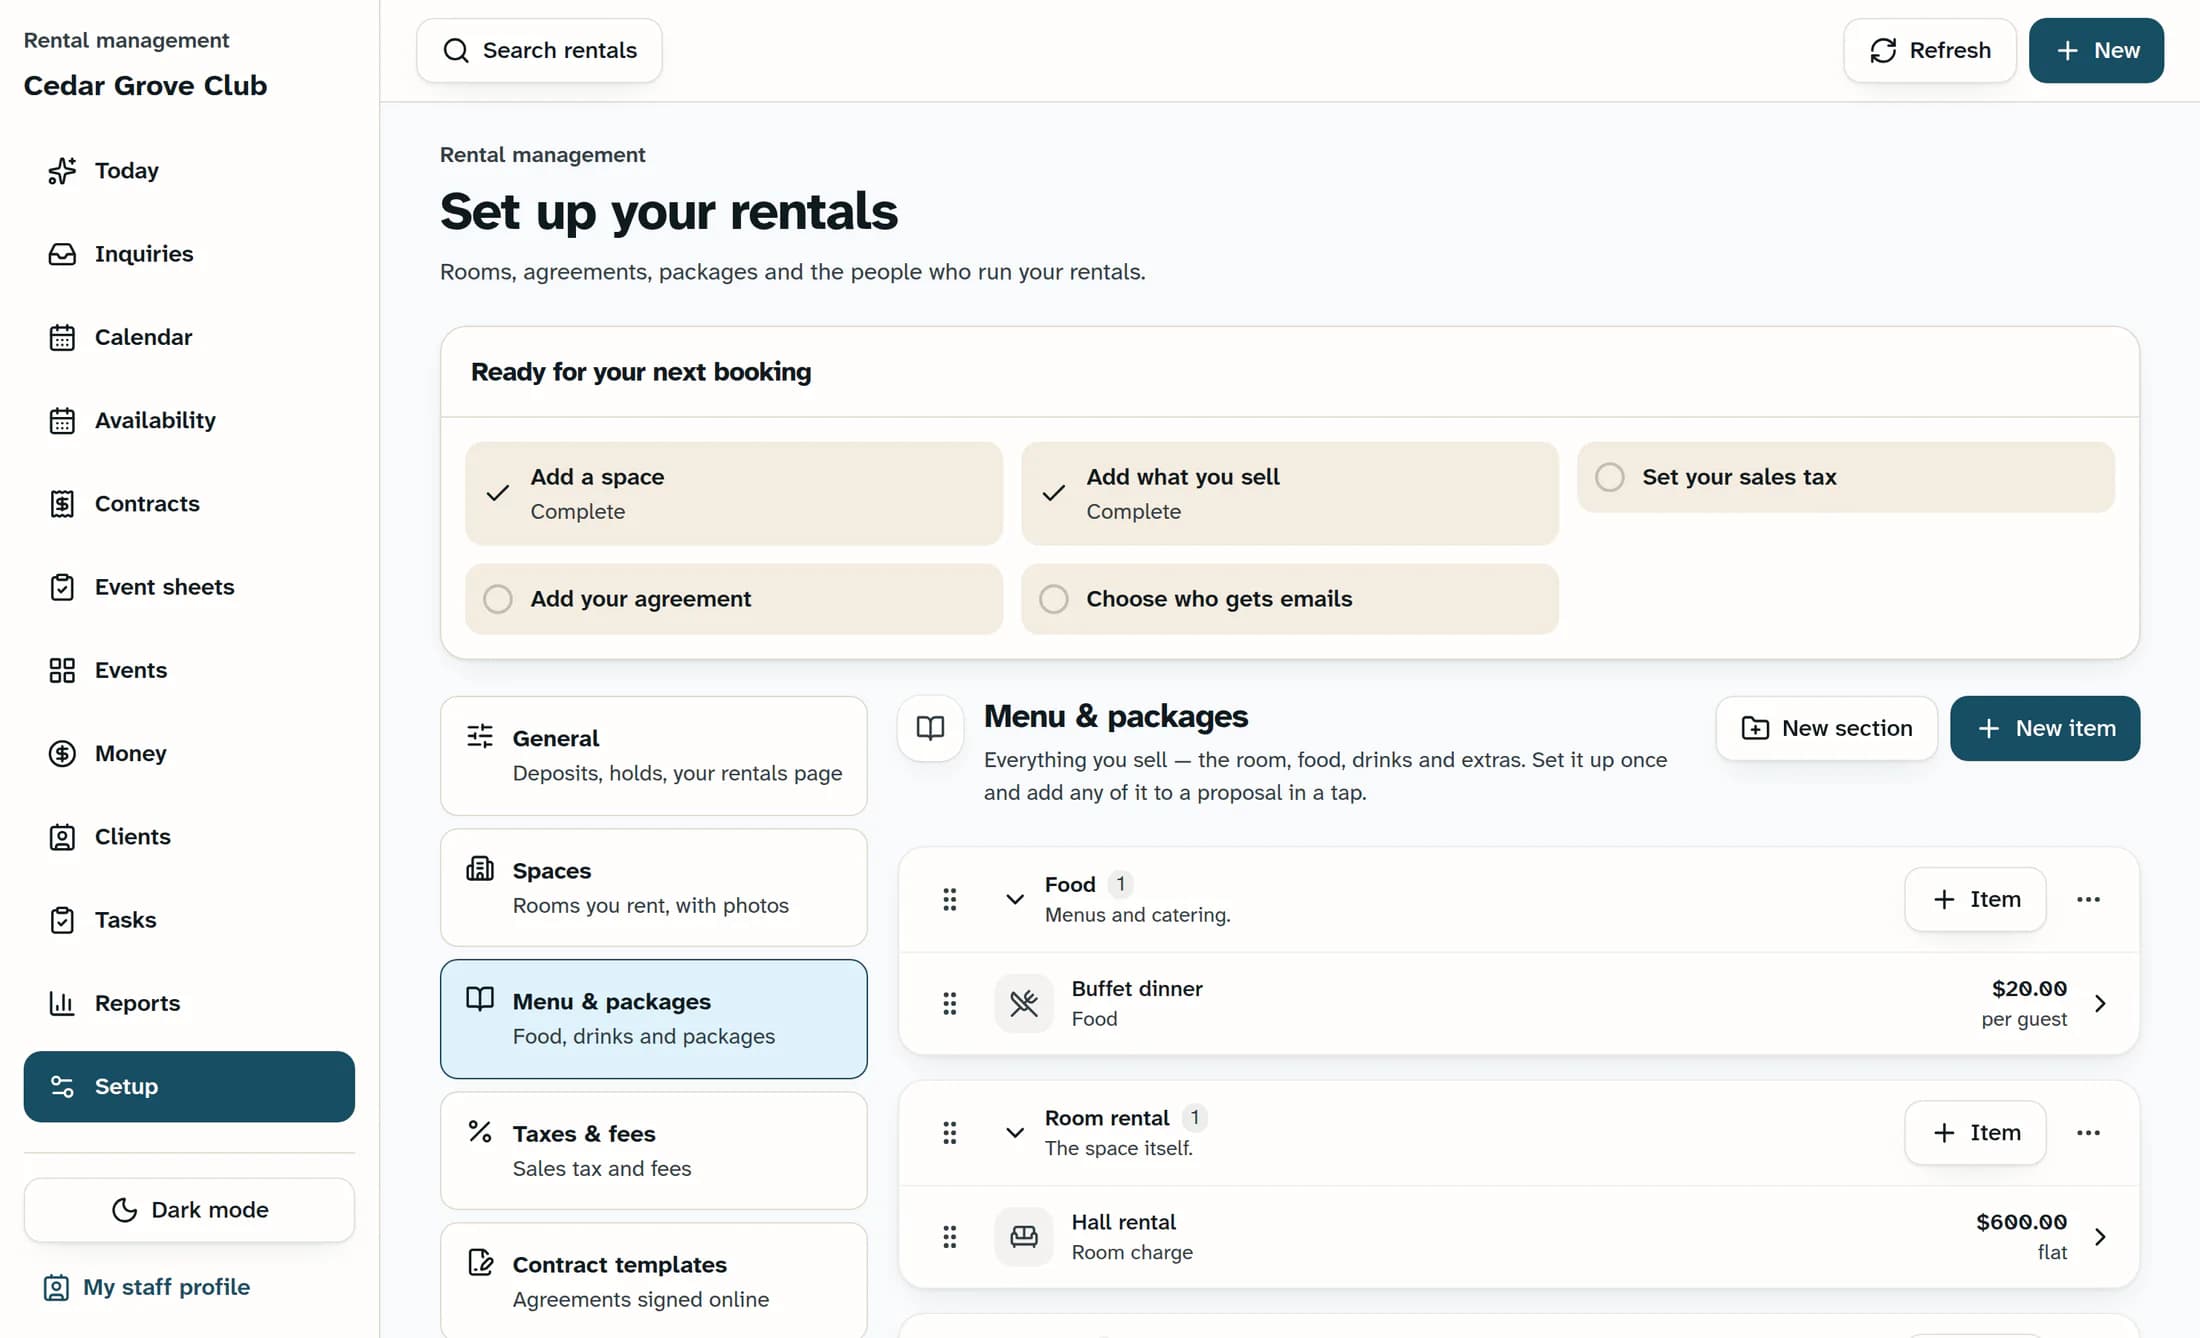
From the admin area, open Rental Management, then Setup → Menu & packages. Existing sections group the reusable items. If the library is empty, Add your own starts an item; Start with examples adds sample sections and items at $0, so you must set real prices before using them.
Step 2 of 15
Create a section
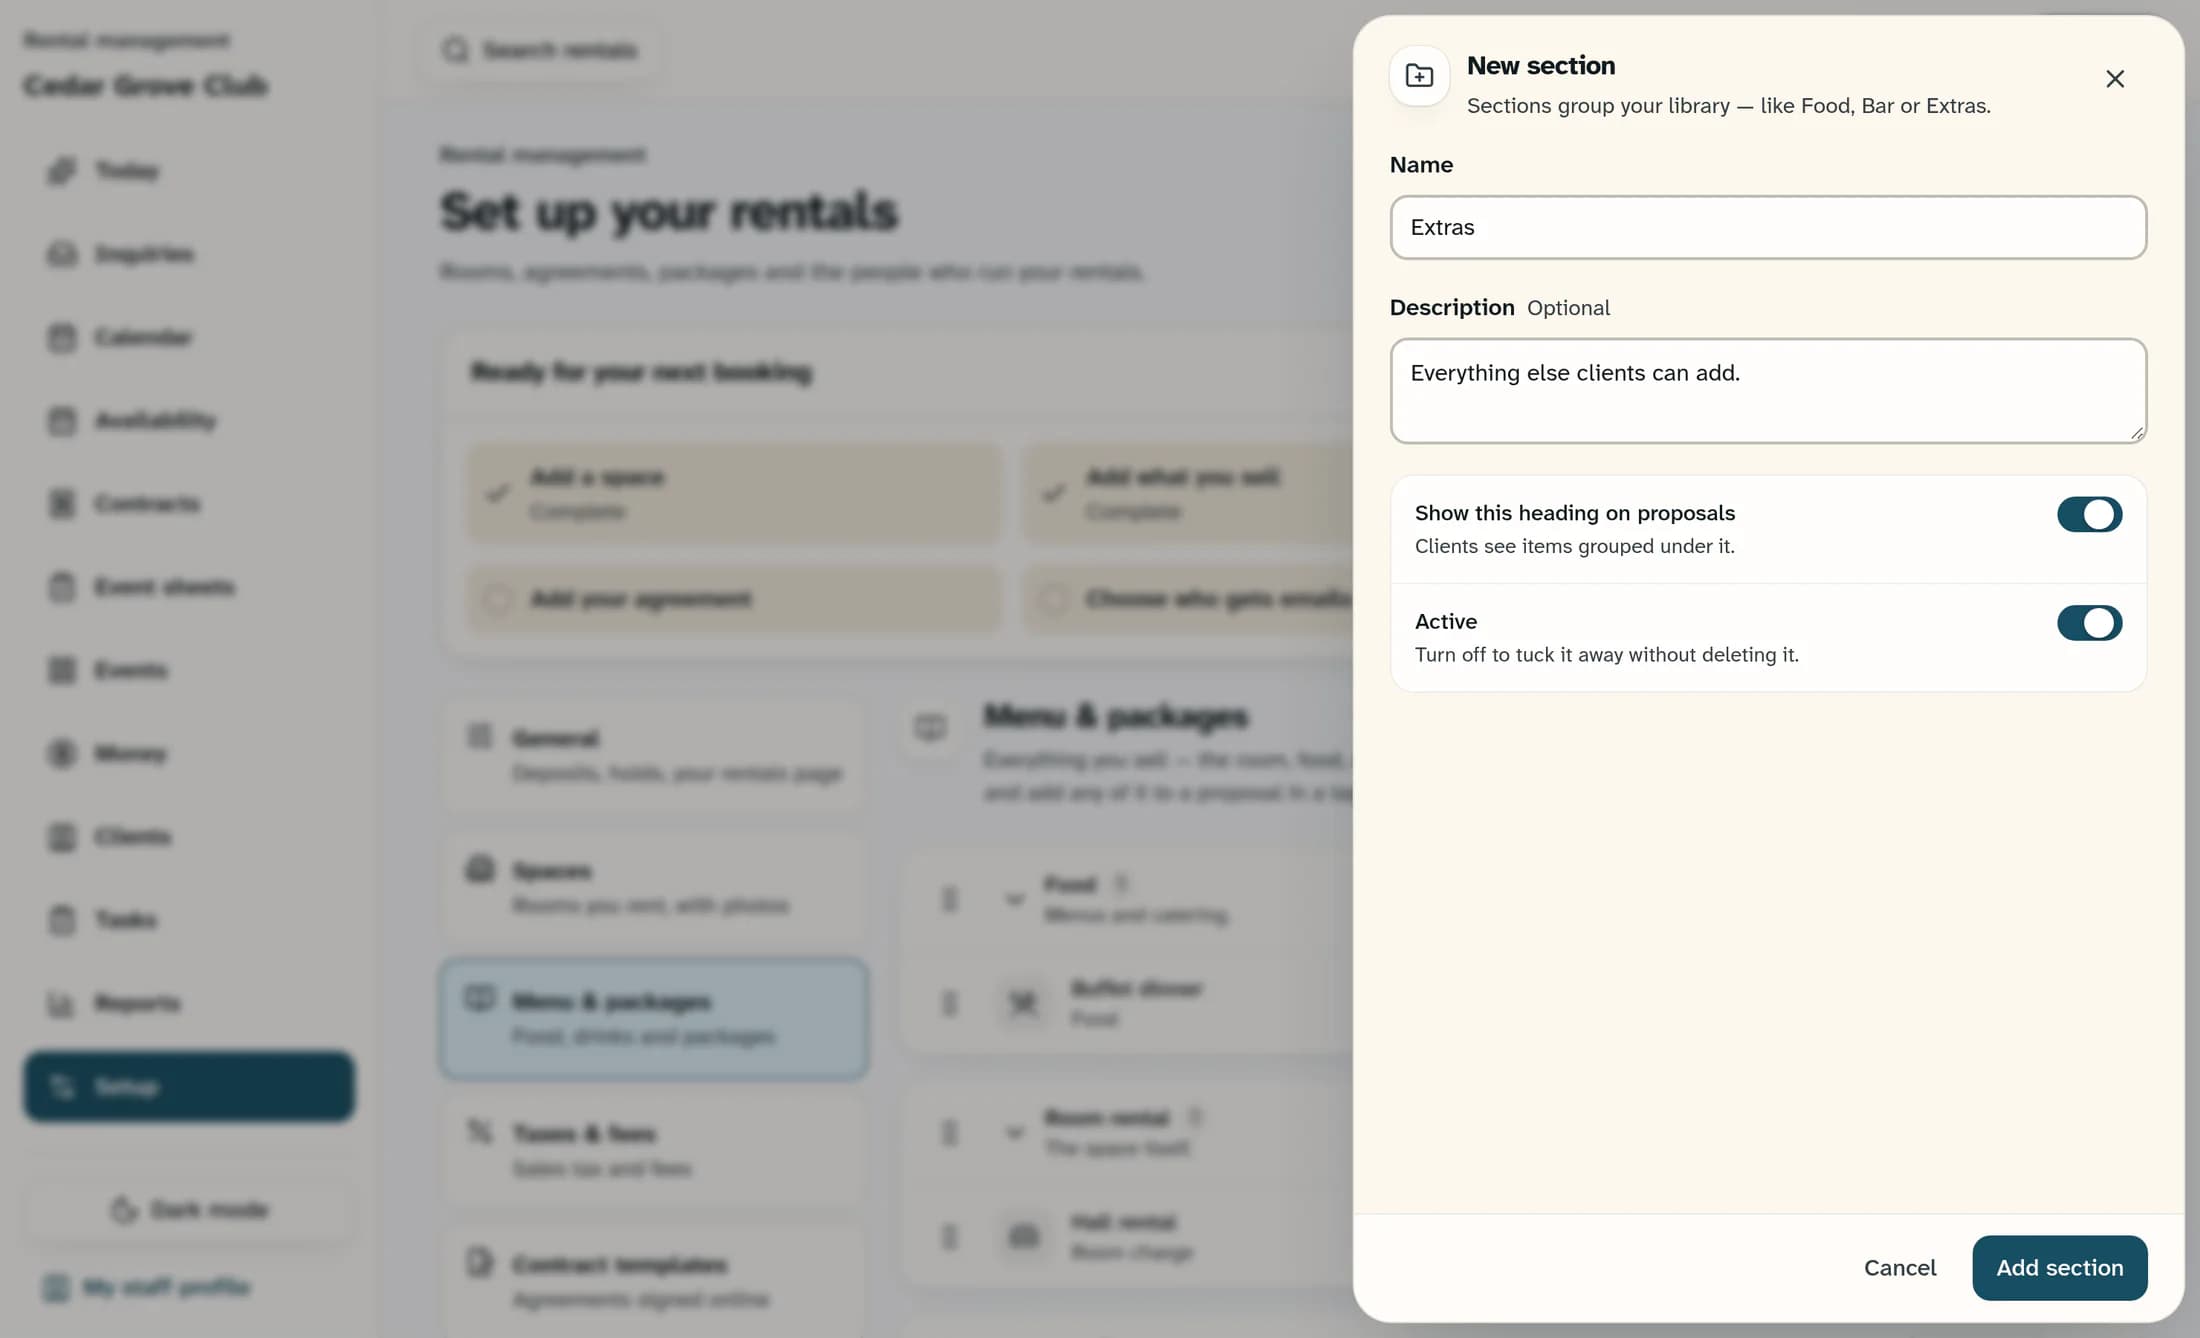
Choose New section at the top of Menu & packages. Enter Name and, optionally, Description; a section might be Food, Bar or Extras. Set Show this heading on proposals for whether clients see the grouping, and Active for whether the section stays in use. Choose Add section.
Step 3 of 15
Edit an existing section
Open the three-dot options button beside the section name, then choose Edit section. Update its fields and choose Save changes. Turning off Active tucks the section away without deleting it. This does not retire its items; use each item's Available setting to stop adding that item to new proposals.
Step 4 of 15
Enter the reusable item's details
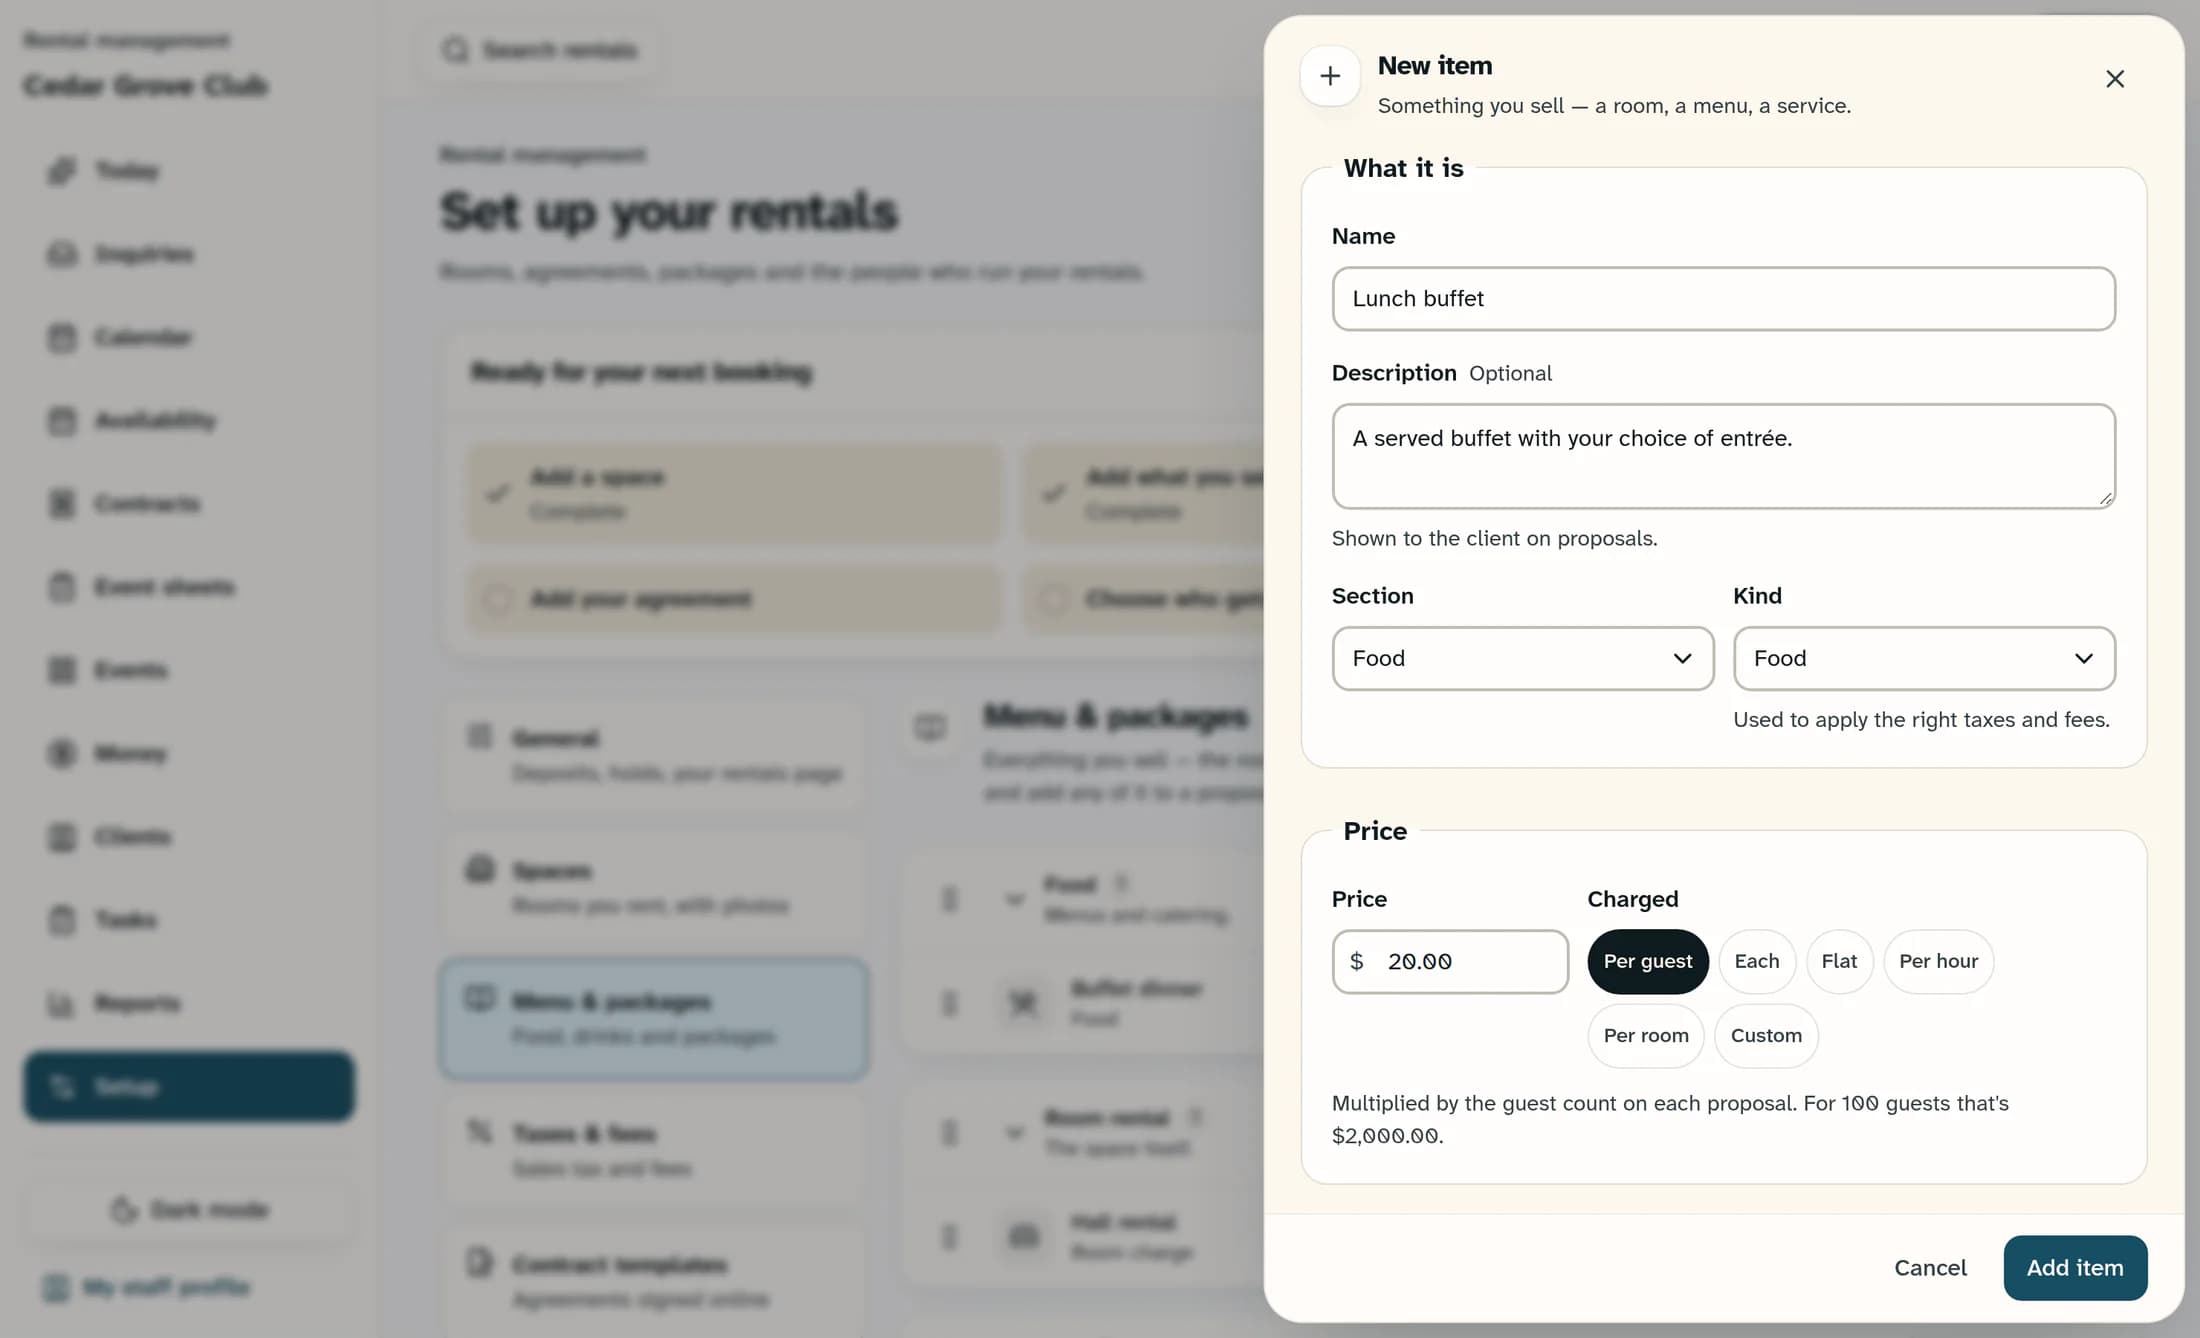
Choose New item at the top, or the section's Item button to start within that section. Under What it is, enter Name and Description, choose Section, then choose Kind. The description appears on proposals; the kind helps apply the right taxes and fees.
Step 5 of 15
Set the price and charging method
Under Price, enter an amount of $0 or more. In Charged, choose Per guest, Each, Flat, Per hour, Per room or Custom. The helper text explains the calculation: per guest multiplies by guest count, each by quantity, per hour by hours, and flat uses one price. For example, $20 per guest is $2,000 for 100 guests.
Step 6 of 15
Choose the tax and fee flags
Under Taxes & fees, set Sales tax applies for whether the line is taxable. Service fee applies, Admin fee applies and Gratuity applies are saved item defaults, but these three switches alone do not determine the amount charged. Review the actual proposal's configured fees and totals separately; automatic fees follow the fee setup and any changes made for that event.
Step 7 of 15
Choose availability and client visibility
Under Who sees it, set Available for whether the item can be added to new proposals. Show on the client's proposal controls whether the line is listed for the client; the proposal calculation excludes hidden lines from the amount charged. Team only hides the item from clients and from the library when building proposals, and team-only proposal lines are not charged. The library's helper text about hidden lines counting toward the total is inconsistent with the calculation; check the proposal's displayed totals.
Step 8 of 15
Add optional item details
Open More options. In Photo link, paste a link to an item photo; this field takes a URL rather than uploading a file. Set Order at least and Order at most if you need quantity bounds: use whole numbers of zero or higher, leave blank for no bound, and keep the maximum at least as large as the minimum. Add Team notes for private instructions copied to the proposal line and never shown to clients. These values do not guarantee that the proposal prevents a different quantity; check the quantity on the actual proposal.
Step 9 of 15
Save before adding choices
Choose Add item for a new item or Save changes when editing one. A successful first save keeps the item open and makes Choices & add-ons available; saving changes to an existing item closes the editor. To edit an existing item, choose its row in the library; if the editor closed, reopen that same row before continuing.
Step 10 of 15
Add a choice or add-on
In the saved item's Choices & add-ons, choose Add, or Add the first one when the list is empty. Enter Option name, then choose Choice for an alternative such as Chicken or Vegetarian, or Add-on for an extra such as a dessert bar. In Price change, enter a positive adjustment to raise the price, a negative adjustment to lower it, or zero or blank for no change. Review the helper amount before saving.
Step 11 of 15
Choose whether to offer the option
Use the switch beside Offered or Not offered to decide whether the option is offered. Choose Add for a new option or Save for an edited one. To change an existing option, choose its row in Choices & add-ons; options save separately from the item's main fields.
Step 12 of 15
Find an item in a longer library
Choose a section heading to collapse or expand its items. When the library has more than six items, a search field appears above the sections; enter words from the item name, description or kind. Every search word must match, and searching shows matching sections expanded. Clear the search to return to the usual grouped list.
Step 13 of 15
Put sections and items in order
Use the drag handle beside a section or item to move it in the list. Section handles are named for the section, and item handles are named for the item. Ordering saves when you finish dragging; it is the order your team sees when building a proposal. Reordering is unavailable while searching. To move an item into another section, change Section in its editor and choose Save changes.
Step 14 of 15
Retire an item while keeping its history
In the item editor, turn off Available, then choose Save changes. The item stays on old proposals and cannot be added to new ones. This is useful when you might offer it again later; to restore it, turn Available on and save.
Step 15 of 15
Delete only records you no longer need
If deletion is appropriate, the saved item editor offers Delete, followed by Delete item in its confirmation. Existing proposals keep their line, while that item's choices and add-ons are also deleted. A section's three-dot menu offers Delete section; its confirmation explains that the items stay under Not in a section. An existing option has its own Delete action and confirmation; proposals that used it keep their line.
Expected result
Your library contains reusable items grouped into sections, with the defaults and saved choices your team needs. New proposals can use available items according to their visibility settings. An existing proposal retains its own lines; check that proposal directly before claiming its prices changed.
If something does not save
About this guide
Applies to the Clubhouse web Rental Management interface. Source release 16782cba (October 21, 2026) was compared with the setup preflight on October 26, 2026. Illustrations reconstruct the source with fictional data; they do not verify a live business workflow. Native member and Workforce apps were not verified for this task.
The screens in this guide show example clubs and people. Your club's name, colours and some labels may look different.