
On this page
- Who can do this
- Before you start
- Open rental spaces
- Enter the room's basics
- Add pricing and team notes
- Choose the room's deposit rule
- Choose visibility and availability
- Save the room before adding photos
- Add room photos
- Choose the cover and photo order
- Remove a photo you no longer need
- Set the venue deposit default
- Set how long new holds last
- Choose what visitors see
- Save the venue settings
- Expected result
- If something does not save
- Related tasks
Who can do this
Your club needs Rental Management. Space changes require permission to manage rental spaces; General changes require permission to manage rental settings. These are separate permissions. If an area says View only, ask a club administrator for the access you need.
Before you start
Step 1 of 13
Open rental spaces
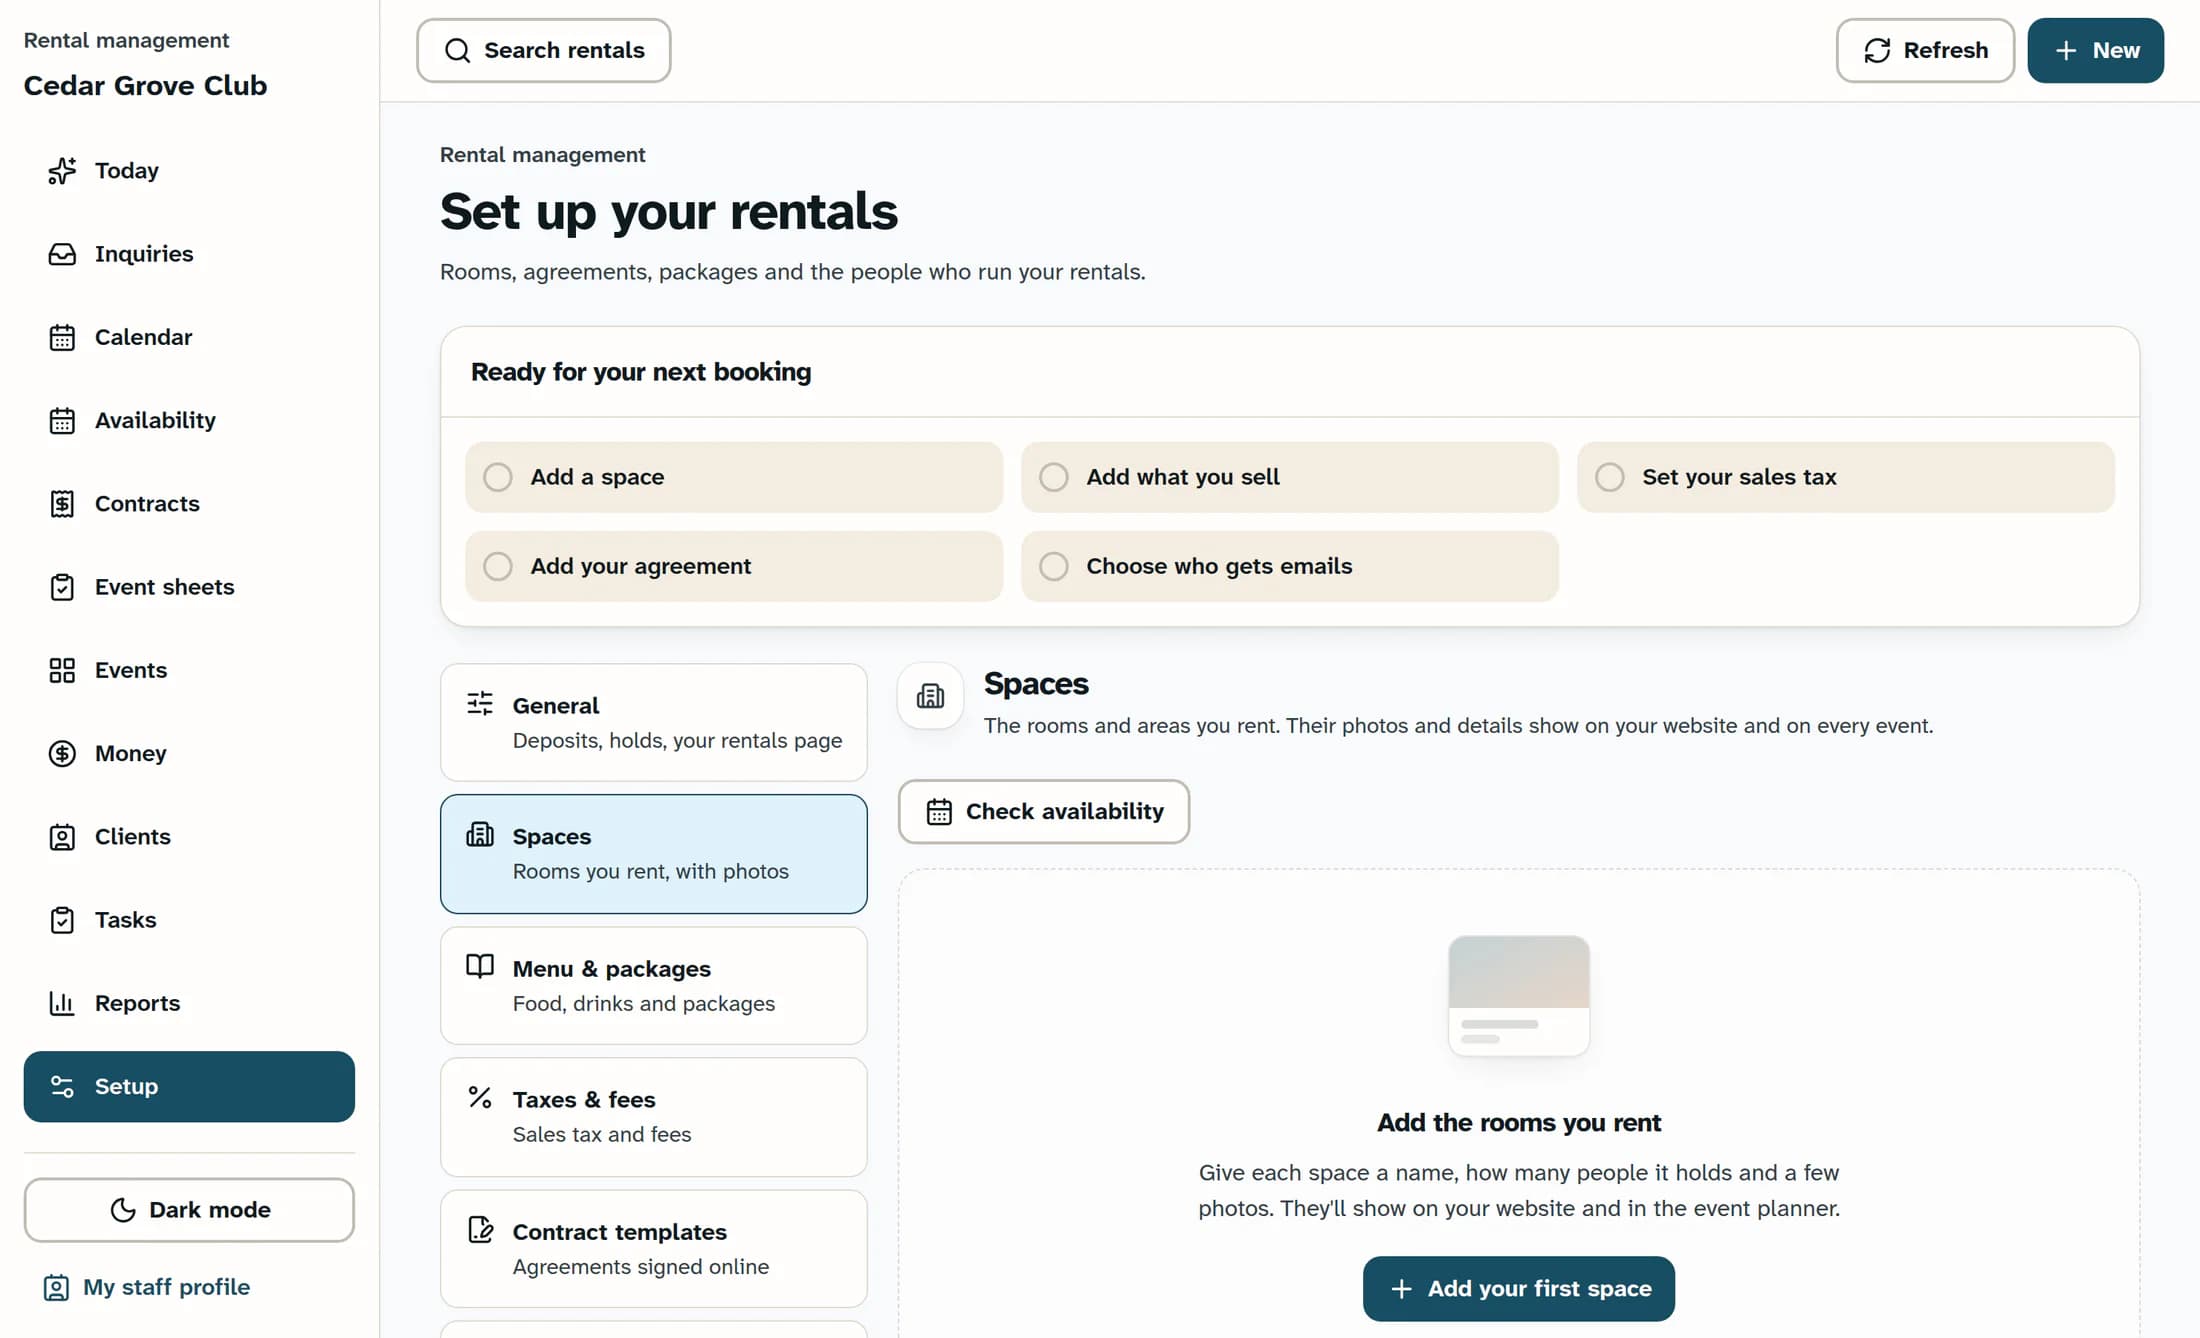
From the admin area, open Rental Management, then Setup → Spaces. Choose Add a space, or Add your first space if there are no rooms yet. To update a room, choose its existing space card.
Step 2 of 13
Enter the room's basics
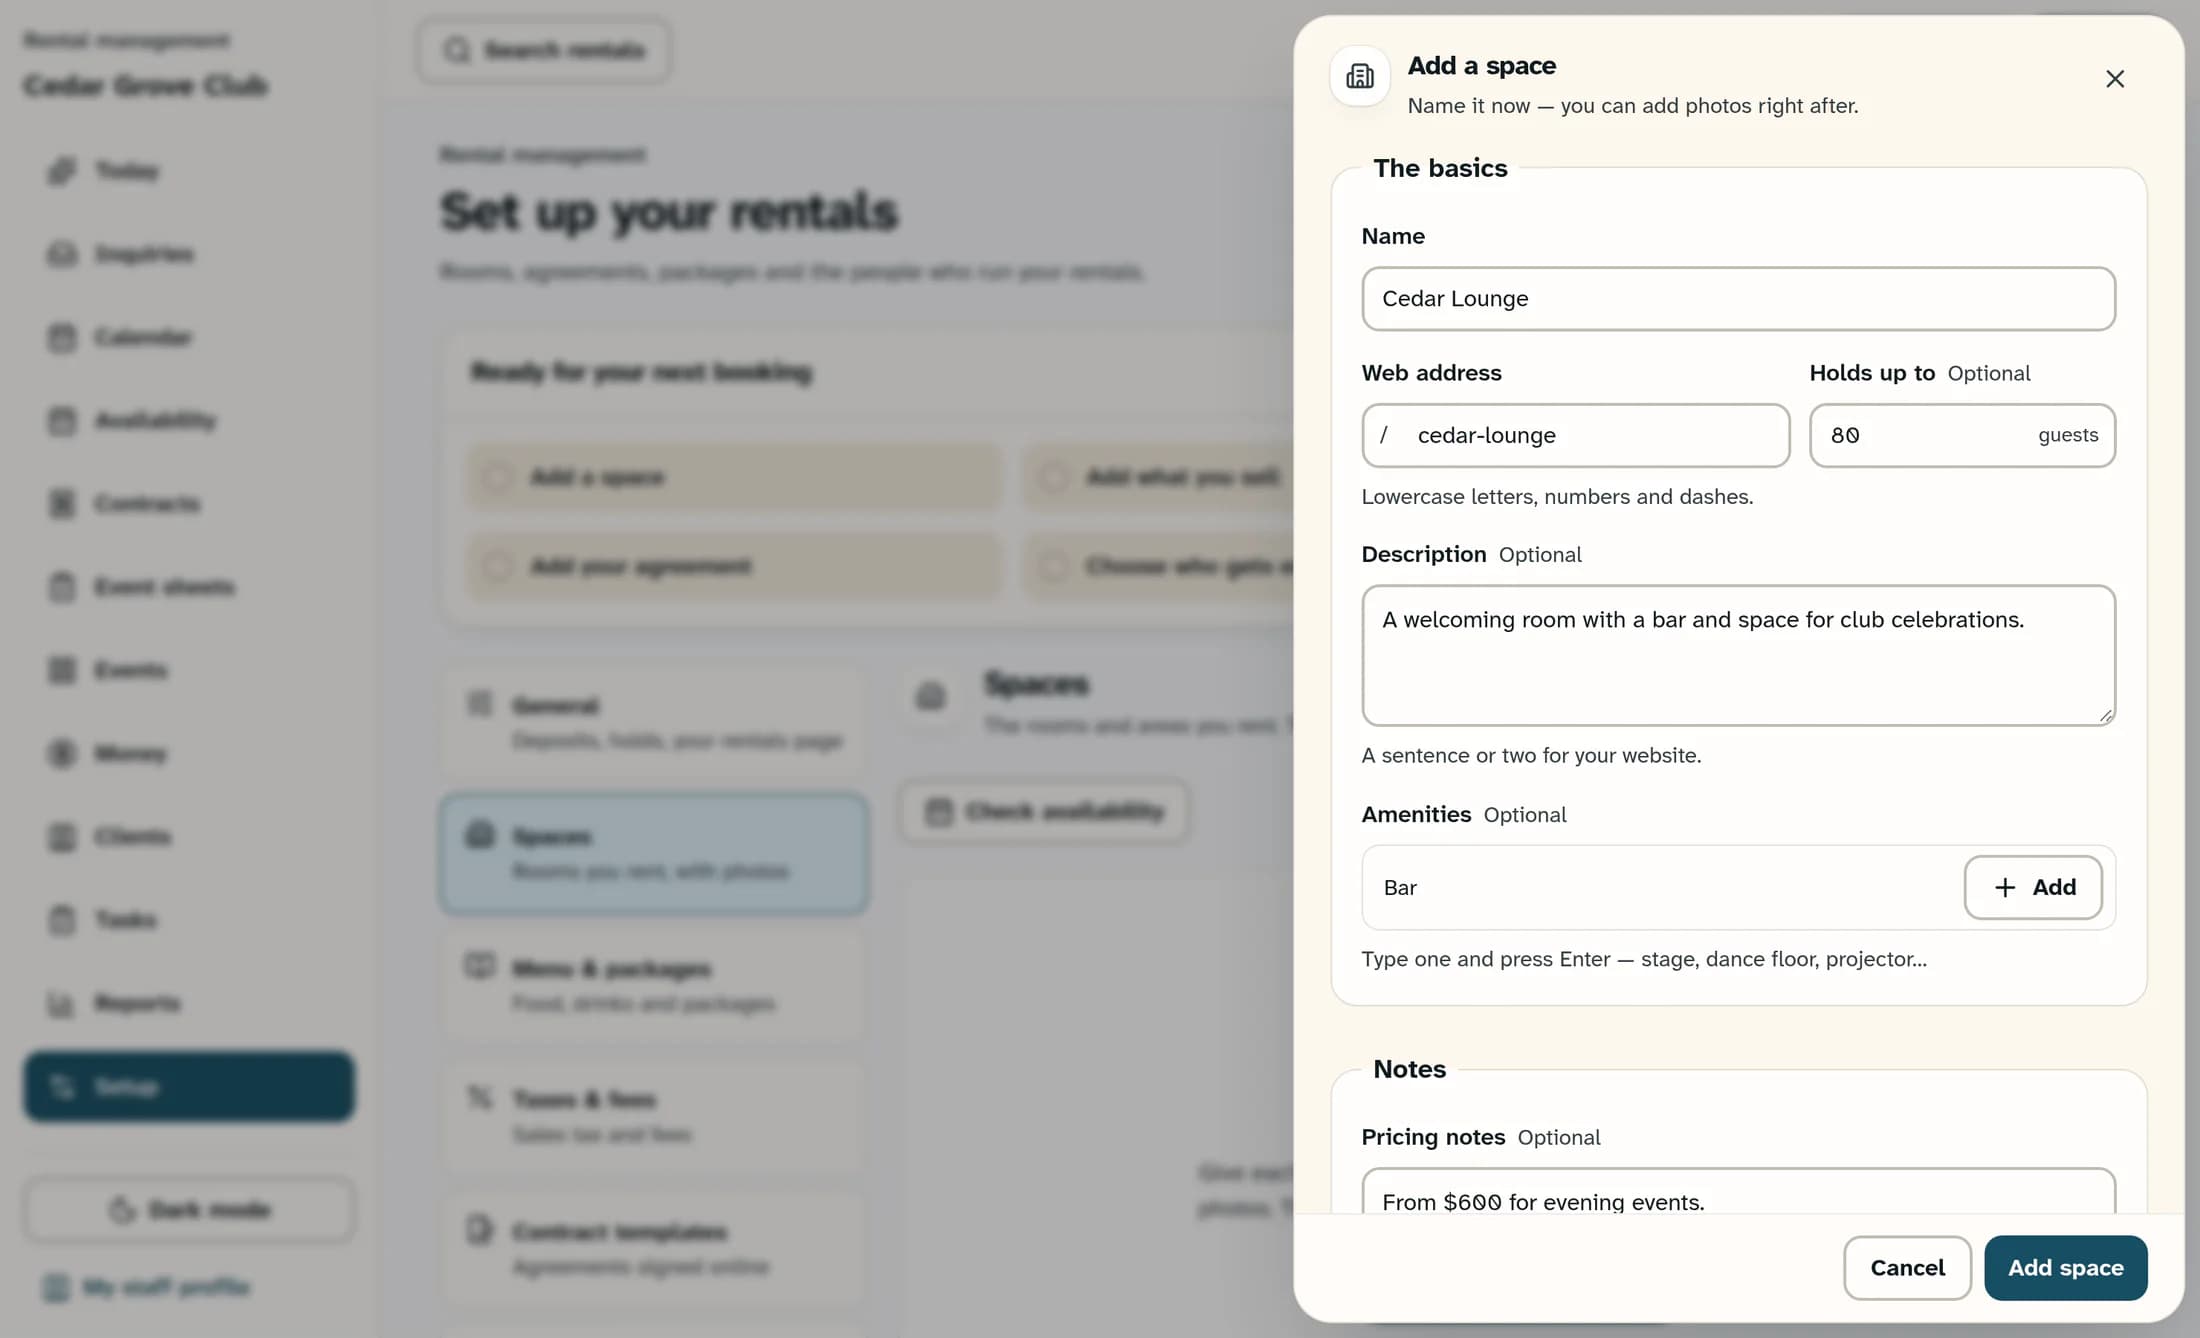
Enter Name. Check Web address, which starts from the name and must be unique; use lowercase letters, numbers and dashes. In Holds up to, enter a whole number of guests, zero or higher, or leave it blank. Add a short Description for your website. In Amenities, type each amenity and press Enter to add it.
Step 3 of 13
Add pricing and team notes
Under Notes, enter Pricing notes for visitors, such as “From $600 for evening events.” Put private setup instructions in Team notes; only your team sees these.
Step 4 of 13
Choose the room's deposit rule
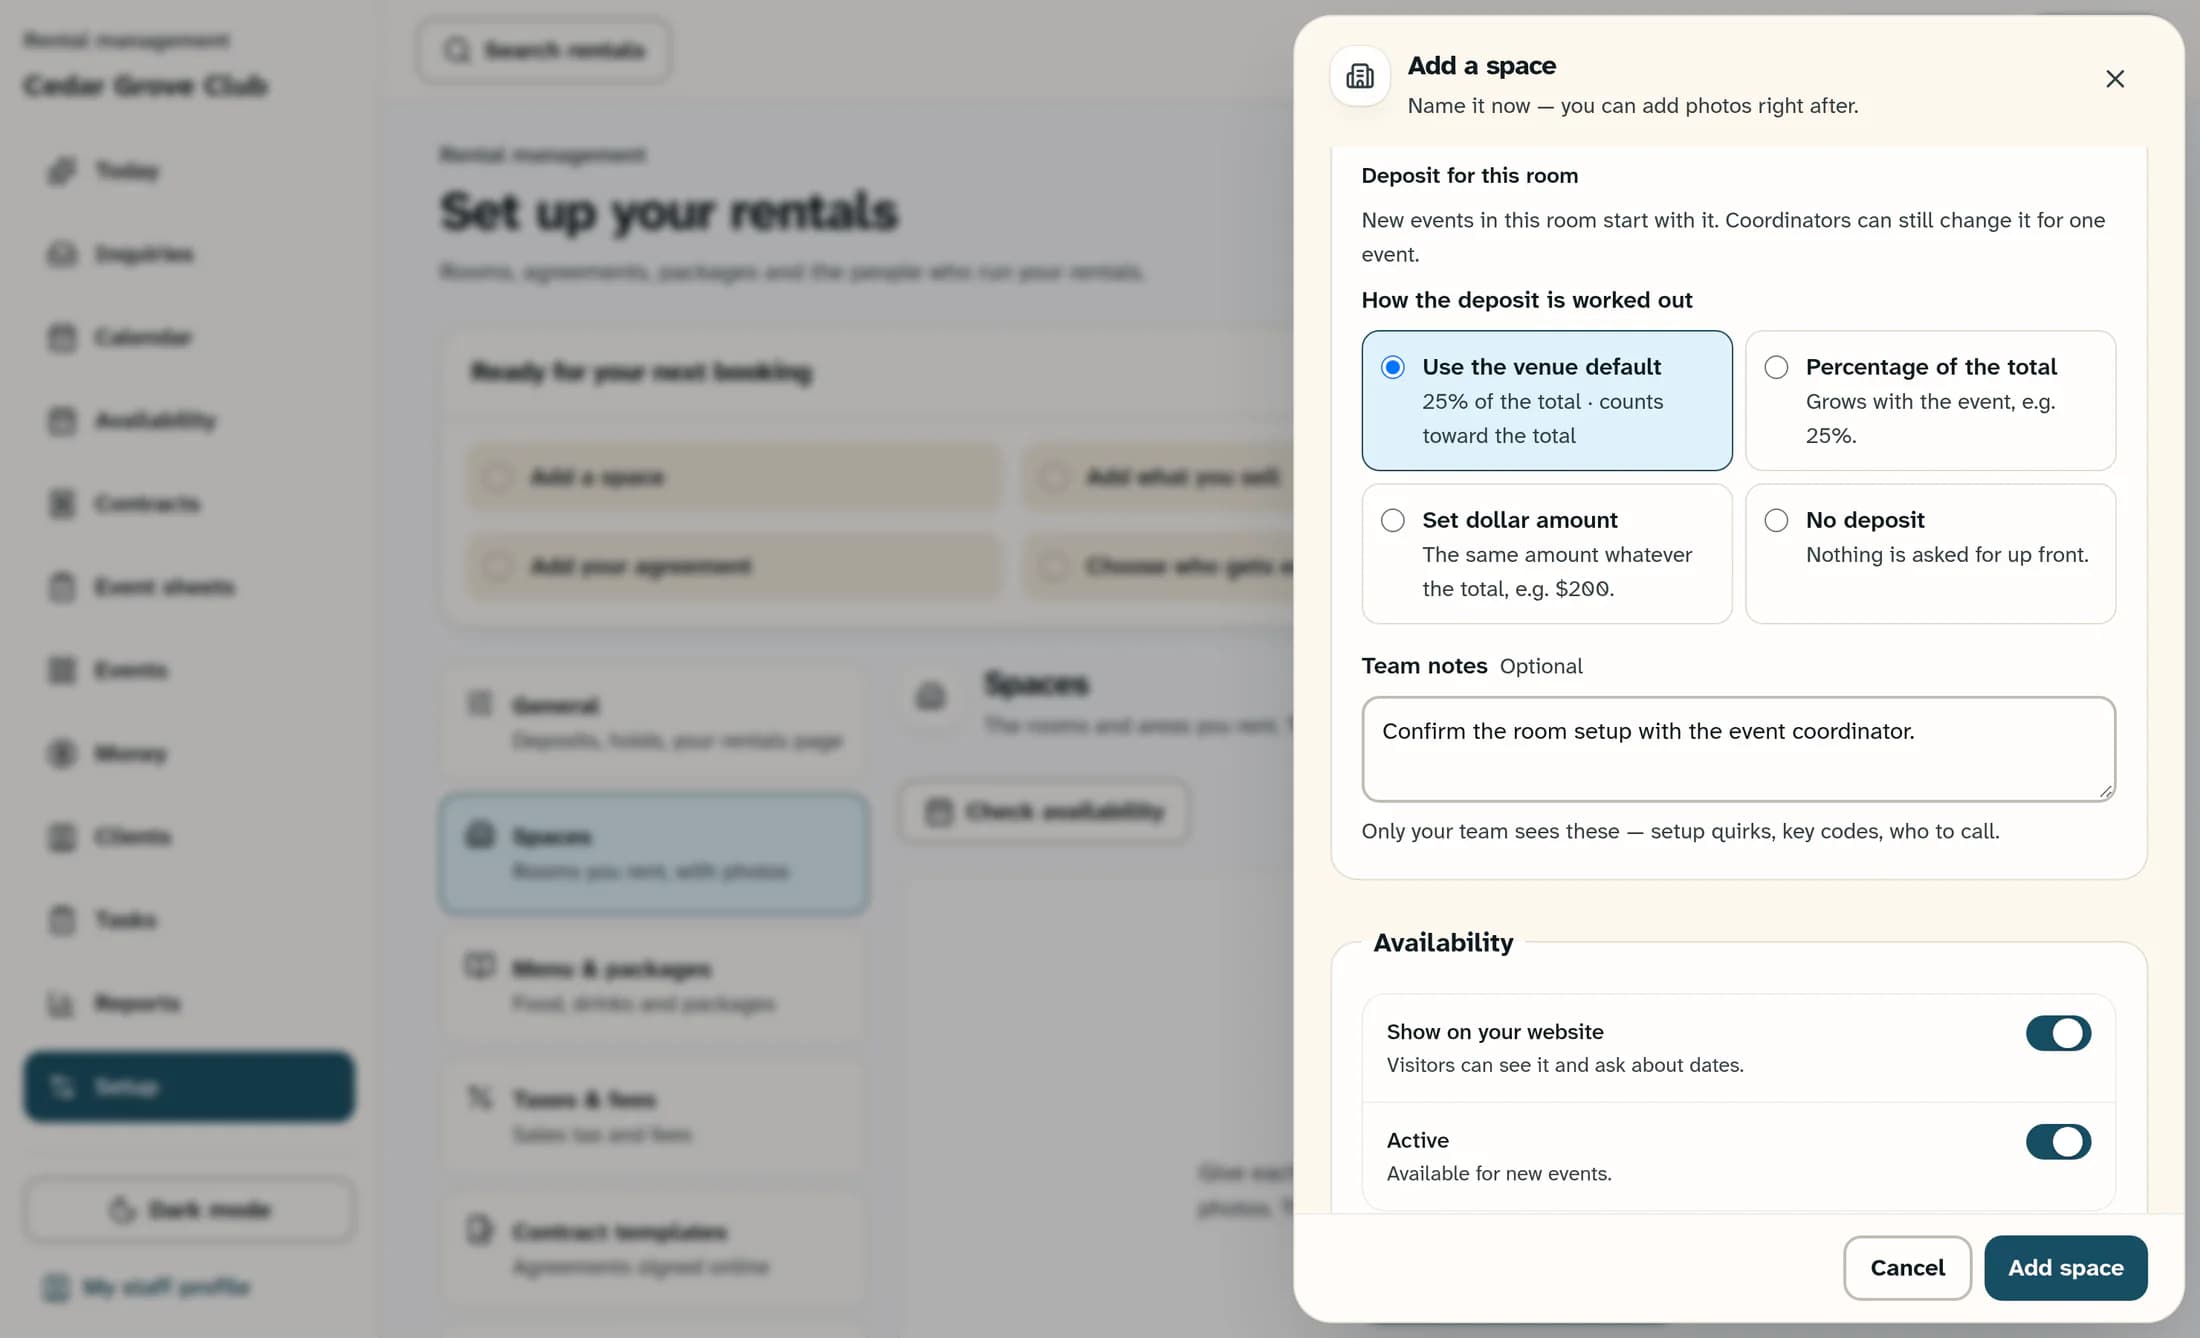
Under Deposit for this room, keep Use the venue default to inherit the club's rule. For a room override, choose Percentage of the total, Set dollar amount or No deposit. A percentage needs a Deposit percentage from 0 to 100; a set amount needs a Deposit amount of zero or more. For a percentage or amount, choose Counts toward the total or Refundable security deposit. The preview uses a $2,000 example event. An event's own rule takes priority, followed by the room's rule, then the venue default.
Step 5 of 13
Choose visibility and availability
Under Availability, set Show on your website for public visibility. Set Active for whether the room can be picked for new events. An inactive room stays on past events and keeps its history. Deleting a room has a different effect: existing events keep their dates and details but lose their room association.
Step 6 of 13
Save the room before adding photos
Choose Add space for a new room or Save changes for an existing room. The first save keeps a new room open so you can add photos; saving changes to an existing room closes its editor. A new room is only ready for photos after it has been added successfully.
Step 7 of 13
Add room photos
If the editor closed after Save changes, reopen the room's card in Setup → Spaces. In the saved room's editor, choose Add photos or Add more photos, then choose your image files. You can also drag the files into that area. The first photo is the cover. Wait for the upload to finish and for the photo to appear; photo changes save separately from the room's other fields.
Step 8 of 13
Choose the cover and photo order
For a later photo, choose Make cover to move it to the front. Use the handle named Drag to change the order to reorder the photo rows; moving a photo to the first position also makes it the cover. These changes save as you make them.
Step 9 of 13
Remove a photo you no longer need
If needed, choose the photo row's Remove photo trash button, then confirm with Remove photo in the confirmation. Removing the cover makes the next photo the cover. A successful removal takes that photo off the room and your website.
Step 10 of 13
Set the venue deposit default
After saving or finishing the room, open General in Setup. Under Deposit to book, choose Percentage of the total, Set dollar amount or No deposit. Enter the percentage or amount when needed, then choose how it is treated: Counts toward the total or Refundable security deposit. Rooms can override this default, and a coordinator can set a rule for one event. Changing a default does not confirm that an already-booked event has been rewritten.
Step 11 of 13
Set how long new holds last
Under Holding a date, use One day shorter, One day longer or a preset such as 1 week. The allowed range is 1–90 days. A hold pencils in a client's interest while they decide; it does not reserve or block the space.
Step 12 of 13
Choose what visitors see
Under Your rentals page, enter a Welcome message of up to 600 characters, or leave it blank for the default. Review the preview. Set Show your rentals page for the whole public page, Take inquiries on your website for its inquiry form, A page for each room for individual room pages, and Show which dates are taken for the public calendar. Turning off the whole page hides its spaces, inquiry form and taken dates. The public calendar never shows client names.
Step 13 of 13
Save the venue settings
Choose Save settings in the Unsaved changes bar. Wait for Settings saved. New events and your rentals page use the saved settings from then on. In the demo, changes stay on the current page.
Expected result
Your saved room is available according to its Active setting, with its public details, photos and deposit rule. Photo changes have their own confirmation. General settings have a separate save. Reopening the room or General should show the saved values.
If something does not save
About this guide
Applies to the Clubhouse web Rental Management interface. Instructions and illustrations were checked against source release 16782cba (October 21, 2026), with the setup sources compared on October 26, 2026. Illustrations reconstruct the source with fictional data; they are not live workflow verification. Native member and Workforce apps were not verified for this task.
The screens in this guide show example clubs and people. Your club's name, colours and some labels may look different.