
On this page
- Before you start
- Open your form
- Add a question
- Set the question and required answer
- Choose an answer type
- Enter choices and helpful hints
- Show a follow-up only when it applies
- Recheck conditions after changing questions
- Review questions affected by removal
- What respondents’ answers are checked for
- Review the draft preview
- Save and check the saved draft
- If the draft will not save
- Review settings before making changes live
- Summary
Before you start
Step 1 of 10
Open your form
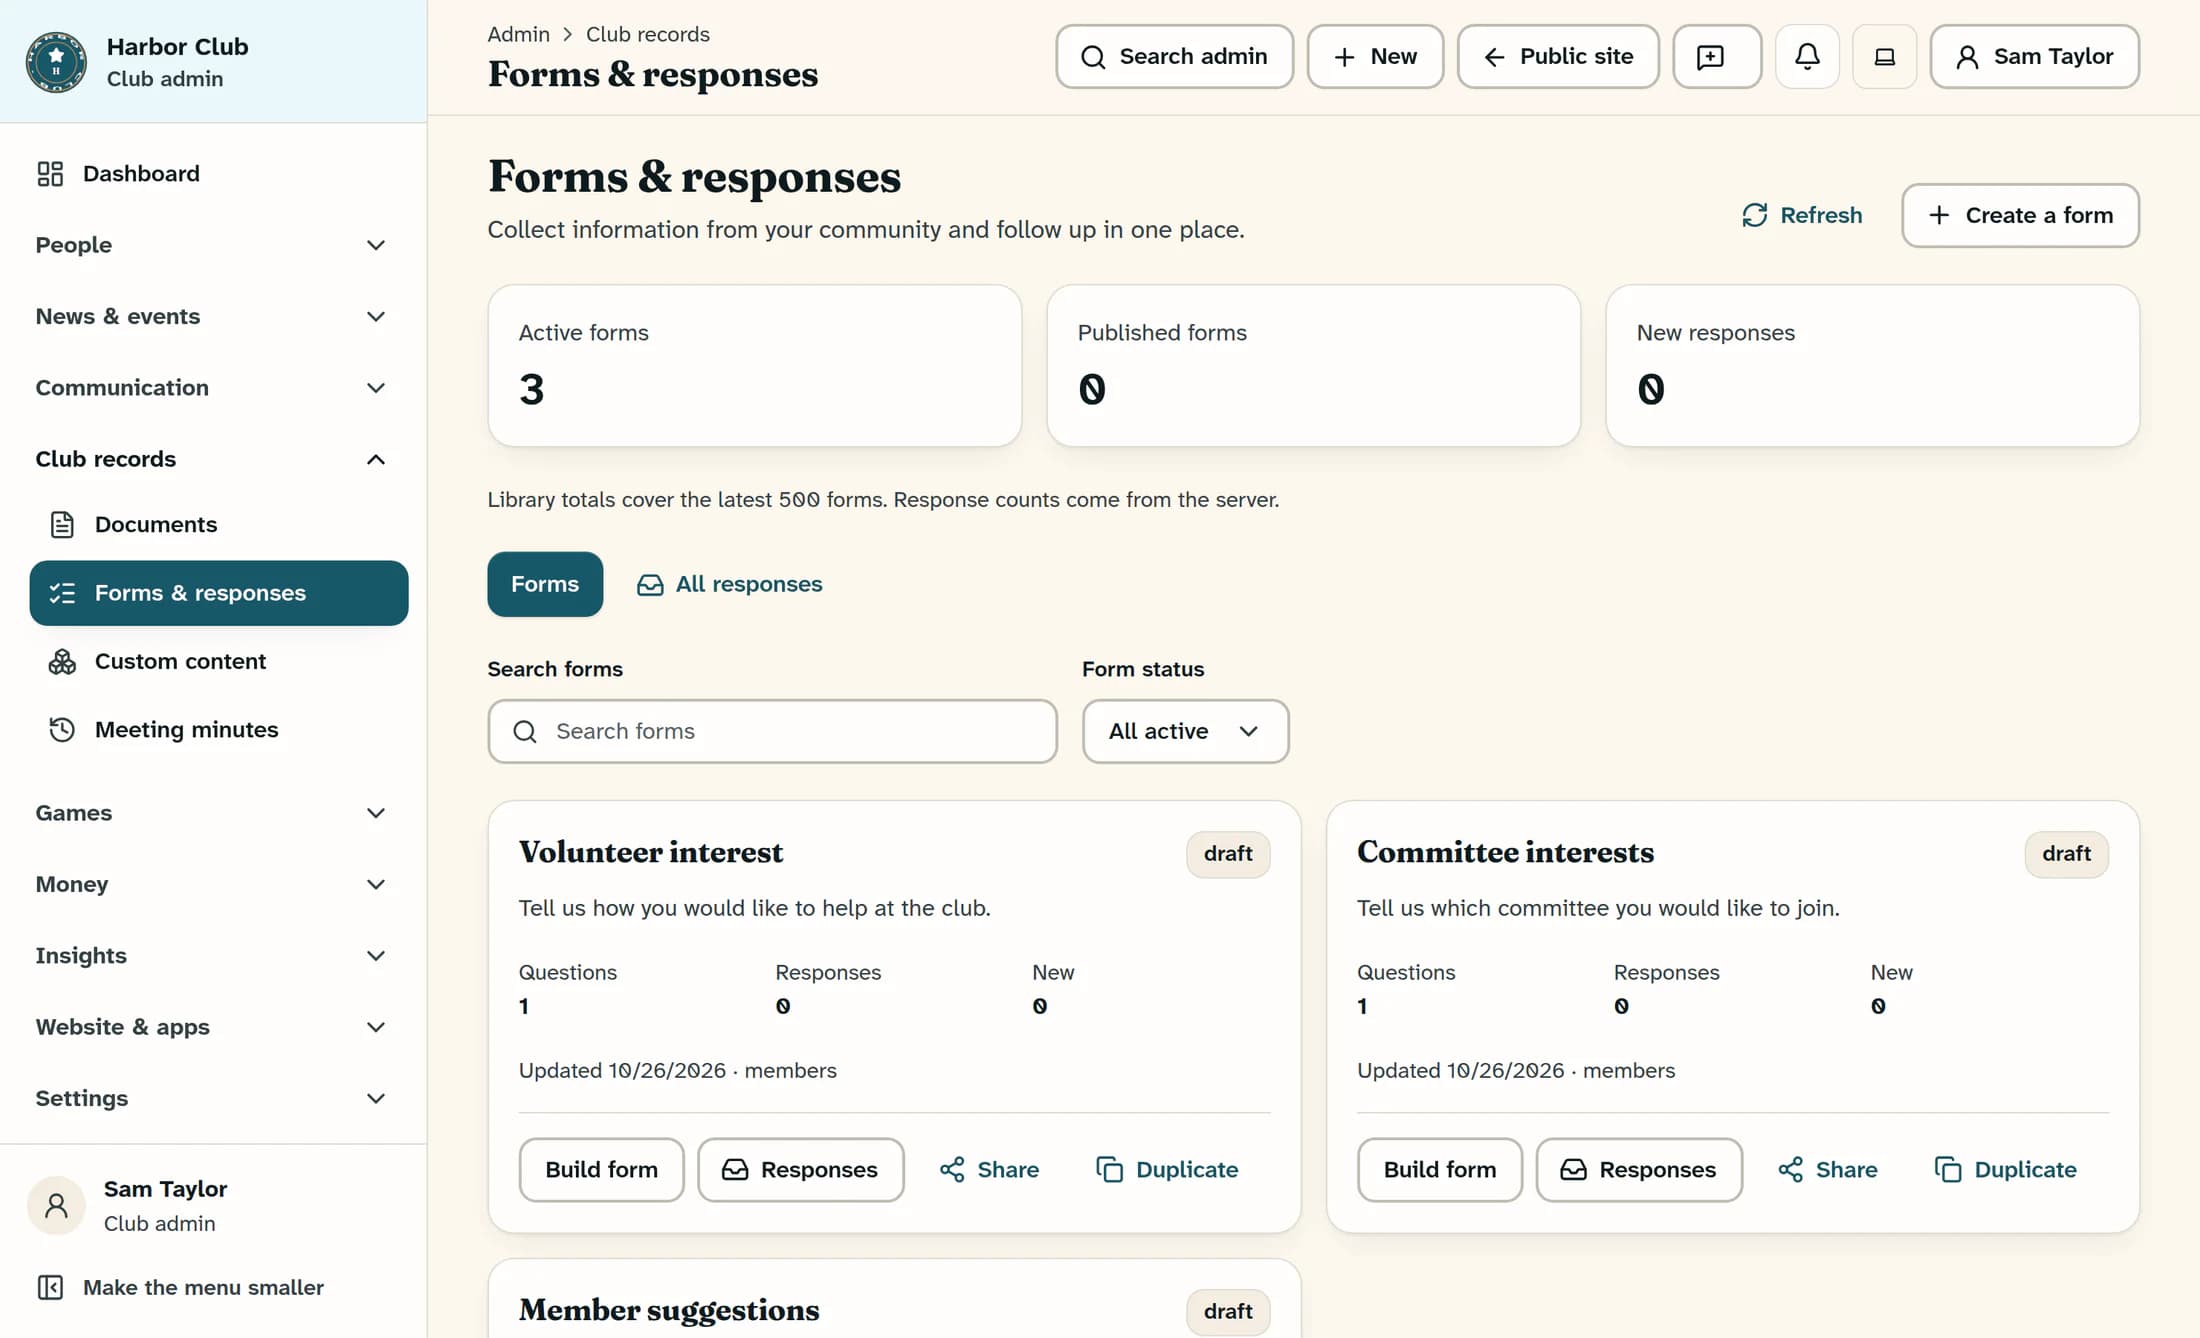
Under Club records, open Forms & Responses. Find your form and select Build form on its card.
Step 2 of 10
Add a question
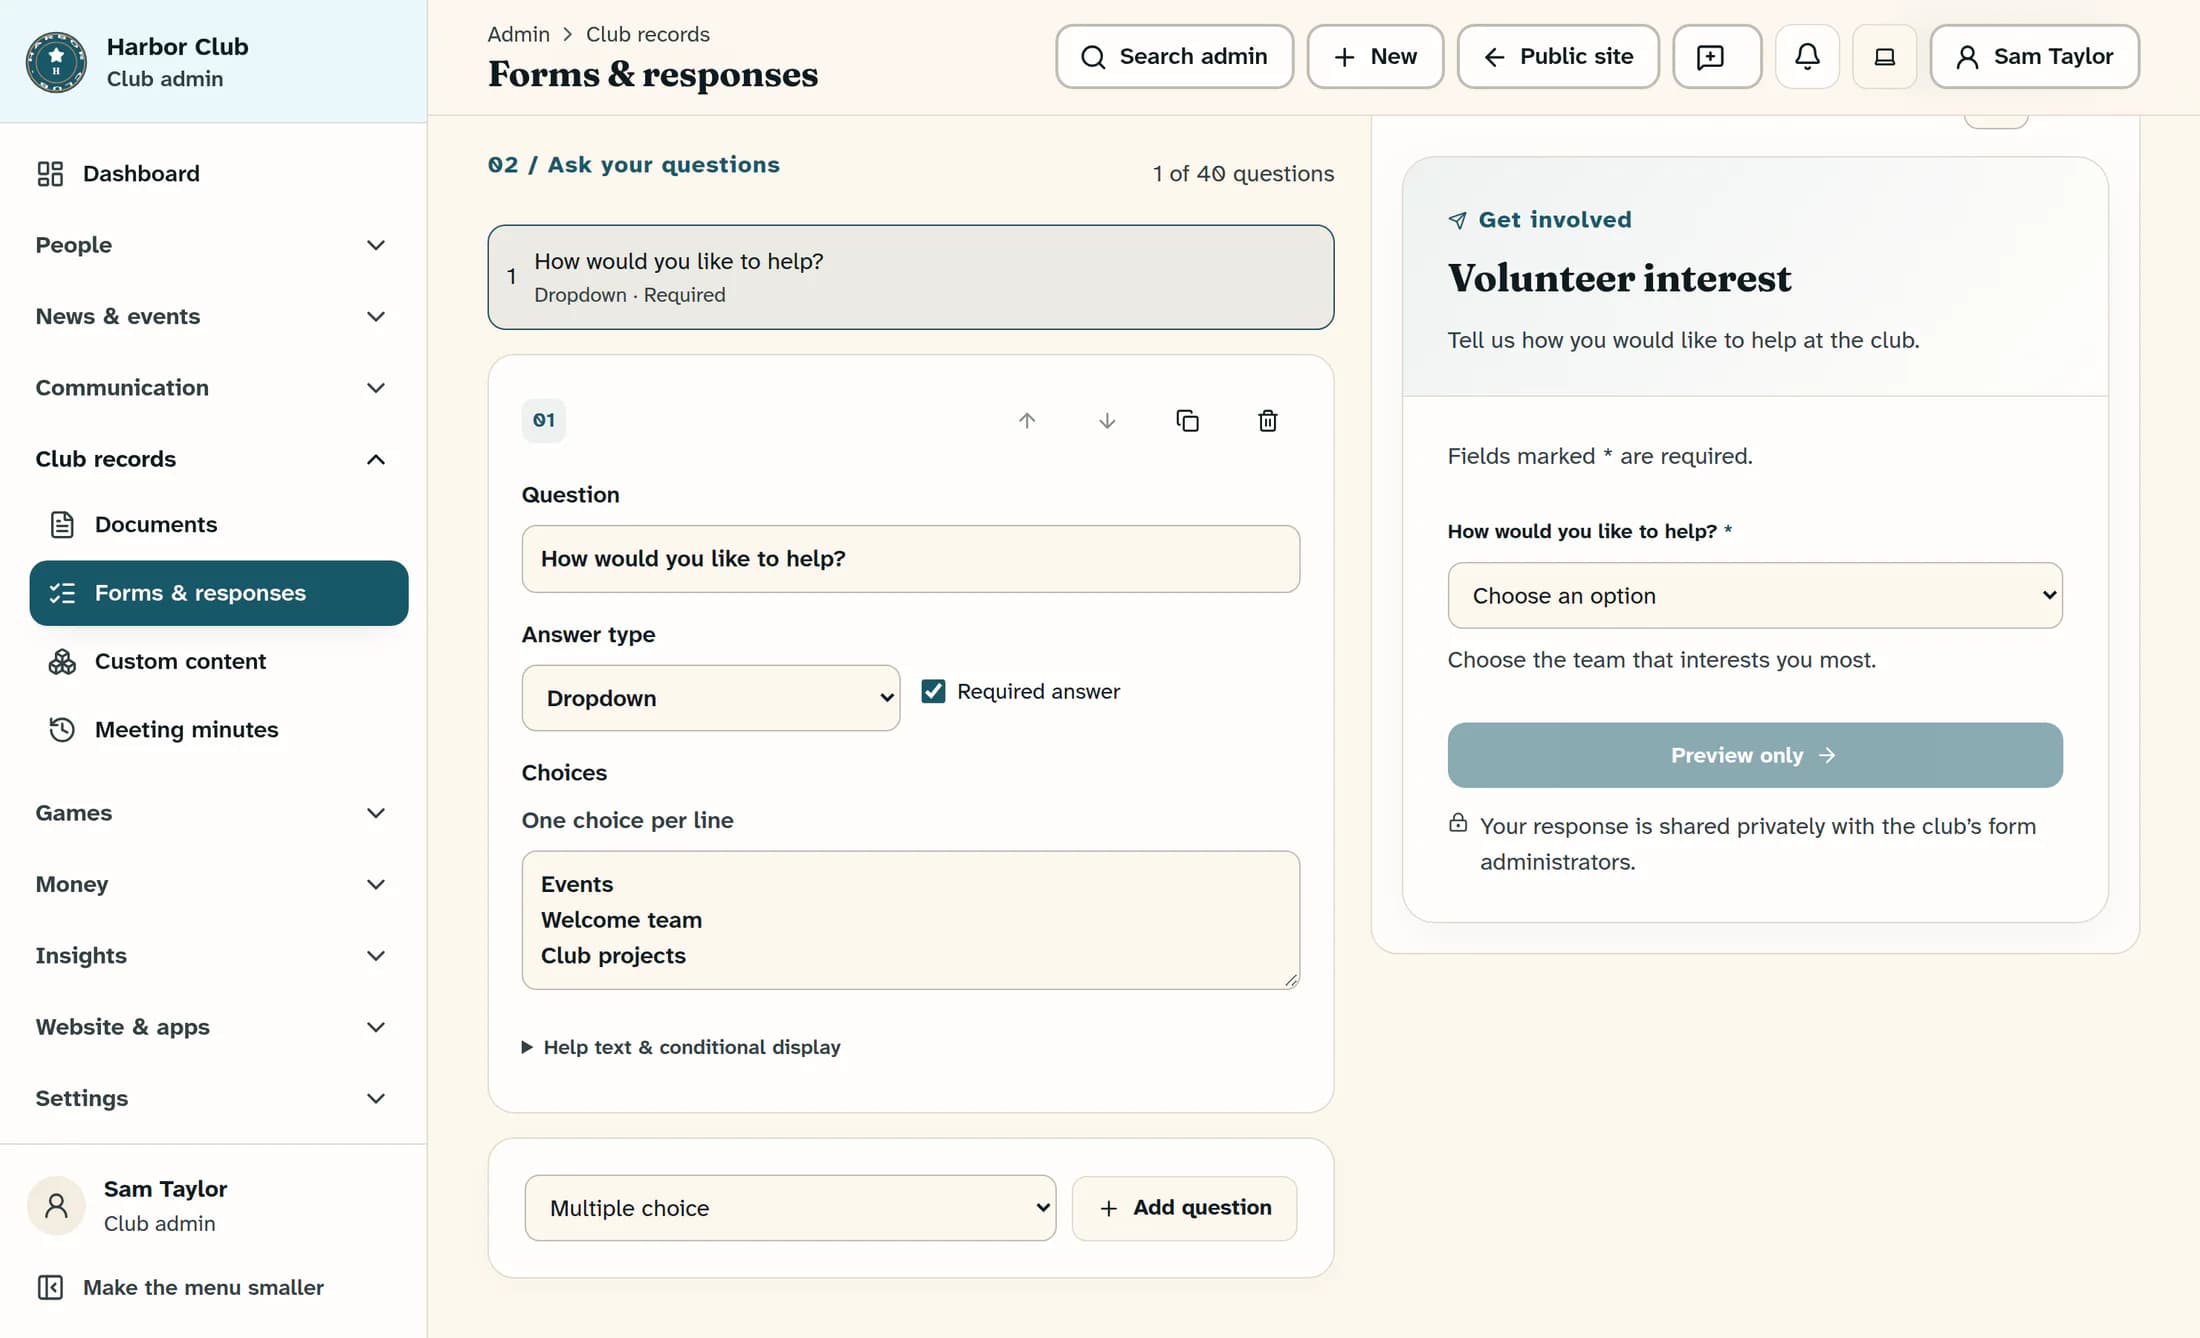
In Questions, choose New question type, then select Add question below the question editor. The new question becomes selected in the outline; a form can contain up to 40 questions.
Step 3 of 10
Set the question and required answer
Select the question in the outline, enter its wording in Question, and choose Answer type. Turn on Required answer if people must answer it when it is shown; new questions start as optional.
Choose an answer type
- Short answer and Long answer collect free text. Email address, Phone number, Number, Date and Website link collect those kinds of information.
- Dropdown and Single choice let people choose one listed answer. Multiple choice lets them select more than one.
- Consent provides a confirmation checkbox. A required consent question must be checked before a respondent can submit.
Step 4 of 10
Enter choices and helpful hints
For Dropdown, Multiple choice or Single choice, enter Choices, one choice per line: use up to 60 unique choices, each no more than 160 characters. Open Help text & conditional display to add optional Help text; Placeholder is available for types other than choices and consent.
Keep question wording within 240 characters, help text within 600 and placeholder text within 160. Every question needs wording even when saving a draft, and choice questions need at least one choice before publication. Publish a form with at least one question.
Step 5 of 10
Show a follow-up only when it applies
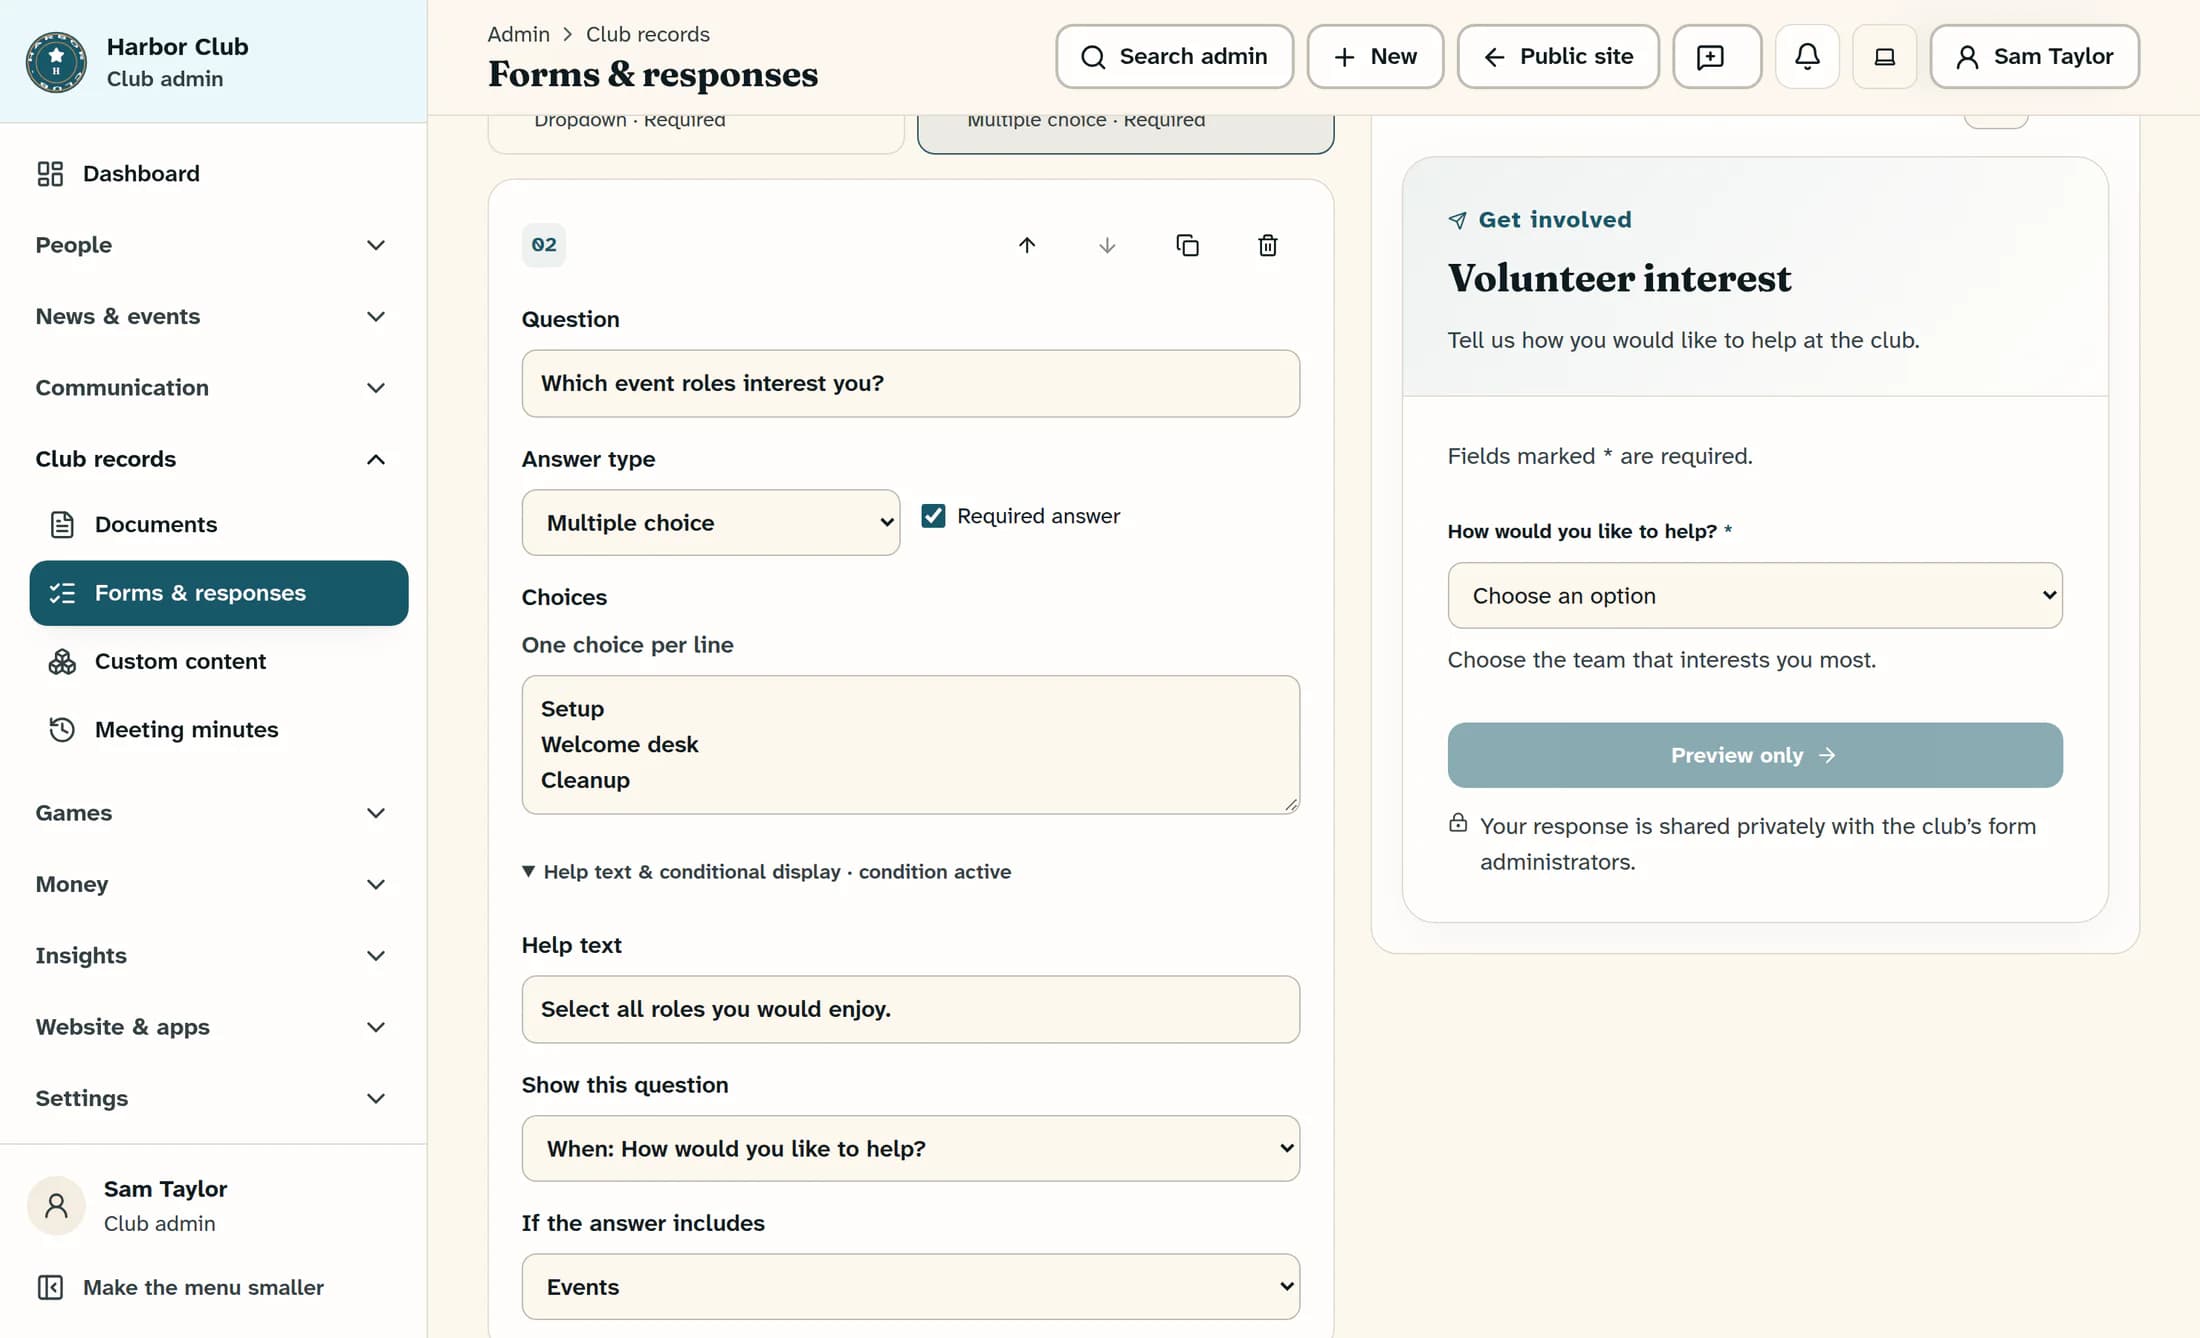
Put a Dropdown, Single choice or Multiple choice question before its follow-up, then select the follow-up in the outline. Under Help text & conditional display, set Show this question to the earlier question and choose the matching option under If the answer includes; choose Always to remove the condition.
A follow-up appears only when its parent question is also visible and its chosen answer matches. For multiple choice, selecting the matching option is enough; a required follow-up needs an answer only while it is shown.
Step 6 of 10
Recheck conditions after changing questions
After changing a parent’s Answer type or Choices, inspect every follow-up and select a valid parent and matching answer again. Use the question’s up/down controls to keep follow-ups after their parent; invalid order changes are rejected, and invalid parent or answer links can prevent saving.
Step 7 of 10
Review questions affected by removal
If you remove a question, read the confirmation before accepting it. Removing a parent resets its direct follow-ups to Always, so inspect those questions—especially required ones—and any further dependent questions before saving.
What respondents’ answers are checked for
- When a respondent submits, visible required questions must have an answer. Required Consent must be checked, and choice answers must come from the listed choices.
- Email address checks email syntax. Number accepts numbers, including negatives and decimals; Date requires a real calendar date; Website link requires a full http:// or https:// address.
- Phone number has no custom phone-format check. This editor does not offer custom regular expressions, numeric minimum/maximum rules or file-upload questions.
- Long answers allow up to 8,000 characters; other text answers allow up to 1,000. Answers to hidden questions are left out of the checked response.
Step 8 of 10
Review the draft preview
Use Desktop preview and Mobile preview to review wording, answer types, choices, required markers and conditional visibility. Try different parent answers to check which follow-ups appear; Preview only is disabled, so this preview cannot test submission validation, display submission errors, send a response or confirm a saved response.
Step 9 of 10
Save and check the saved draft
Select Save draft and check the saved version status before leaving. To check persistence, return to All forms and reopen Build form; if an error offers Reload saved form, it replaces the editor with the saved copy and asks you to discard any unsaved changes.
If the draft will not save
Step 10 of 10
Review settings before making changes live
In Settings, review Who can respond?, Closing date & time and Maximum responses, along with the button label, confirmation and privacy text. When the draft is ready, Publish changes updates an existing published form, while Publish form publishes a new one; saving a draft alone keeps the previous published version live.
Summary
Your saved draft holds the revised questions until you choose to publish them. Earlier responses retain the question and answer structure used when they were submitted, even after you change or remove questions.