
On this page
- Who can do this
- Before you start
- Open the hiring pipeline
- Find a name or email address
- Choose the posting
- Check the posting period
- Choose a review view
- Open the applicant
- Review the overview
- Read the application
- Read the team’s scorecards
- Read applicant messages
- Check interview records
- Check an existing offer
- Understanding earlier records
- Expected result
- If something goes wrong
- Related tasks
Who can do this
Hiring managers and club administrators with access to Workforce hiring and applicant records can use this guide. Your club must have Workforce available, and your role determines which controls are available.
Before you start
Step 1 of 12
Open the hiring pipeline
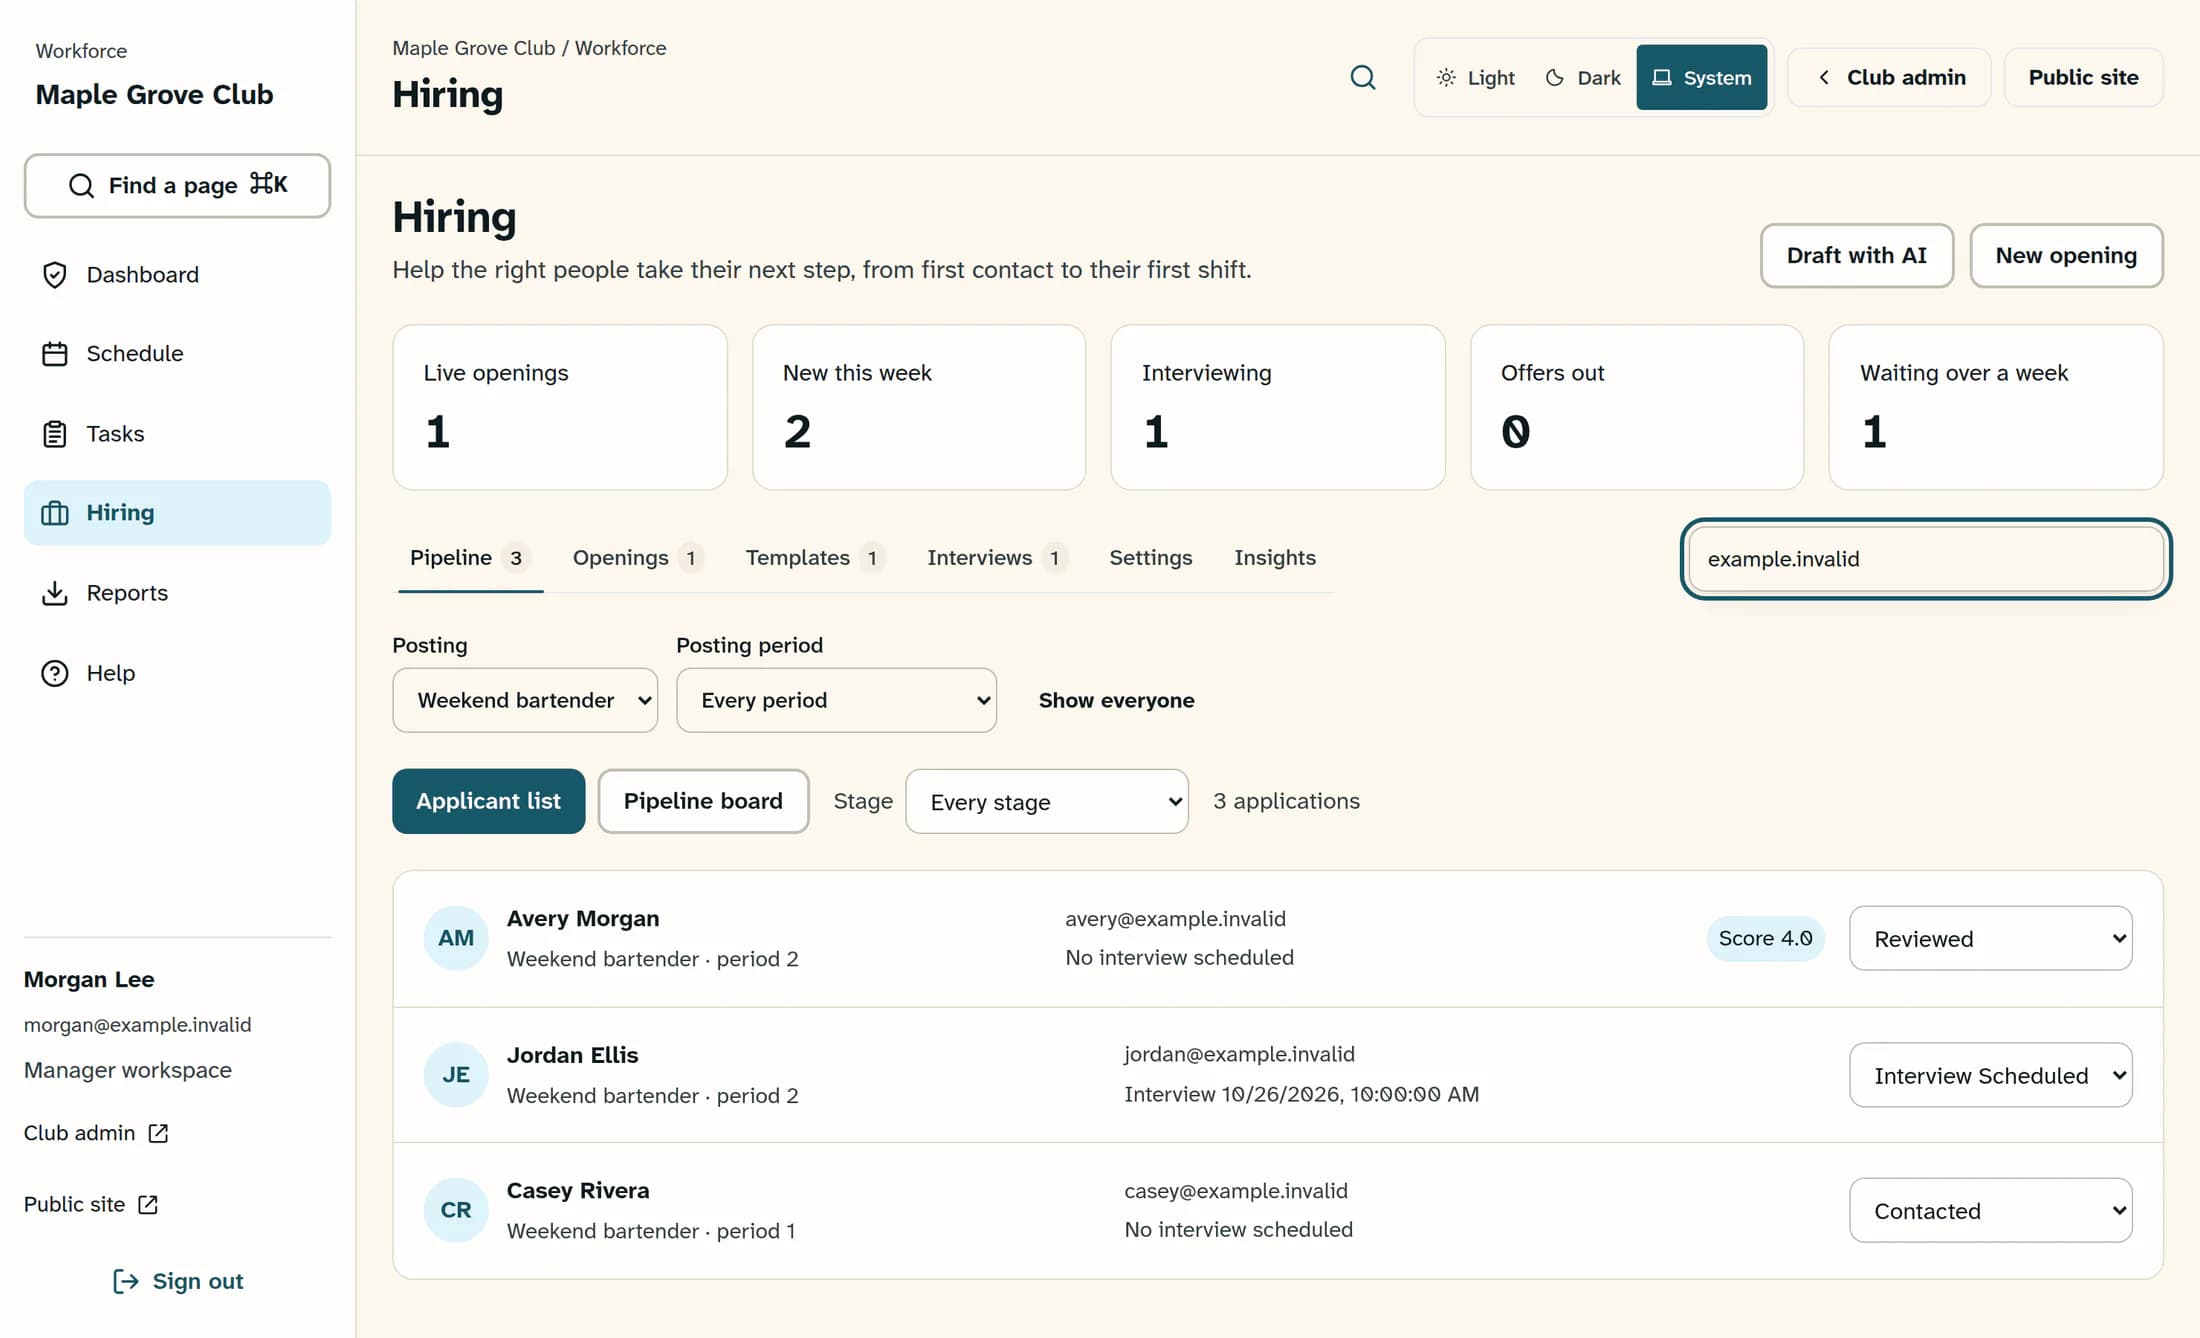
Open Workforce, choose Hiring in the sidebar, then choose Pipeline. The browser route is /workforce?view=hiring.
Step 2 of 12
Find a name or email address
Enter part of the applicant’s name or email in Search applicants. Search works together with the posting, period and list-stage filters, so a matching person can still be hidden by a filter.
Step 3 of 12
Choose the posting
Choose a job in Posting, or use All postings to include all jobs. A screen reader announces this control as Show applicants for.
Step 4 of 12
Check the posting period
When Posting period appears, choose Every period to include earlier applications or This period (open now) for the currently open period. A posting period is one stretch when a job accepts applications; you can also select a dated period, and the current-period option appears only while a period is open.
Step 5 of 12
Choose a review view
Use Applicant list for rows of applicants, or Pipeline board for cards grouped by hiring stage. In the list, Stage filters the rows; choose Every stage for the full filtered set, and leave each applicant’s own stage selector unchanged.
Step 6 of 12
Open the applicant
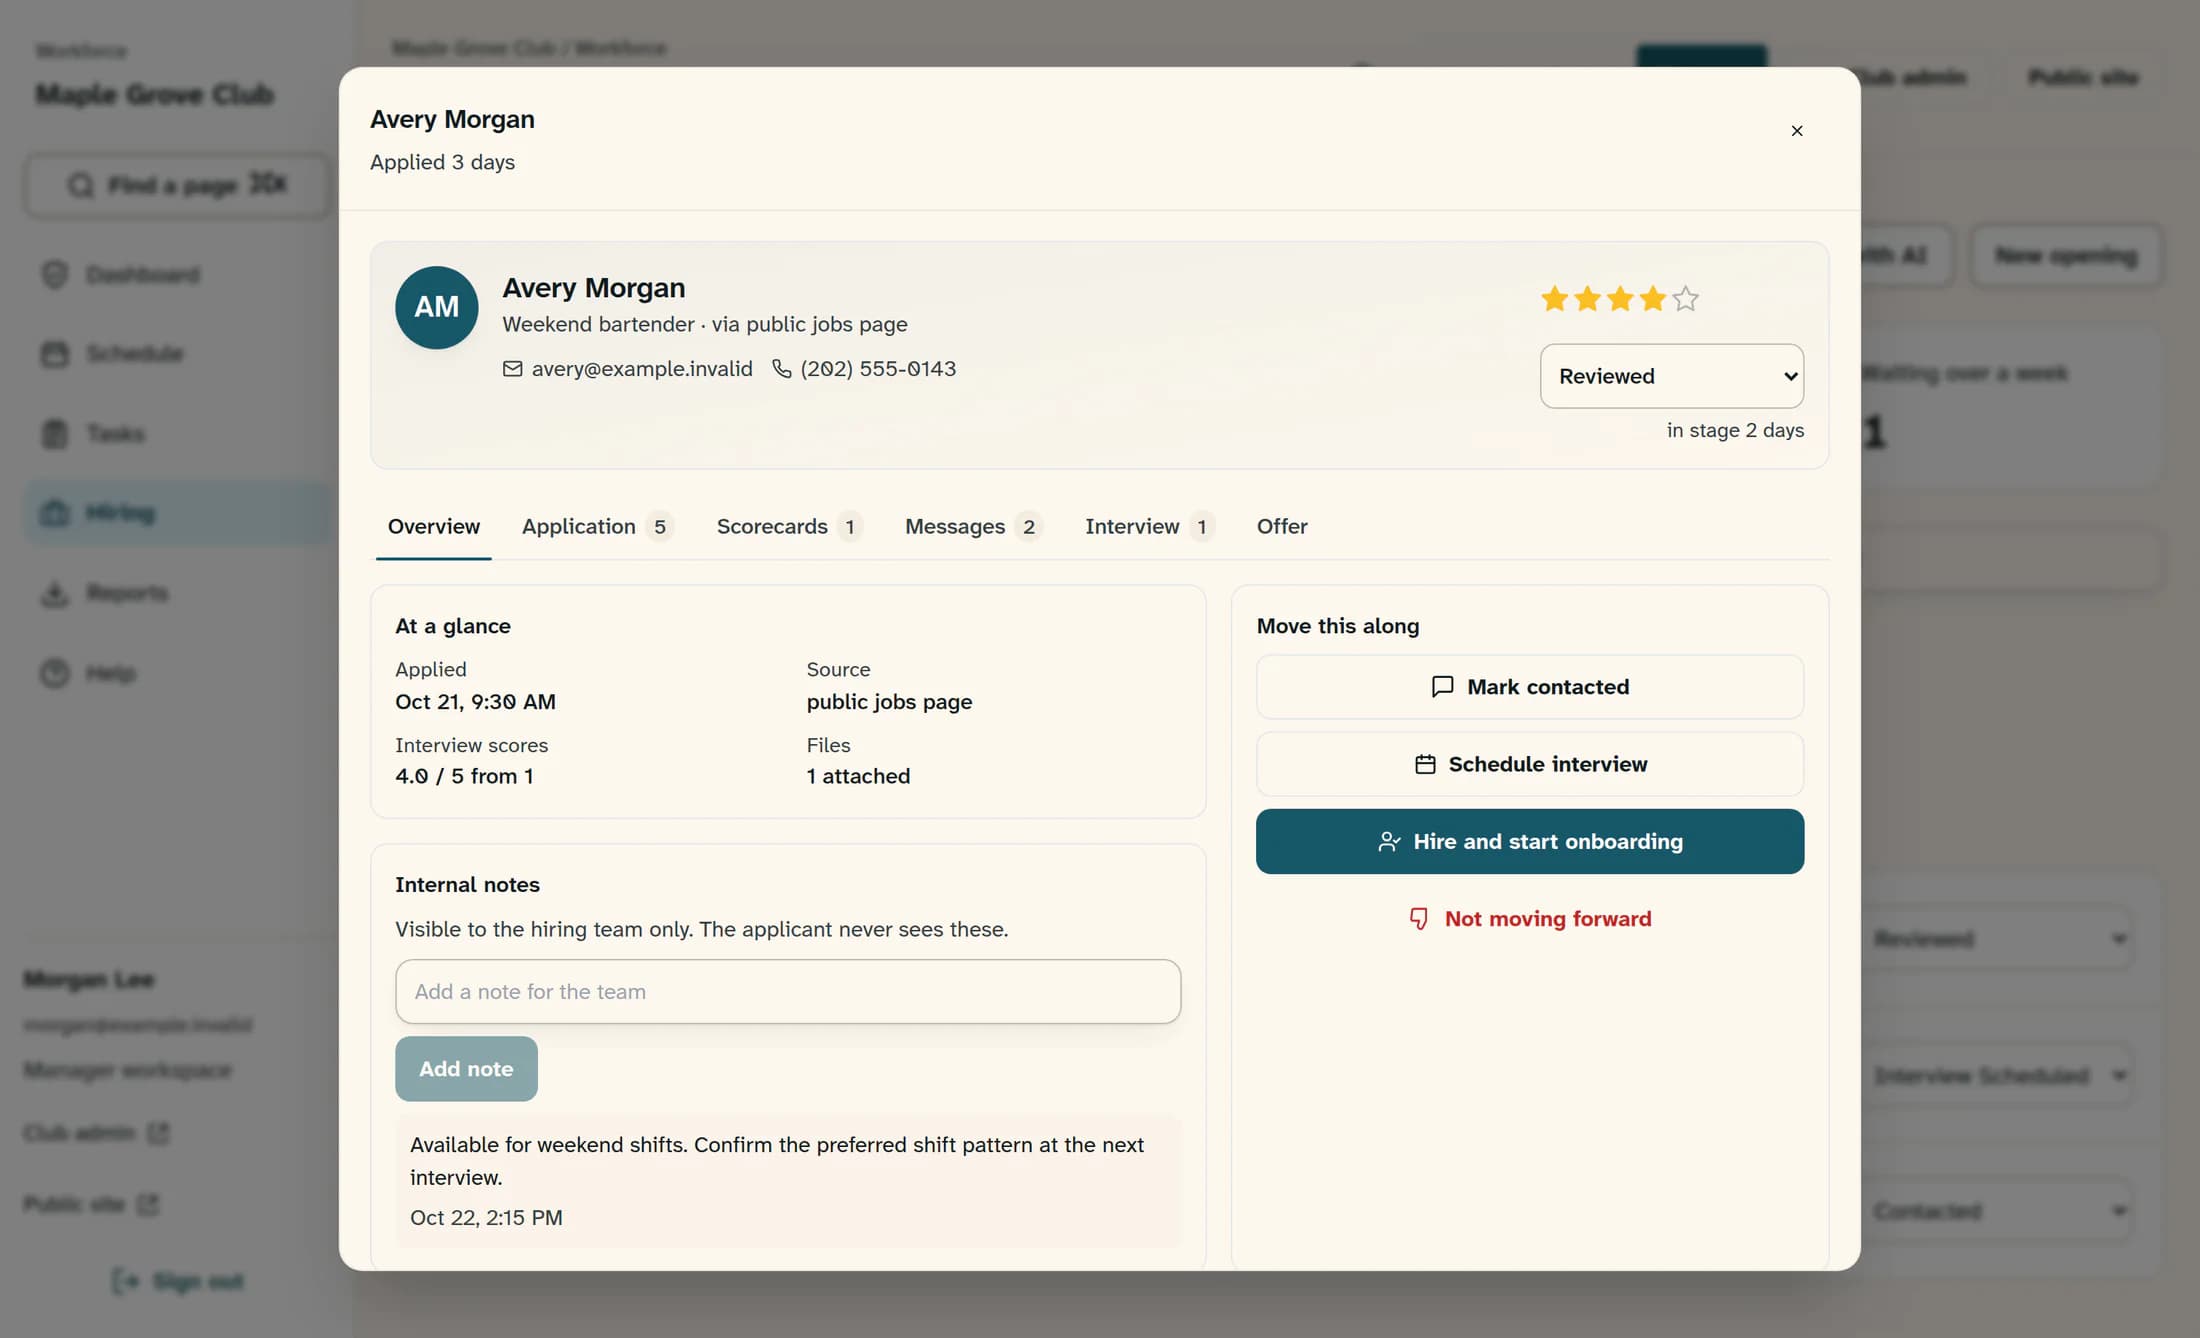
Select the applicant’s name in the list or their card on the board. Check the job title, current stage and time in that stage in the applicant window; these are current details, not a complete timeline of stage changes.
Step 7 of 12
Review the overview
Choose Overview to read At a glance, including the application date, source, interview score summary and file count. Read Internal notes for hiring-team context: the applicant never sees these notes.
Step 8 of 12
Read the application
Choose Application to read the submitted answers and see any available Attachments. Check the application date and posting period when comparing an older submission with a newer one.
Step 9 of 12
Read the team’s scorecards
Choose Scorecards and read What the team thinks for saved recommendations, overall ratings, strengths and concerns. A scorecard is an interviewer’s assessment; leave your scorecard fields unchanged during this review.
Step 10 of 12
Read applicant messages
Choose Messages and read Conversation, including whether each message was sent or received and its date and status. These are applicant communications, separate from the hiring team’s private Internal notes; leave the message composer empty.
Step 11 of 12
Check interview records
Choose Interview and read Scheduled for dates, locations and interview status. Leave the scheduling form and completion controls unchanged.
Step 12 of 12
Check an existing offer
Choose Offer to review the latest offer’s details and status, when one exists. A draft or an empty offer form does not mean an offer has been sent; leave all offer and hiring controls unchanged.
Understanding earlier records
When a posting has more than one period, applicant rows or cards can show a period number or “before periods.” Application answers, scorecards, interviews and offers belong to the application you opened; notes, messages and attached files can include records for the same applicant across applications. Use their dates for context.
Expected result
You have found the intended application and reviewed its current progress and available records. Filtering, changing views and reading tabs leave the applicant’s stage, rating and hiring records unchanged.
If something goes wrong
About this guide
This guide covers the Clubhouse browser interface on a desktop or laptop. It was source-checked against the October 21, 2026 reference release and the October 24, 2026 comparison with the live release; the hiring workflow matched. The illustrations do not verify a live review, and native member and Workforce apps were not checked.
The screens in this guide show example clubs and people. Your club's name, colours and some labels may look different.