
On this page
Before you begin
Step 1 of 4
Choose the week and review its shifts
Open Schedule in Workforce, select Week, and use the date arrows to reach the week you want. Check the displayed date range before continuing.
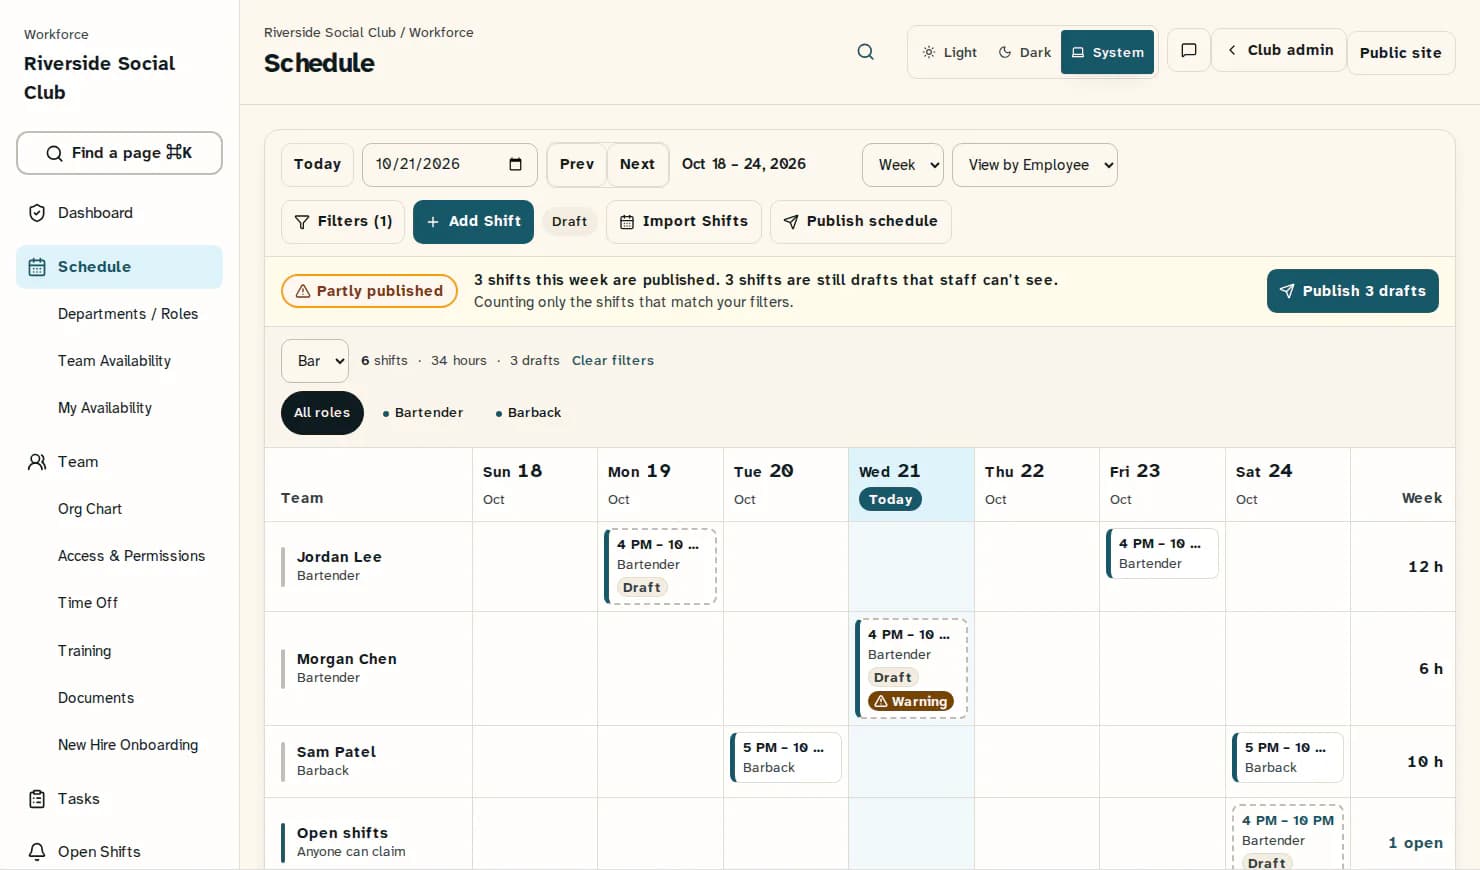
Review the department selector and role chips. Filters can narrow the schedule further, and Clear filters removes active filters within your permitted scope. The Schedule status strip below the toolbar counts the visible shifts. When drafts remain, its publish button acts on the visible drafts and waiting changes; you do not select rows with checkboxes.
Check each assigned employee, role, start and end time, and any Open shifts. Dashed cards and Draft labels identify unpublished shifts. The strip distinguishes Nothing scheduled, Draft, Partly published, Published, changes waiting, and Published. Review Warning badges for scheduling clashes or a person assigned outside their roles, and check open-ended shifts carefully. Resolve anything unintended before publishing. If a time is shortened in a shift card, click the shift, then choose Edit to inspect its full details.
Step 2 of 4
Check the scope of waiting changes
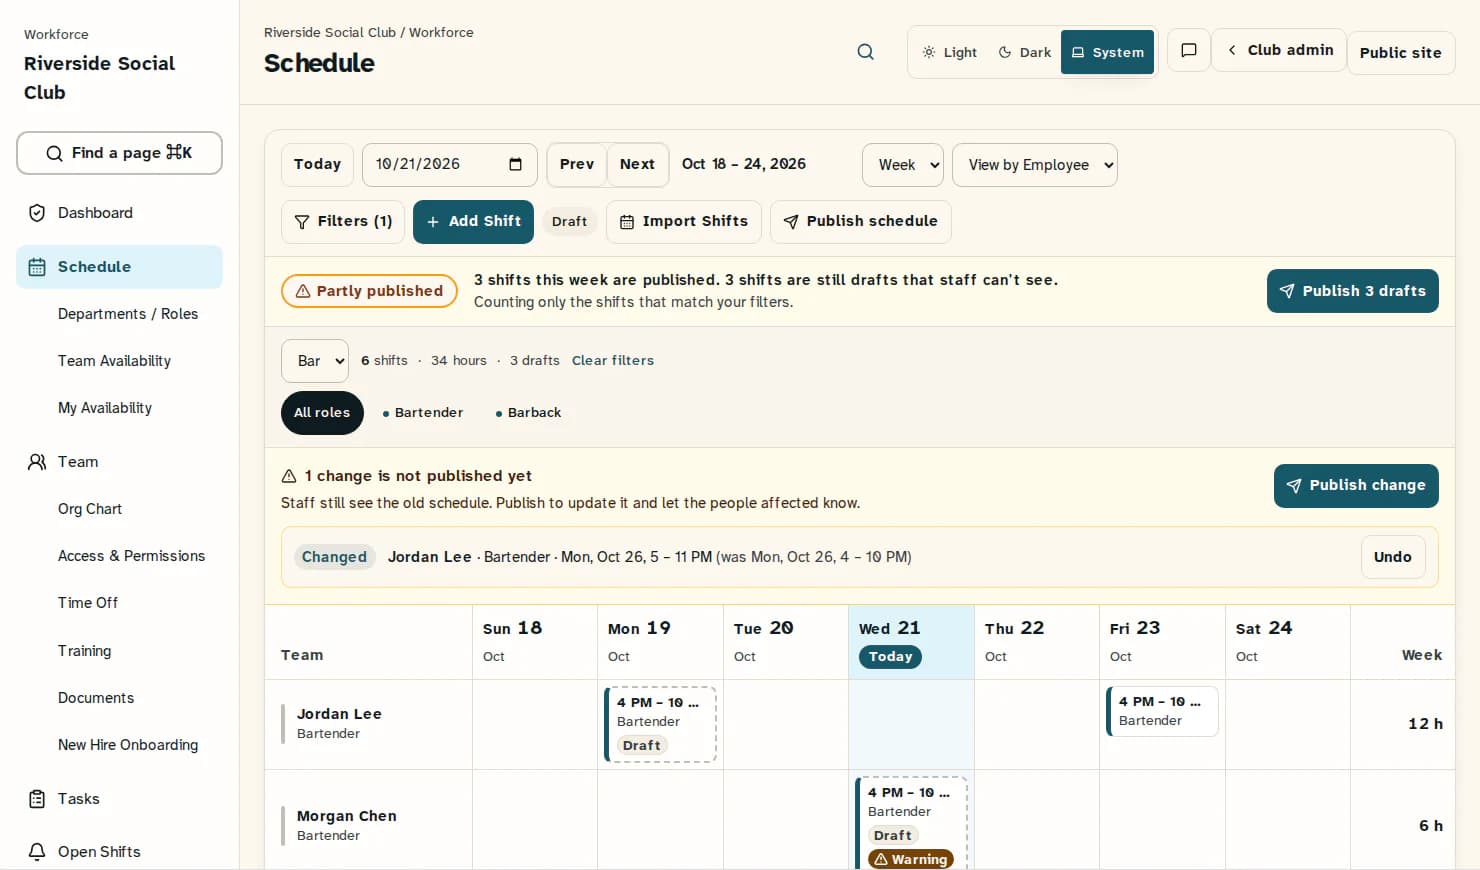
If the amber Changes not published yet banner appears, compare its Changed and Removing entries with your intended plan. Staff still see the old shifts while these edits wait.
The banner can include changes from any week you are allowed to schedule. Its Publish change button (or Publish N changes for several entries) applies every waiting change counted there, including entries beyond the first six shown; it does not follow the week or filters. If visible drafts also remain, the status strip can publish those drafts together with the visible changes. If only changes remain, the strip has no publish button: use the amber banner after checking every waiting change it counts. Use the banner’s publish button only when you intend to apply all those waiting changes.
Step 3 of 4
Publish the visible drafts and edits
When visible drafts remain, check the Schedule status strip below the toolbar. Its button says Publish 1 draft, Publish N drafts, or Publish all N when visible drafts and staged changes are combined. Check the date range, filters, and count, then click that button when the visible work is ready. It publishes immediately; it does not open a notification dialog.
Assigned employees are automatically notified about newly published drafts, and affected employees are notified about published changes. There is no notification preference on this path. Publishing an unassigned shift does not assign someone to it. If no drafts remain, use the waiting-changes banner described above for staged changes.
Step 4 of 4
Check what was published
Read the result message and review the schedule’s current state. Successfully published drafts lose their Draft label. Applied edits lose their Changed label, and published removals disappear.
Draft publication, staged changes, and notifications can succeed or fail separately. If a message reports a failure, refresh the schedule and check which drafts or changes remain before retrying. A notification failure does not by itself mean the shifts are still unpublished.
Optional: publish a named schedule with notification choices
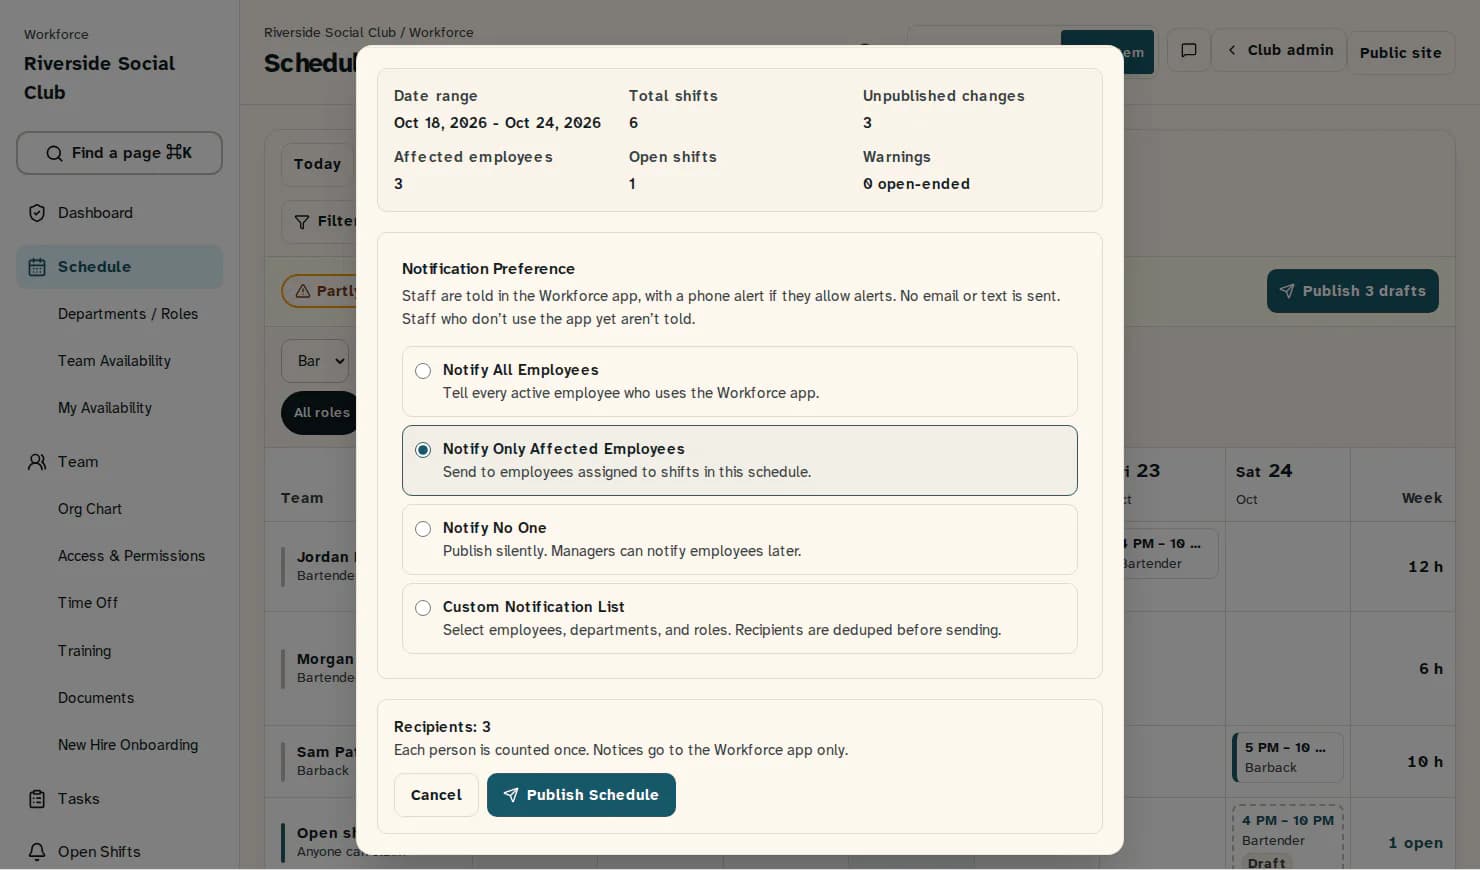
If an active named schedule covers the week and you have scheduling administration access, Publish schedule appears in the toolbar. Click Publish schedule to open the Publish Schedule dialog.
Check Date range, Total shifts, Unpublished changes, Affected employees, Open shifts, and Warnings. Here, Unpublished changes counts draft rows attached to that named schedule. This action publishes those attached drafts; it does not apply the separately staged edits or removals in the amber banner, and it does not use the visible week’s filters.
Choose a Notification Preference:
- Notify All Employees: tell every active employee who uses the Workforce app.
- Notify Only Affected Employees: the default; tell employees assigned to shifts in this schedule.
- Notify No One: publish without queuing employee notifications.
- Custom Notification List: choose employees, departments, and roles; each recipient is counted once.
Check Recipients, then click Publish Schedule to confirm. Use the status-strip action when drafts and staged changes remain together, or the amber banner for changes on their own, after checking its scope.
If something looks wrong
Your schedule is ready to check
Confirm that the intended week’s drafts and changes are published and that any notification result is understood. Recheck the week and filters each time you publish another batch.