
On this page
- Before you start
- Open Departments / Roles
- Add a department
- Set the department’s color and availability
- Save the department
- Add a role within the department
- Set the role’s wage hint and availability
- Save the role
- Edit an existing department or role
- When you rename a role
- If the name changed but assignments did not
- Deactivate or restore a department
- Deactivate or restore a role
- Inactive is not a scheduling ban
- Understand deletion before continuing
- Delete only an item you intend to remove
- Scheduling roles do not grant access
- If a change does not appear
- Related tasks
- Devices and checked release
- Summary
Before you start
Step 1 of 11
Open Departments / Roles
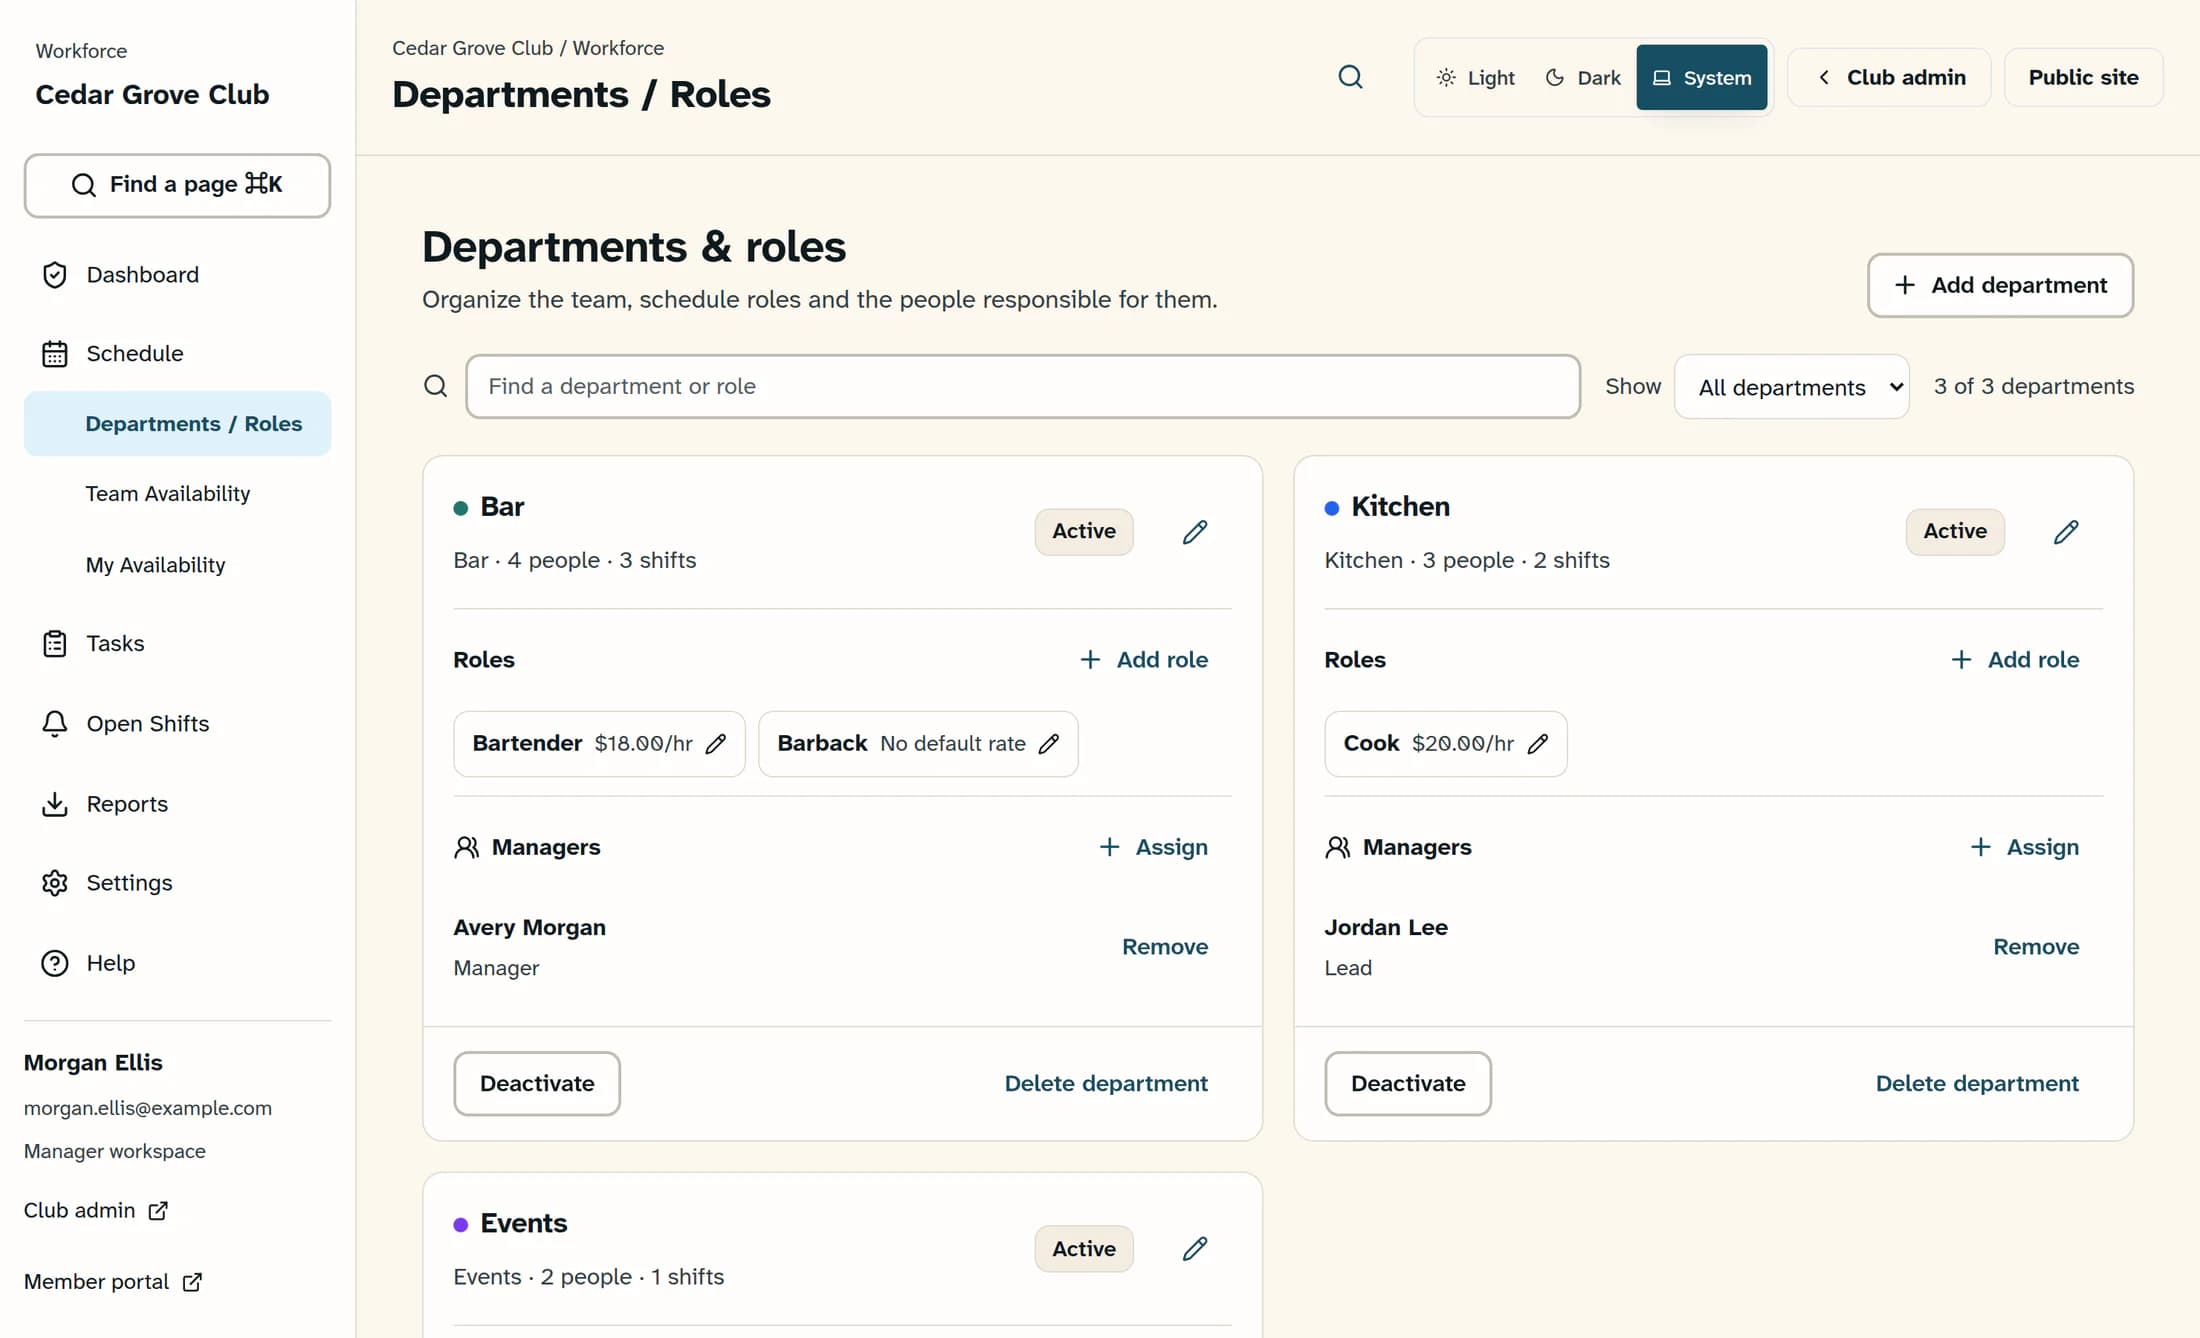
In Workforce, open Schedule and choose Departments / Roles. On Departments & roles, review the existing departments before adding another; each card lists its roles and managers.
Step 2 of 11
Add a department
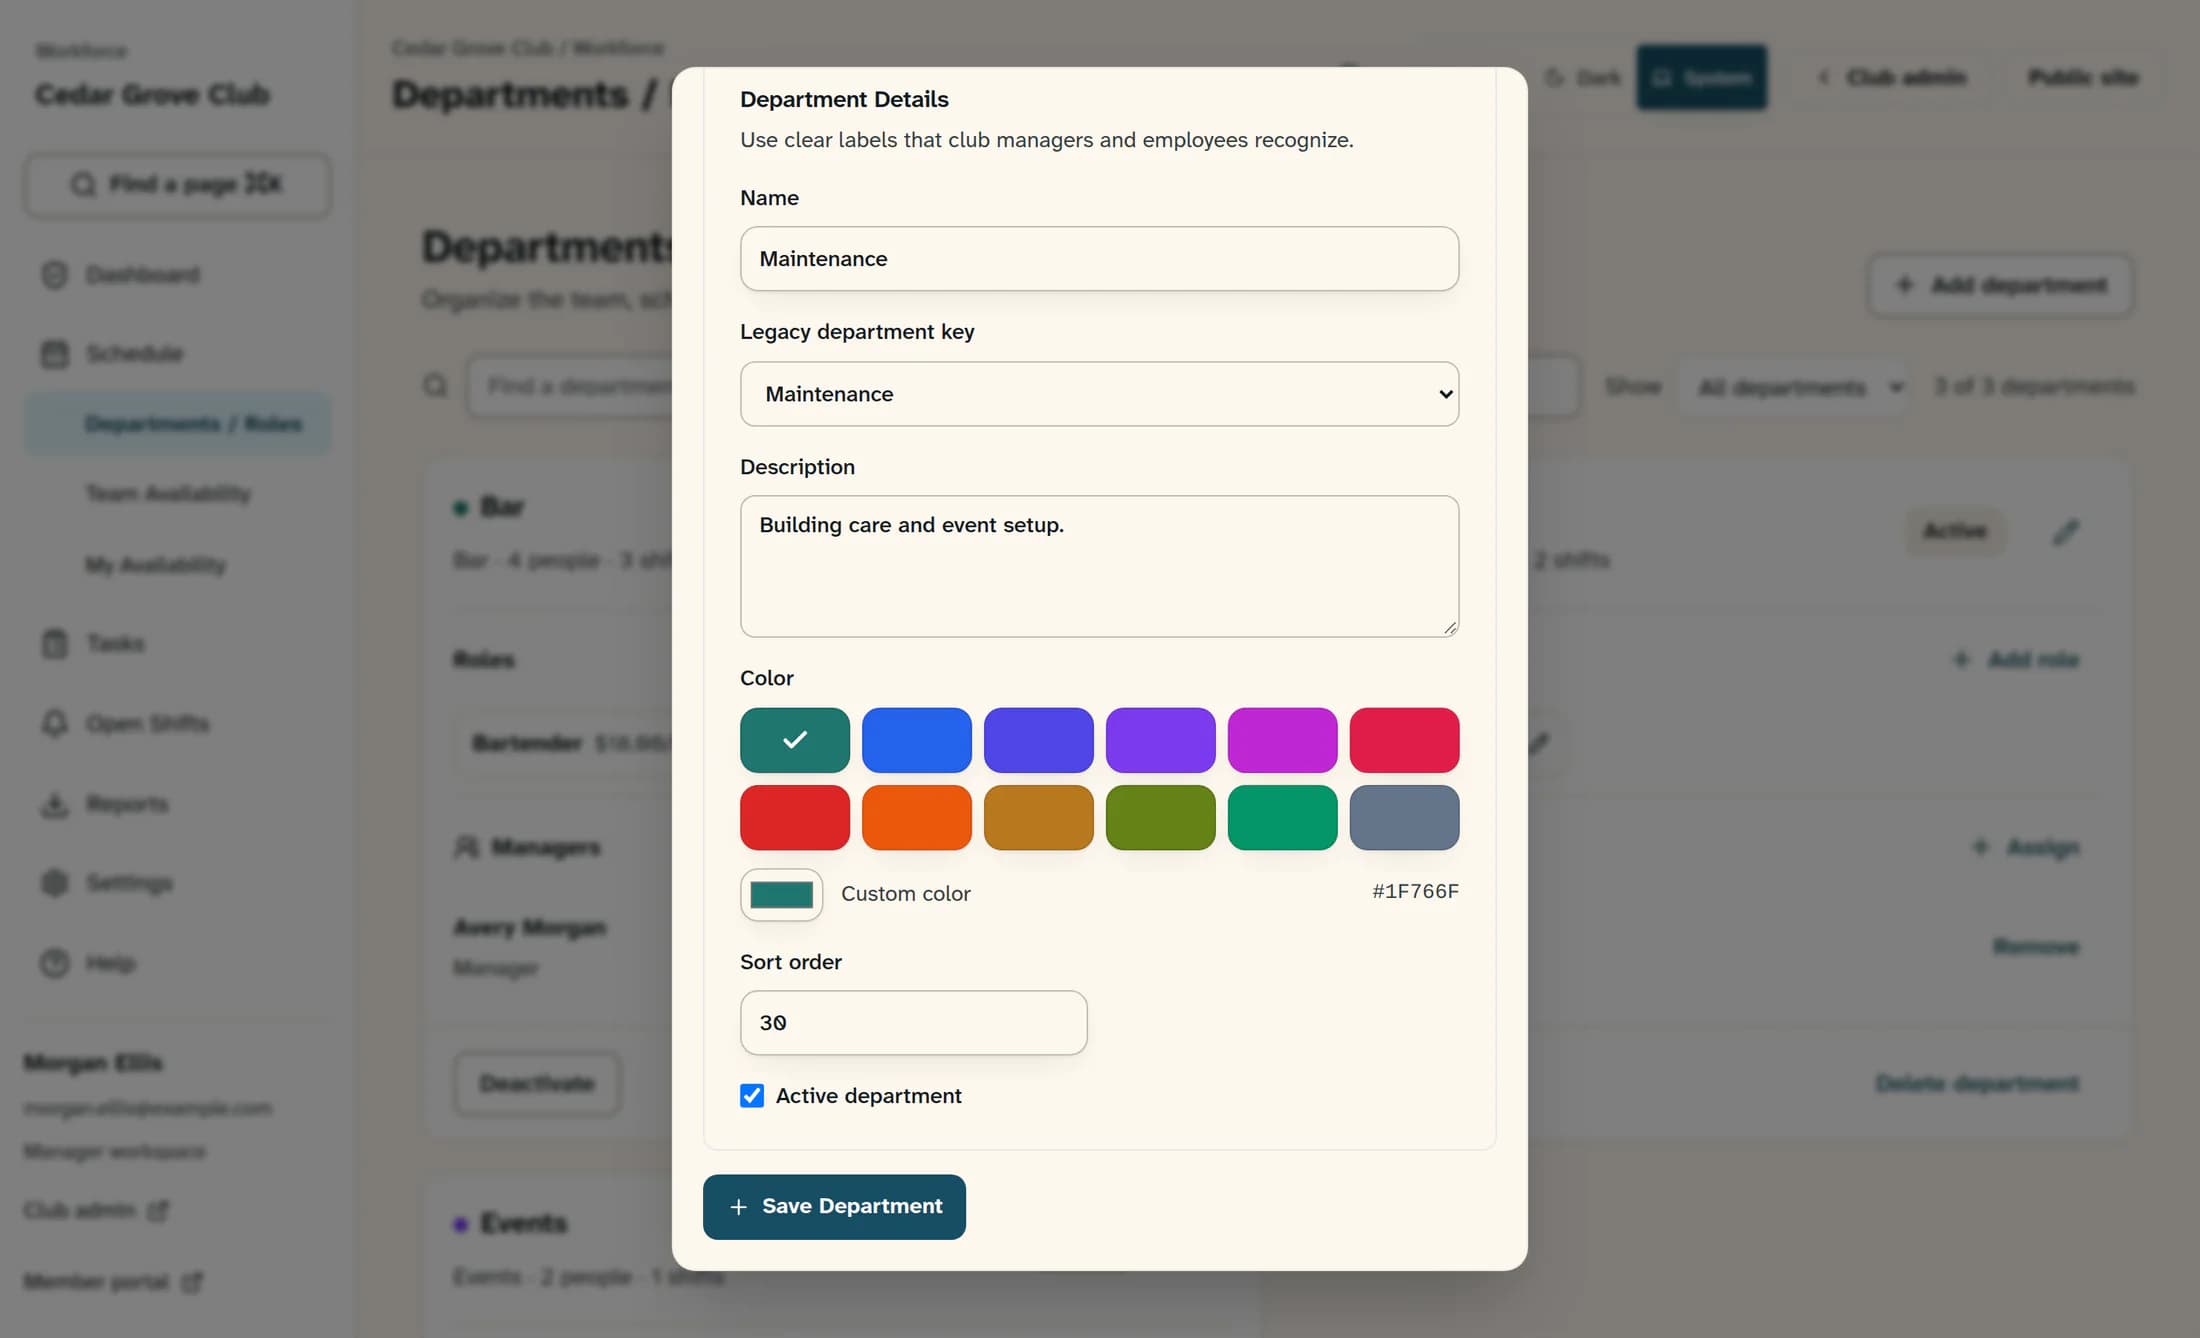
Choose Add department at the top of the page. In Add Department, enter Name, choose Legacy department key and add Description if helpful; the legacy key links this department to an existing staff and scheduling category.
Step 3 of 11
Set the department’s color and availability
Choose Color from the presets or use Custom color, then enter Sort order to set its position. Leave Active department checked to include it in active department lists, or clear it to keep the department inactive; its roles have their own active settings.
Step 4 of 11
Save the department
Choose Save Department and wait for Department saved. Check that the department appears on the page before adding its roles.
Step 5 of 11
Add a role within the department
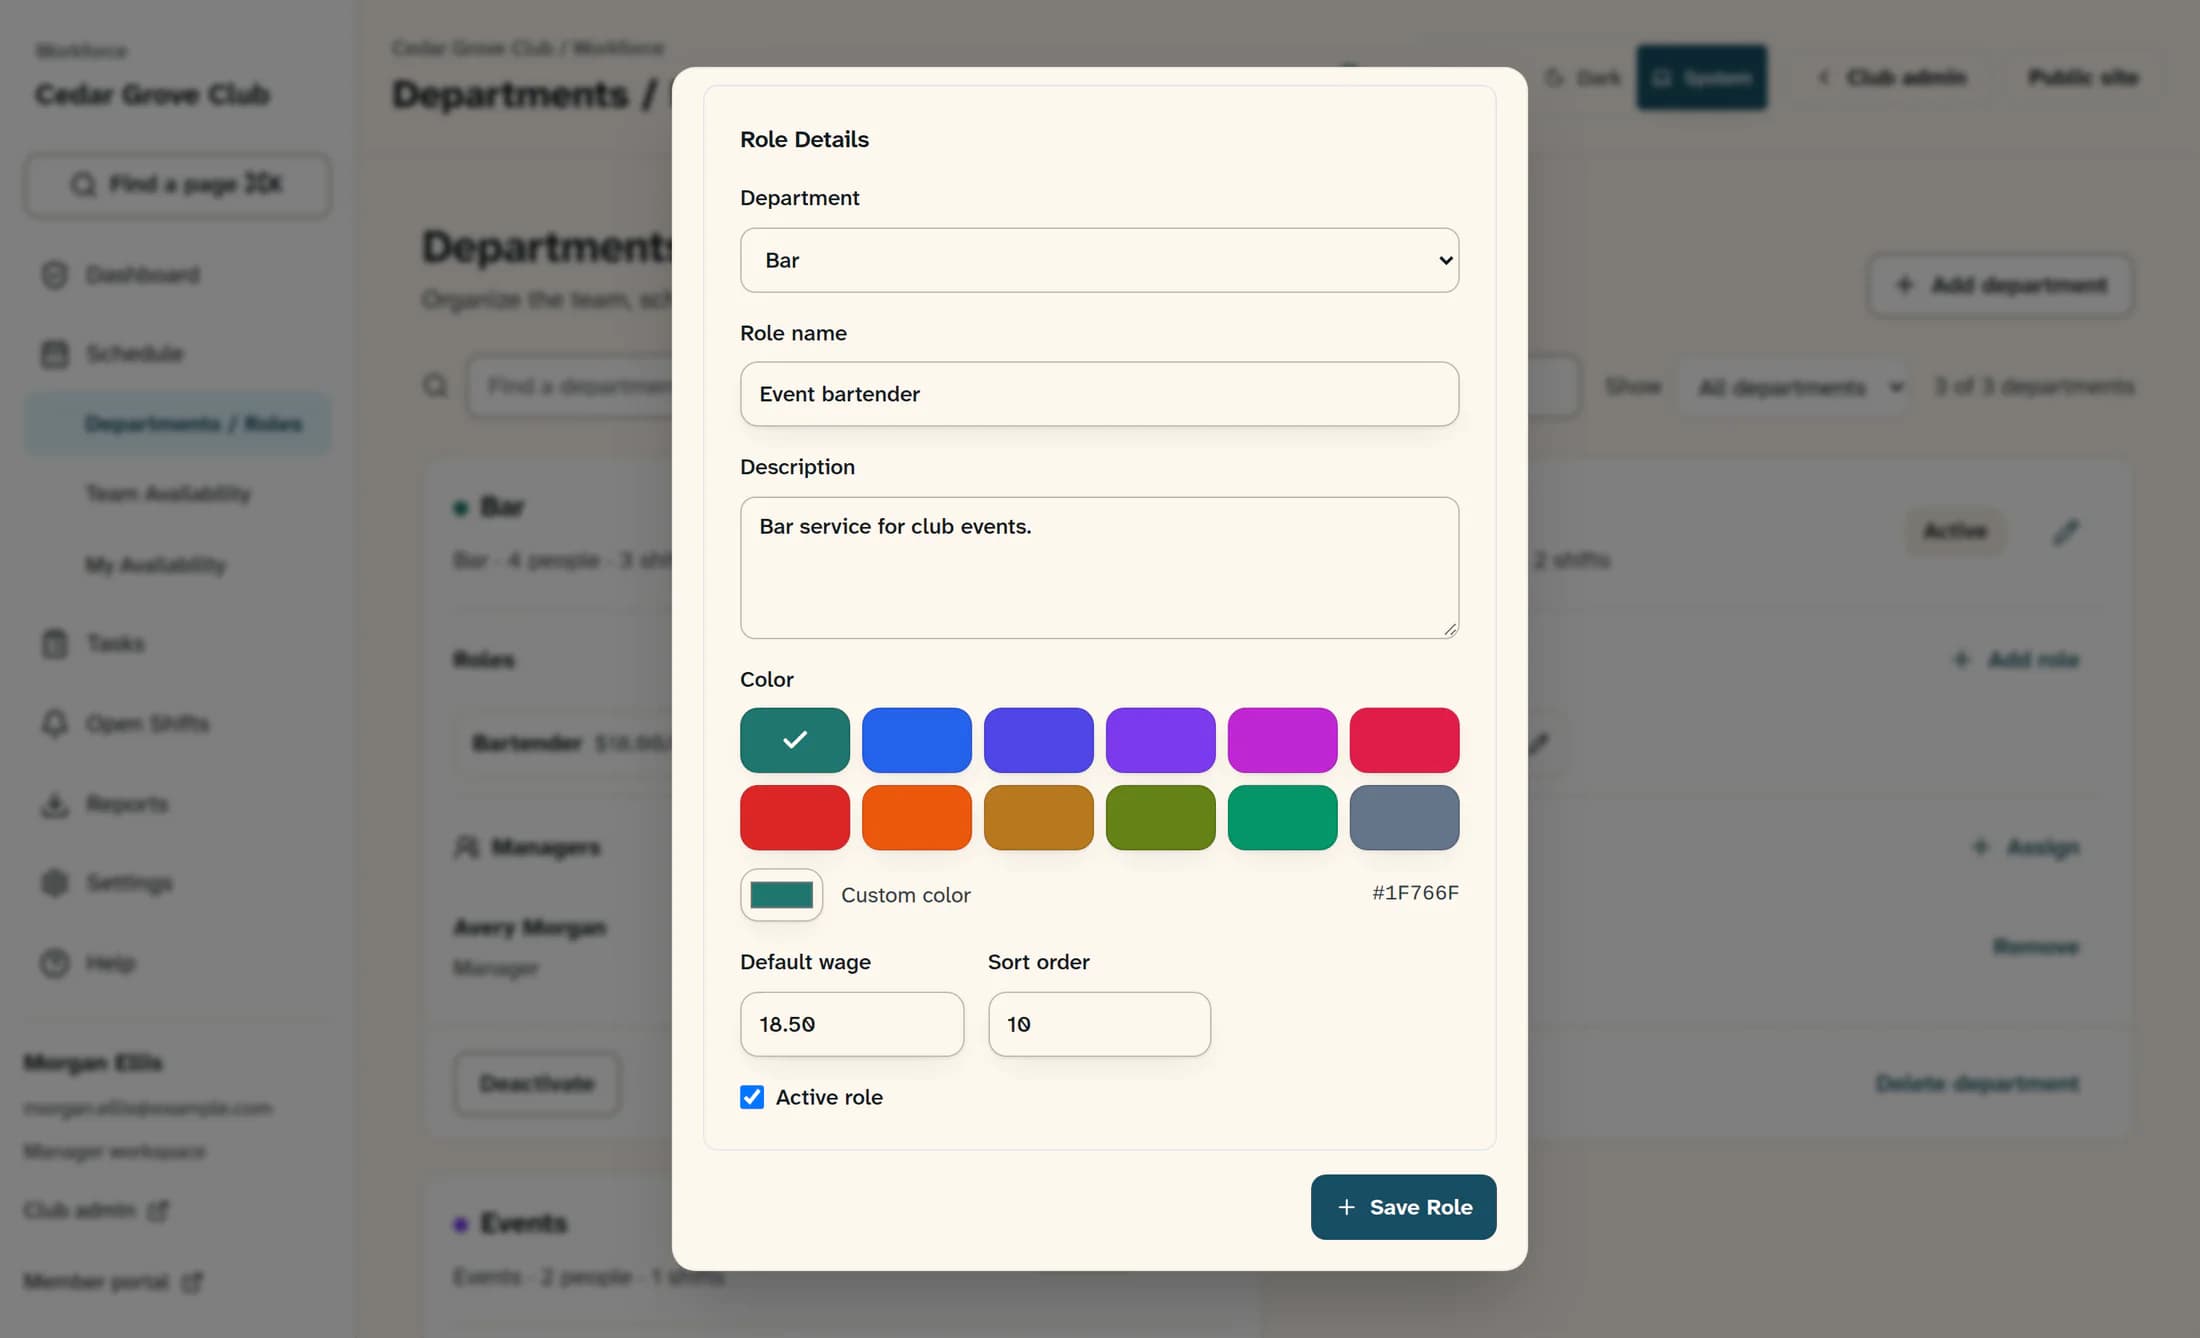
Choose Add role in the department’s Roles section. In Add Role, check Department, enter Role name and add Description if needed; choose Color or Custom color for this scheduling role.
Step 6 of 11
Set the role’s wage hint and availability
Enter an optional Default wage and Sort order, and leave Active role checked to include it in the active role catalog. The default wage is a hint associated with the role; creating a role or scheduling it does not set an employee’s actual hourly rate.
Step 7 of 11
Save the role
Choose Save Role and wait for Role saved. The role should appear under the department with its default rate, or No default rate if no wage hint was entered.
Step 8 of 11
Edit an existing department or role
Use the pencil button at the top right of the department card to open Edit Department, or choose the role’s row to open Edit Role. Update the fields you need and use Save Department or Save Role to keep the change; check the selected Department before saving a role.
When you rename a role
A role rename updates matching names on shifts, saved default shifts, schedule templates, open shifts and employee role assignments. The update follows the Legacy department key, which is the shared staff and scheduling category, rather than only the named department card. If multiple departments share that key, matching role-name references in that shared category can also change; check them before renaming.
If the name changed but assignments did not
If you see a warning that the role was renamed but its shift and employee assignments could not be updated, the role itself may already be saved. Refresh the page and check the current name and affected assignments, then ask the person responsible for Workforce to resolve the warning. Do not repeatedly rename or create another role to retry the update.
Step 9 of 11
Deactivate or restore a department
Choose Deactivate in the department card’s footer to mark it inactive and remove it from active department lists while keeping history. To bring it back, set Show to All departments or Inactive and choose Restore in that card; the page confirms Department deactivated. or Department restored.
Step 10 of 11
Deactivate or restore a role
Open the role’s row and choose Deactivate Role in Edit Role to remove it from the active role catalog while preserving history. Open the inactive role again and choose Restore Role when it is needed; these buttons apply the status change without a separate Save Role action.
Inactive is not a scheduling ban
Deactivating a department does not deactivate its roles; change each role’s status separately if needed. An employee’s previously allowed role names or an existing shift value can still appear in a shift picker even when a catalog role is inactive. Check the actual scheduling choices and use Workforce access controls separately when you need to restrict who can schedule.
Understand deletion before continuing
Use deactivation when you may need the item again. Deletion removes the item from the department and role catalog and removes scheduling permissions for deleted roles; employee records, past shifts, wages and HR history remain. Deleting a department also deletes its roles and department manager assignments.
Step 11 of 11
Delete only an item you intend to remove
For a department, choose Delete department in its card’s footer; for a role, open Edit Role and choose Delete Role. Read the confirmation, including the department’s affected role count when shown, then use the delete button to confirm or Cancel to keep the item.
If deletion could not be confirmed, refresh and check whether the item is still present before trying again. A successful deletion message states that employee and schedule history was kept. There is no Restore action for an item that has been deleted from the catalog.
Scheduling roles do not grant access
A job role describes scheduled work; it does not give someone manager permissions or assign a department manager. Manager assignments in the department’s Managers section and Workforce access controls are separate tasks, as is updating an employee’s pay.
If a change does not appear
Devices and checked release
Applies to Workforce in a web browser. Source checked on October 26, 2026 for release 16782cba, with the department and role behavior compared with the deployed source. Illustrations reconstruct that design with fictional examples; navigation outside Schedule and the calculation of upcoming shift counts can differ. No live changes or native app workflow were verified.
Summary
Your departments and roles are ready when their save messages appear and the page shows the expected names, colors and active states. Use deactivation to preserve an item for later, and check rename warnings before making another change.