
On this page
- Before you start
- Open custom content
- Open the lists screen
- Set up your list
- Understand the list settings
- Open your first field
- Add the first field
- Choose a kind of field
- Add the remaining fields
- Avoid field and entry errors
- Add and save your first entry
- Check the saved entry
- Show the list on your website
- Your list is ready to use
Before you start
Step 1 of 8
Open custom content
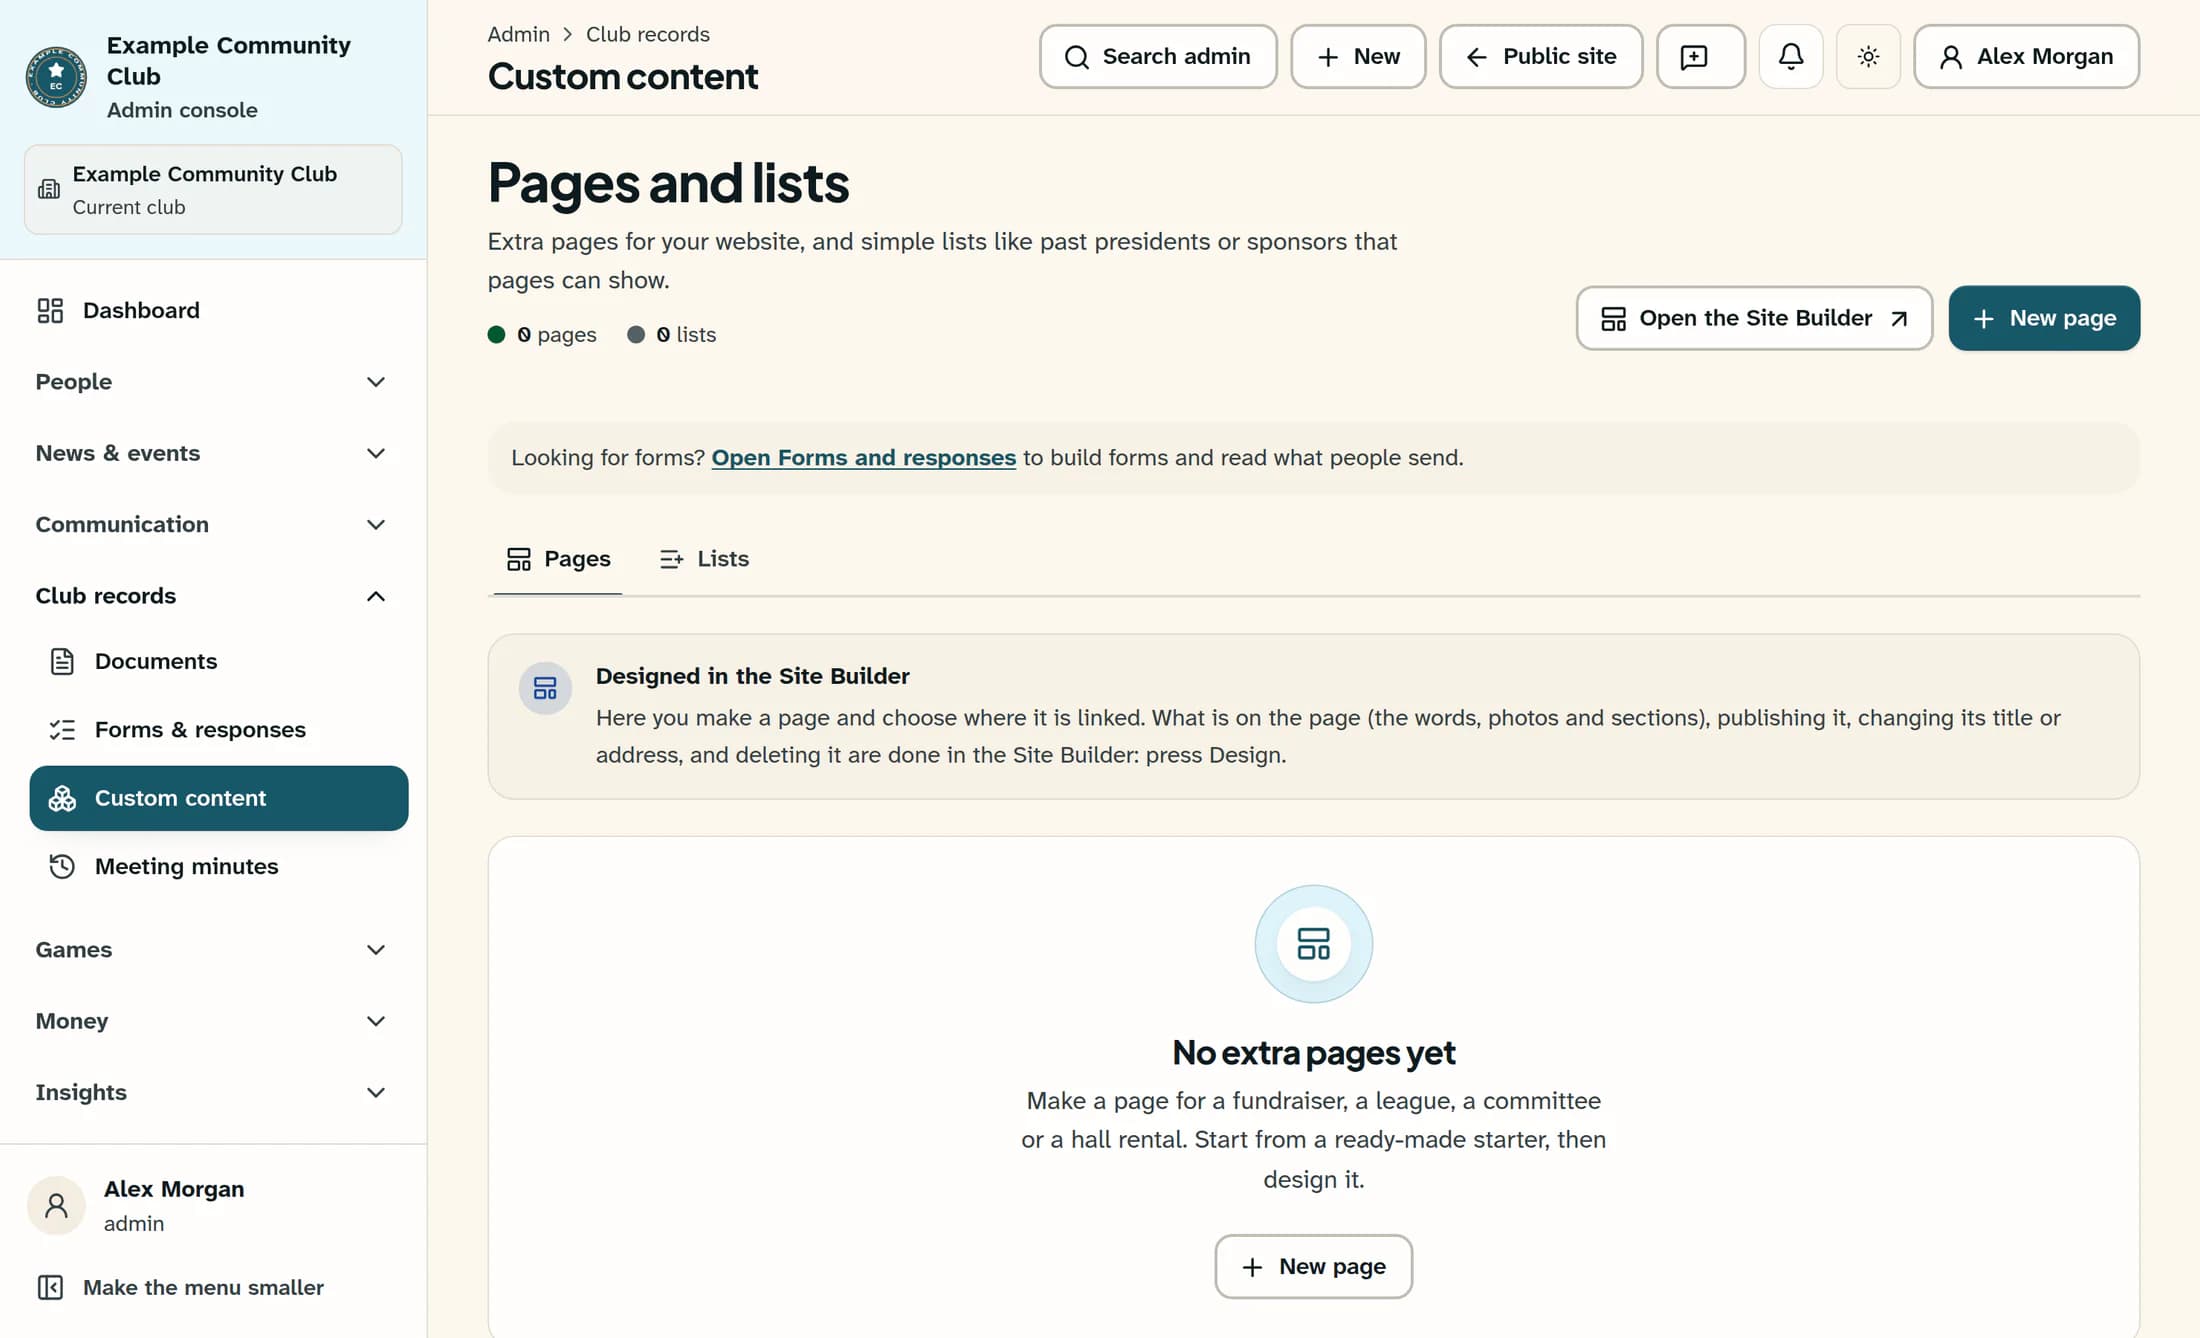
In the admin menu, open Club records, then Custom content. The Pages and lists screen starts on Pages.
Step 2 of 8
Open the lists screen
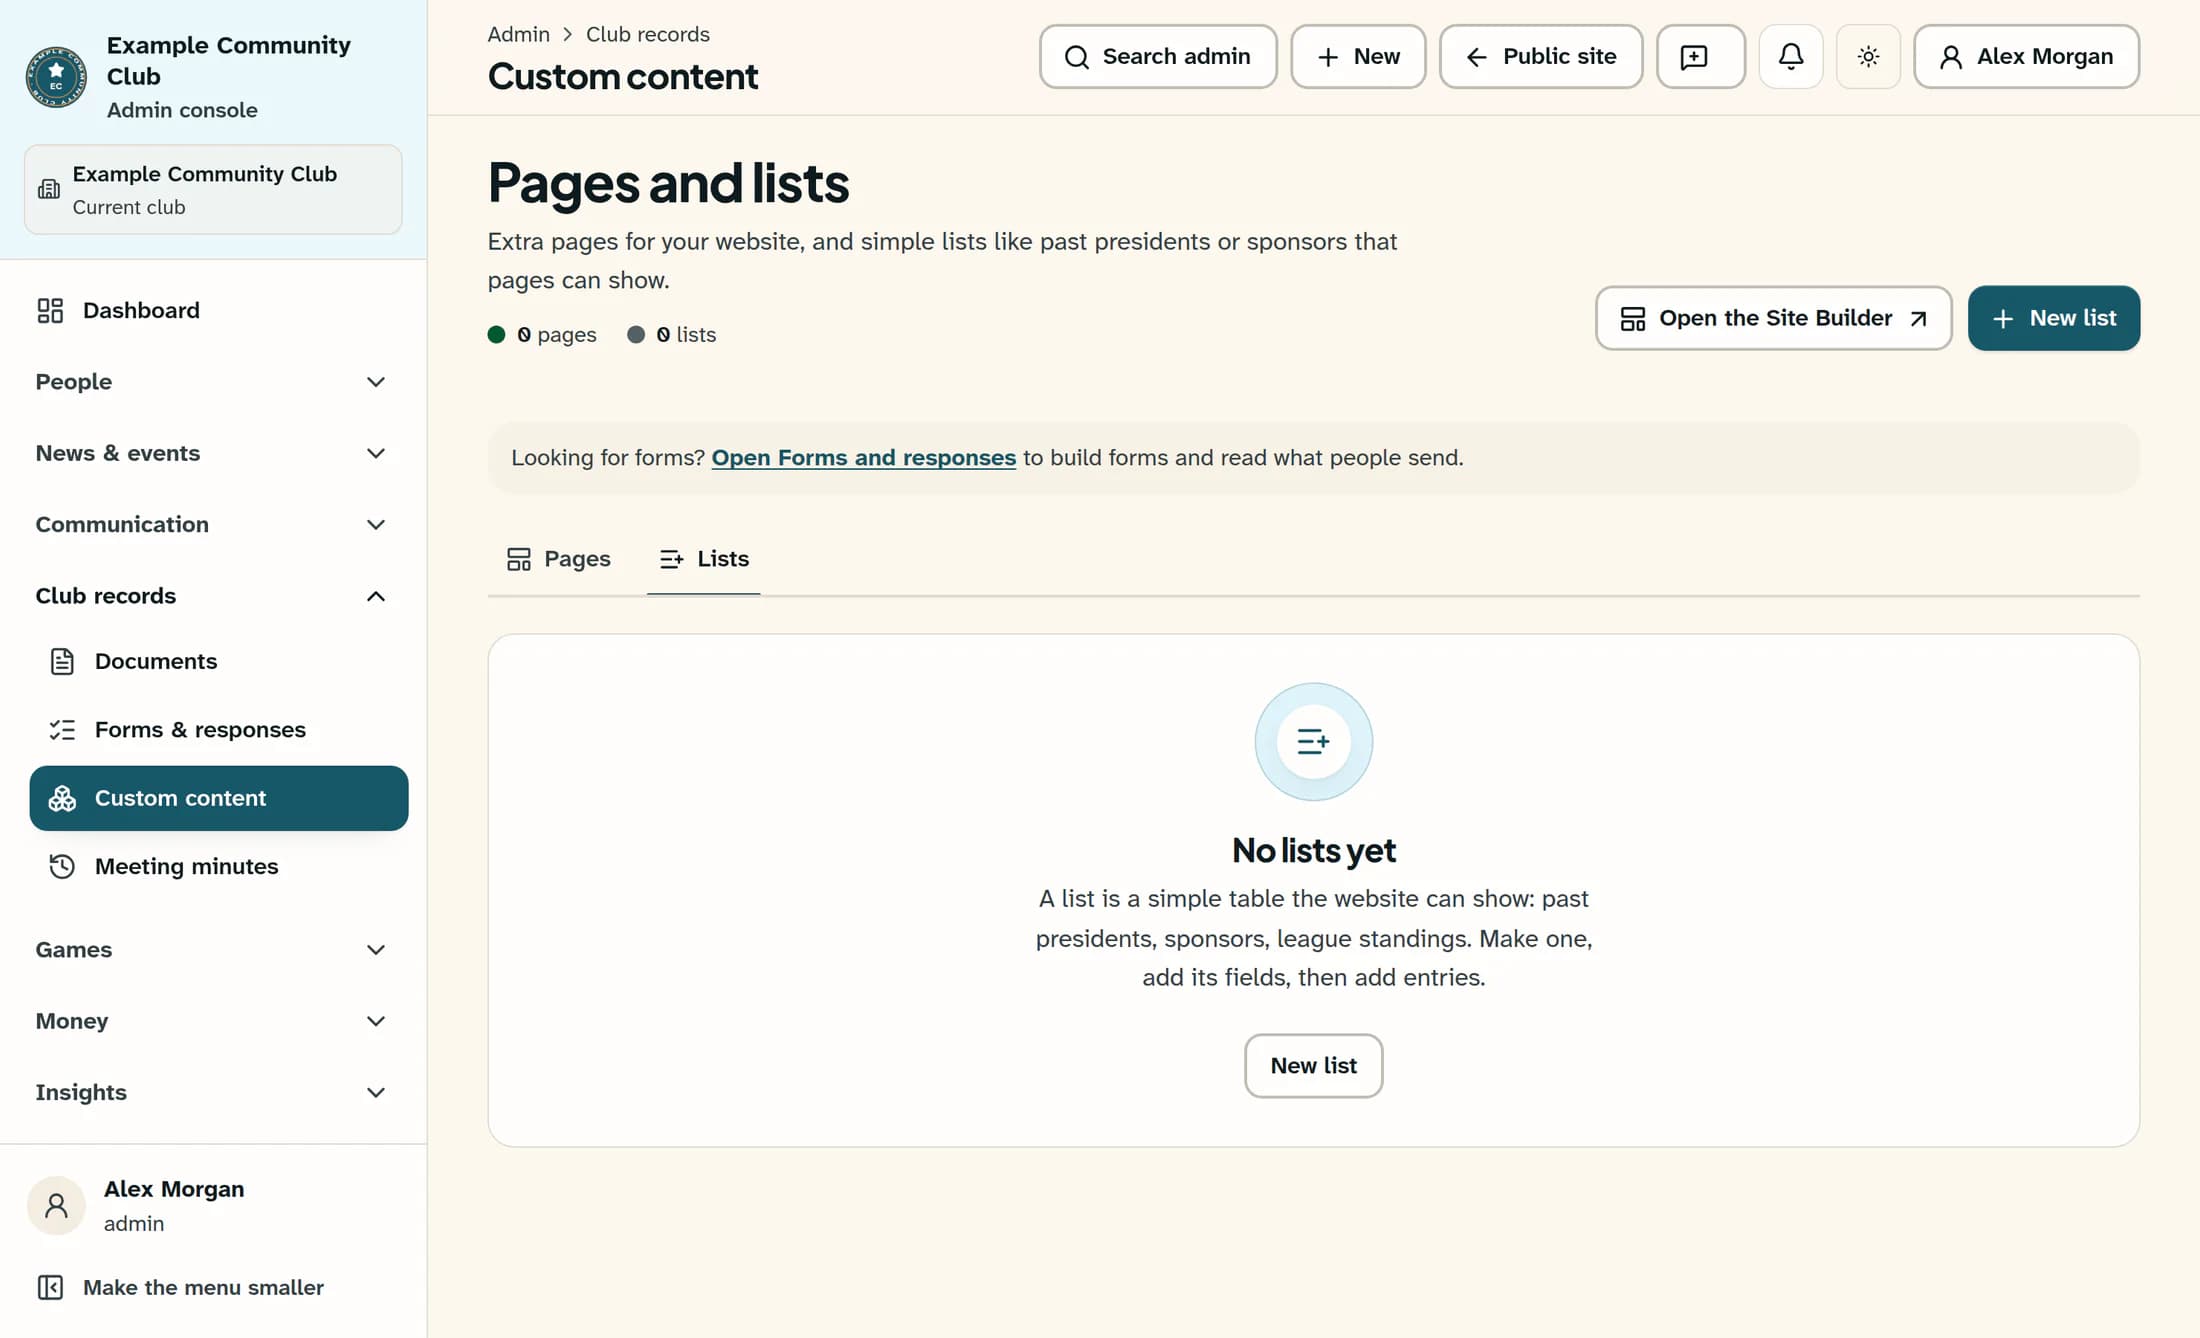
On Pages and lists, choose Lists. Select New list to open the creation dialog.
Step 3 of 8
Set up your list
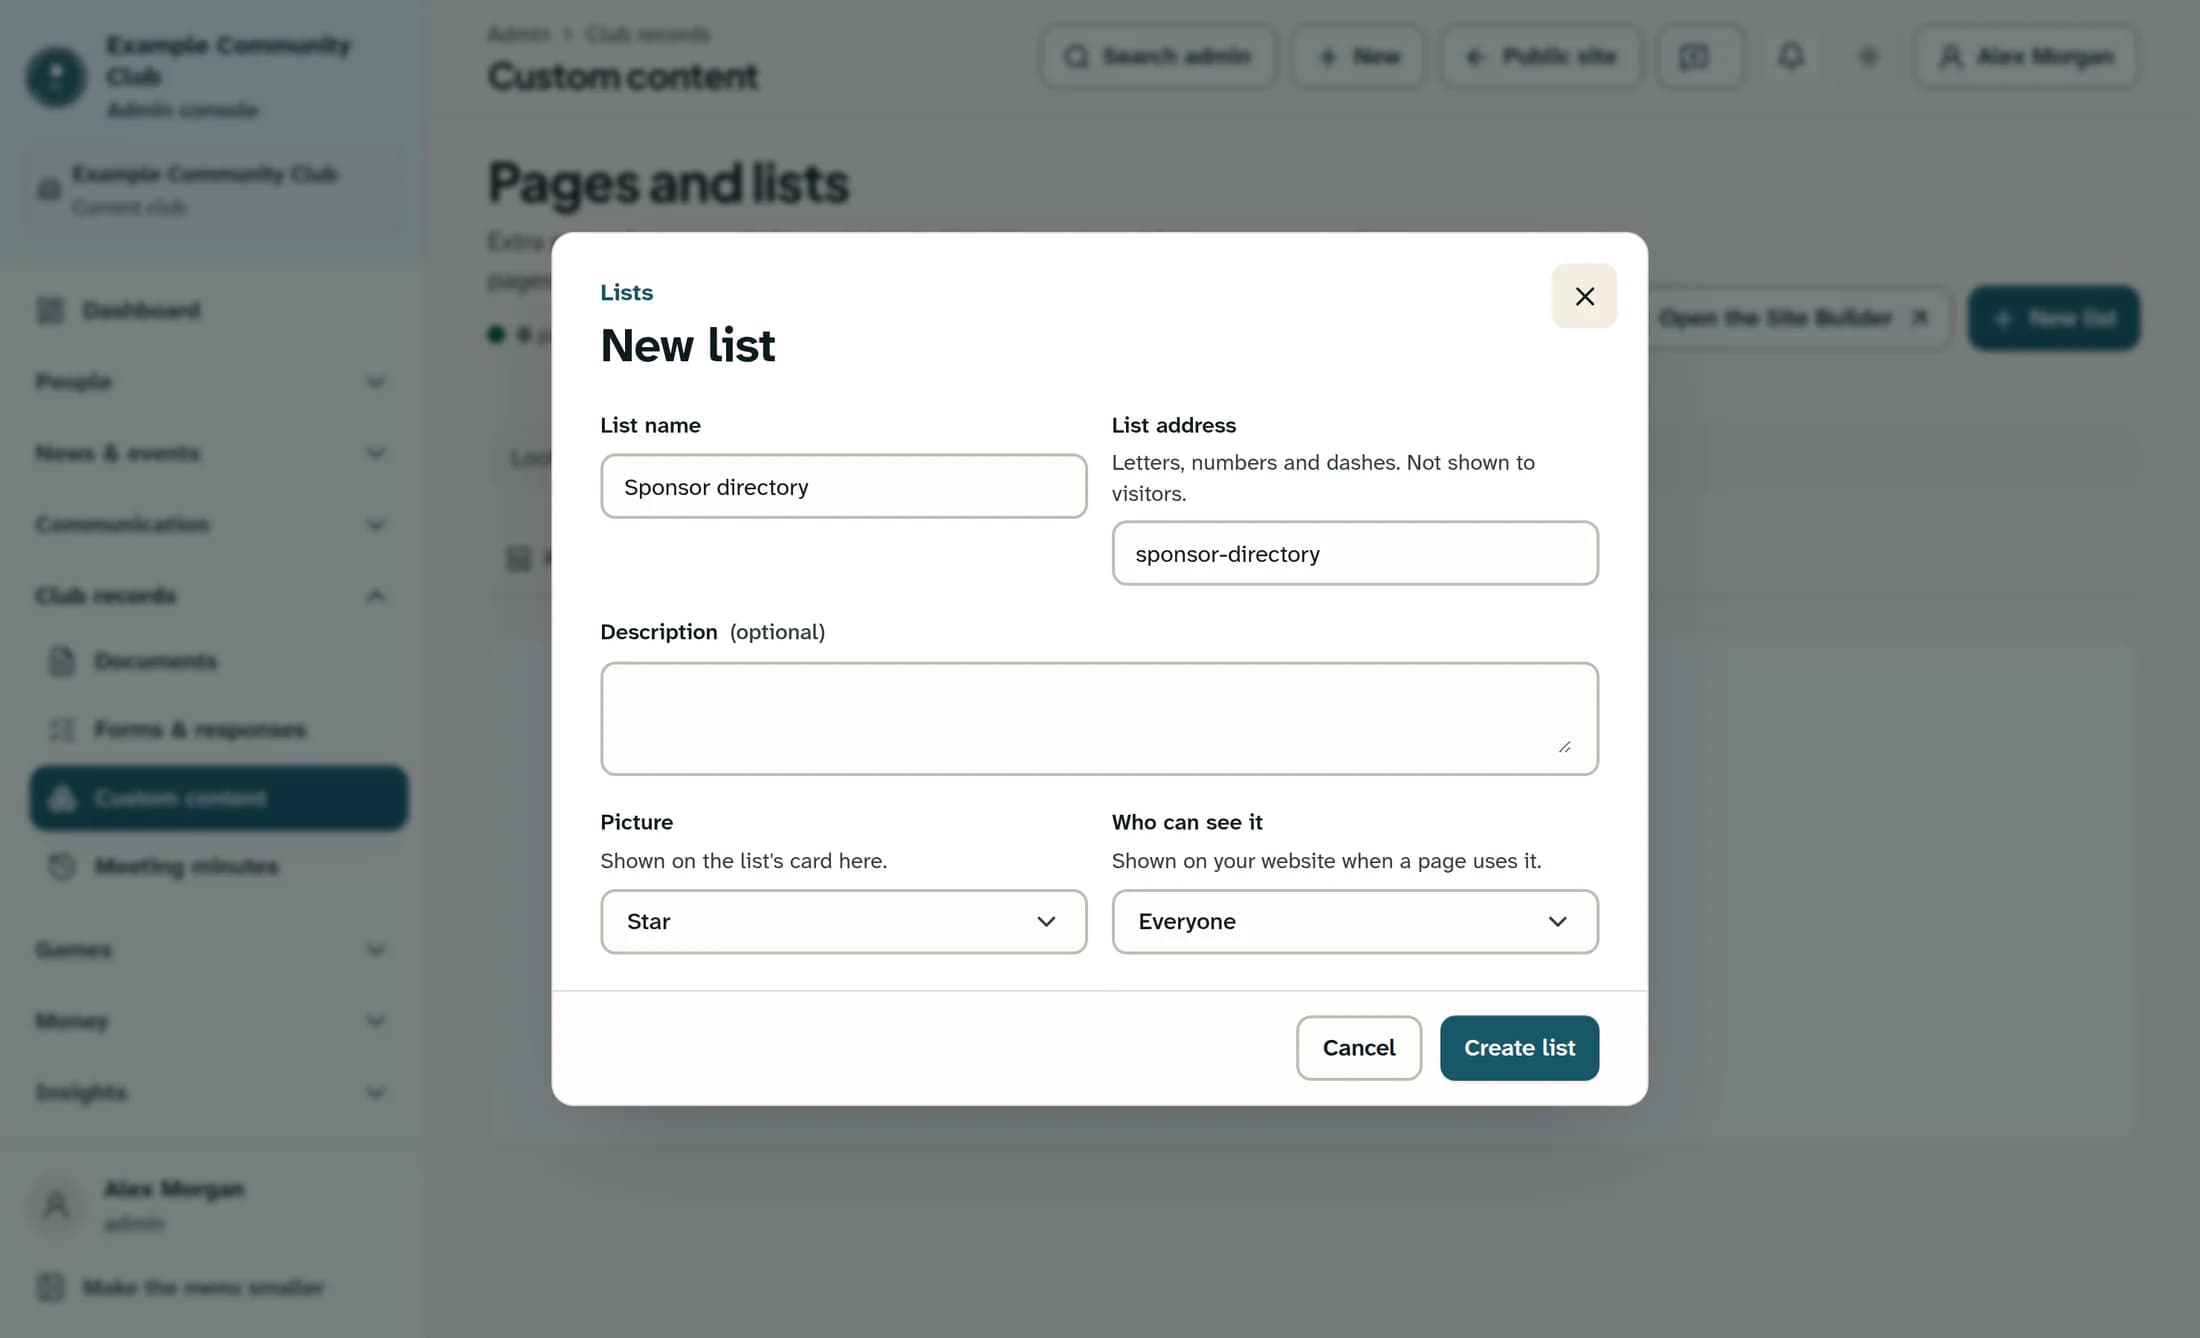
Enter “Sponsor directory” in List name and review List address, which fills from the name. Choose an icon under Picture, then choose Who can see it; use Everyone for a list intended for a public website page. Select Create list to open the new list.
Understand the list settings
Step 4 of 8
Open your first field
The new list opens with Entries selected. While it has no fields, Add an entry is disabled; select the Fields link in the message to begin.
Step 5 of 8
Add the first field
Under Fields, select Add a field. Enter “Business name” in Name, choose Text under Kind of field, and select Required if every entry must have a name. Select Save field.
Choose a kind of field
- Text: a name or short line. Long text: a paragraph or more.
- Number: a year or count. Money: a dollar amount, shown as USD.
- Date: a calendar day. Time: a time of day. Date and time: both together.
- Yes or no: a switch. A required Yes or no field still permits No; Required does not force the switch to Yes.
- Picture address: the address of a picture. File address: the address of a file. These accept address text, not uploads; use a full http(s) address or a root-relative address beginning with /. Saving does not verify that the resource exists, and the standard website list displays these values as text.
- Website link: a web address beginning with http:// or https://. Email: an email address. Phone: a phone number.
- Pick one: one choice from your list. Pick several: multiple choices from your list.
Step 6 of 8
Add the remaining fields
Repeat Add a field for each detail you need; for this example, name a second field “Website link” and choose Website link as its kind. For Pick one or Pick several, enter at least two distinct, nonblank lines in Choices; surrounding spaces and blank lines are removed and duplicate lines count once. Keep commas out of Pick several choices, then select Save field.
Avoid field and entry errors
Step 7 of 8
Add and save your first entry
Return to Entries, then select Add an entry. Fill in the fields, such as the fictional business “Example Garden Supplies” and website “https://example.com”, including each field marked “(required)”. Select Save entry.
Step 8 of 8
Check the saved entry
Confirm that the entry appears under Entries in the same list, using its first filled-in field other than Yes or no as the title. Select Edit if you need to check or correct its values; saving an entry gives it published status immediately, with no separate publish step.
Show the list on your website
Creating a list does not place it on a website page. A page must contain a custom-list block with this list selected in its List setting, the list must be visible to Everyone, and its entries must have published status. A saved entry may therefore appear immediately if a public page already uses that list; list and entry setup alone does not create or publish a website page.
Your list is ready to use
You now have a list with fields and a saved first entry. Keep adding entries in the same list, and select this list in the List setting when setting up a custom-list block on your website.