
On this page
Before you start
Step 1 of 9
Open the existing album
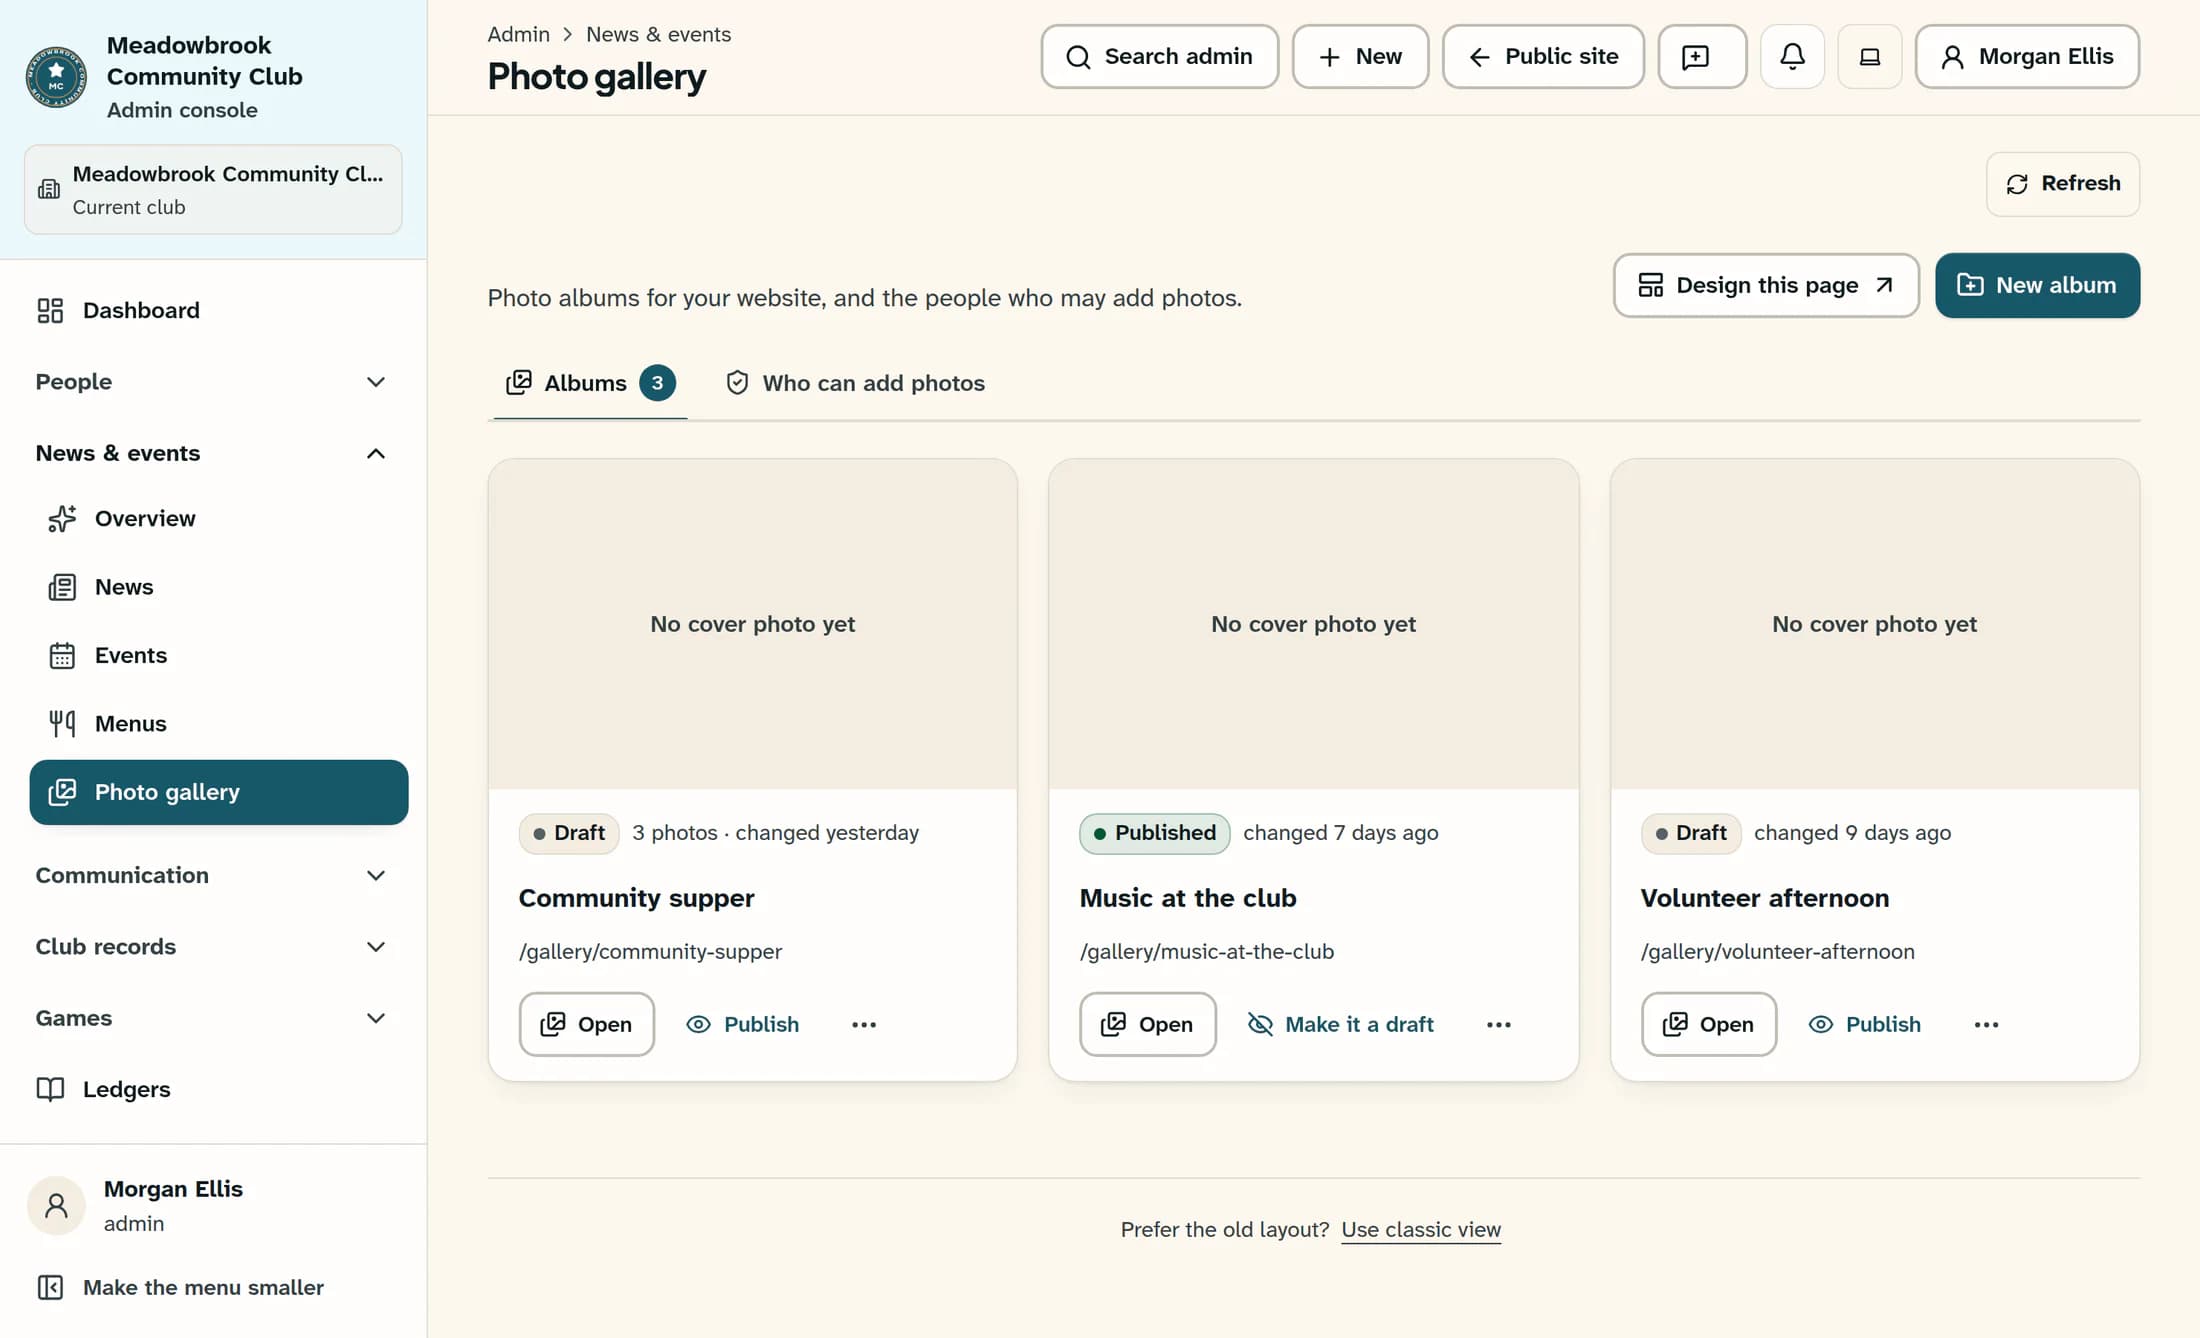
In the admin menu under News & events, select Photo gallery. In Albums, find the album you want and select its Open button.
Step 2 of 9
Start adding photos
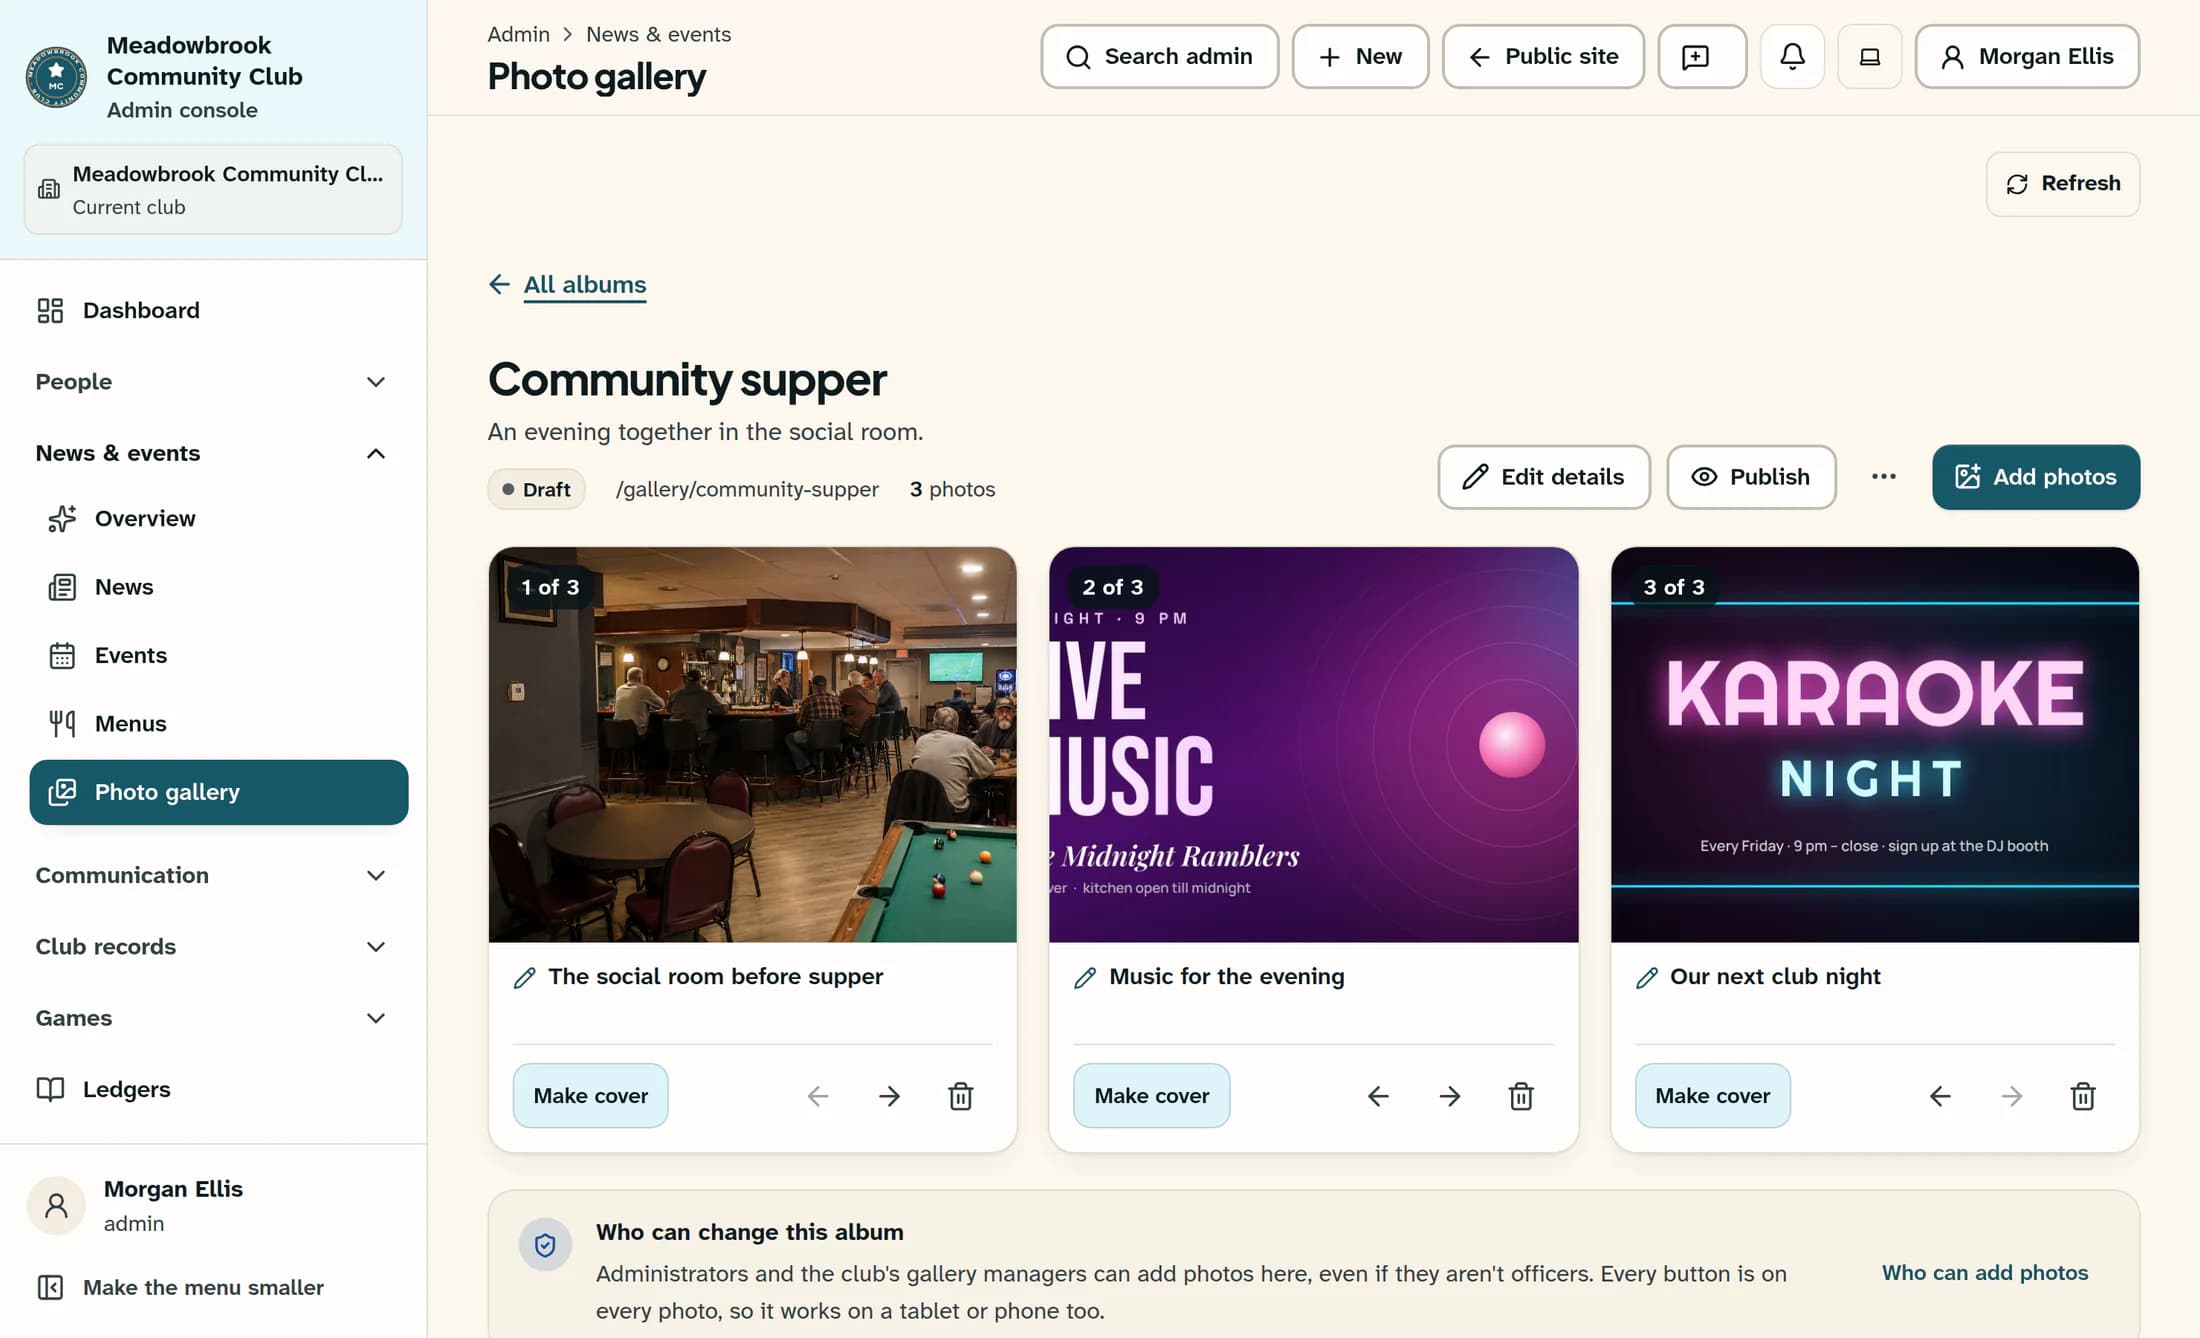
Check the album name, then select Add photos at the top of the album. You can add images to an album that already contains photos.
Step 3 of 9
Choose files from your device
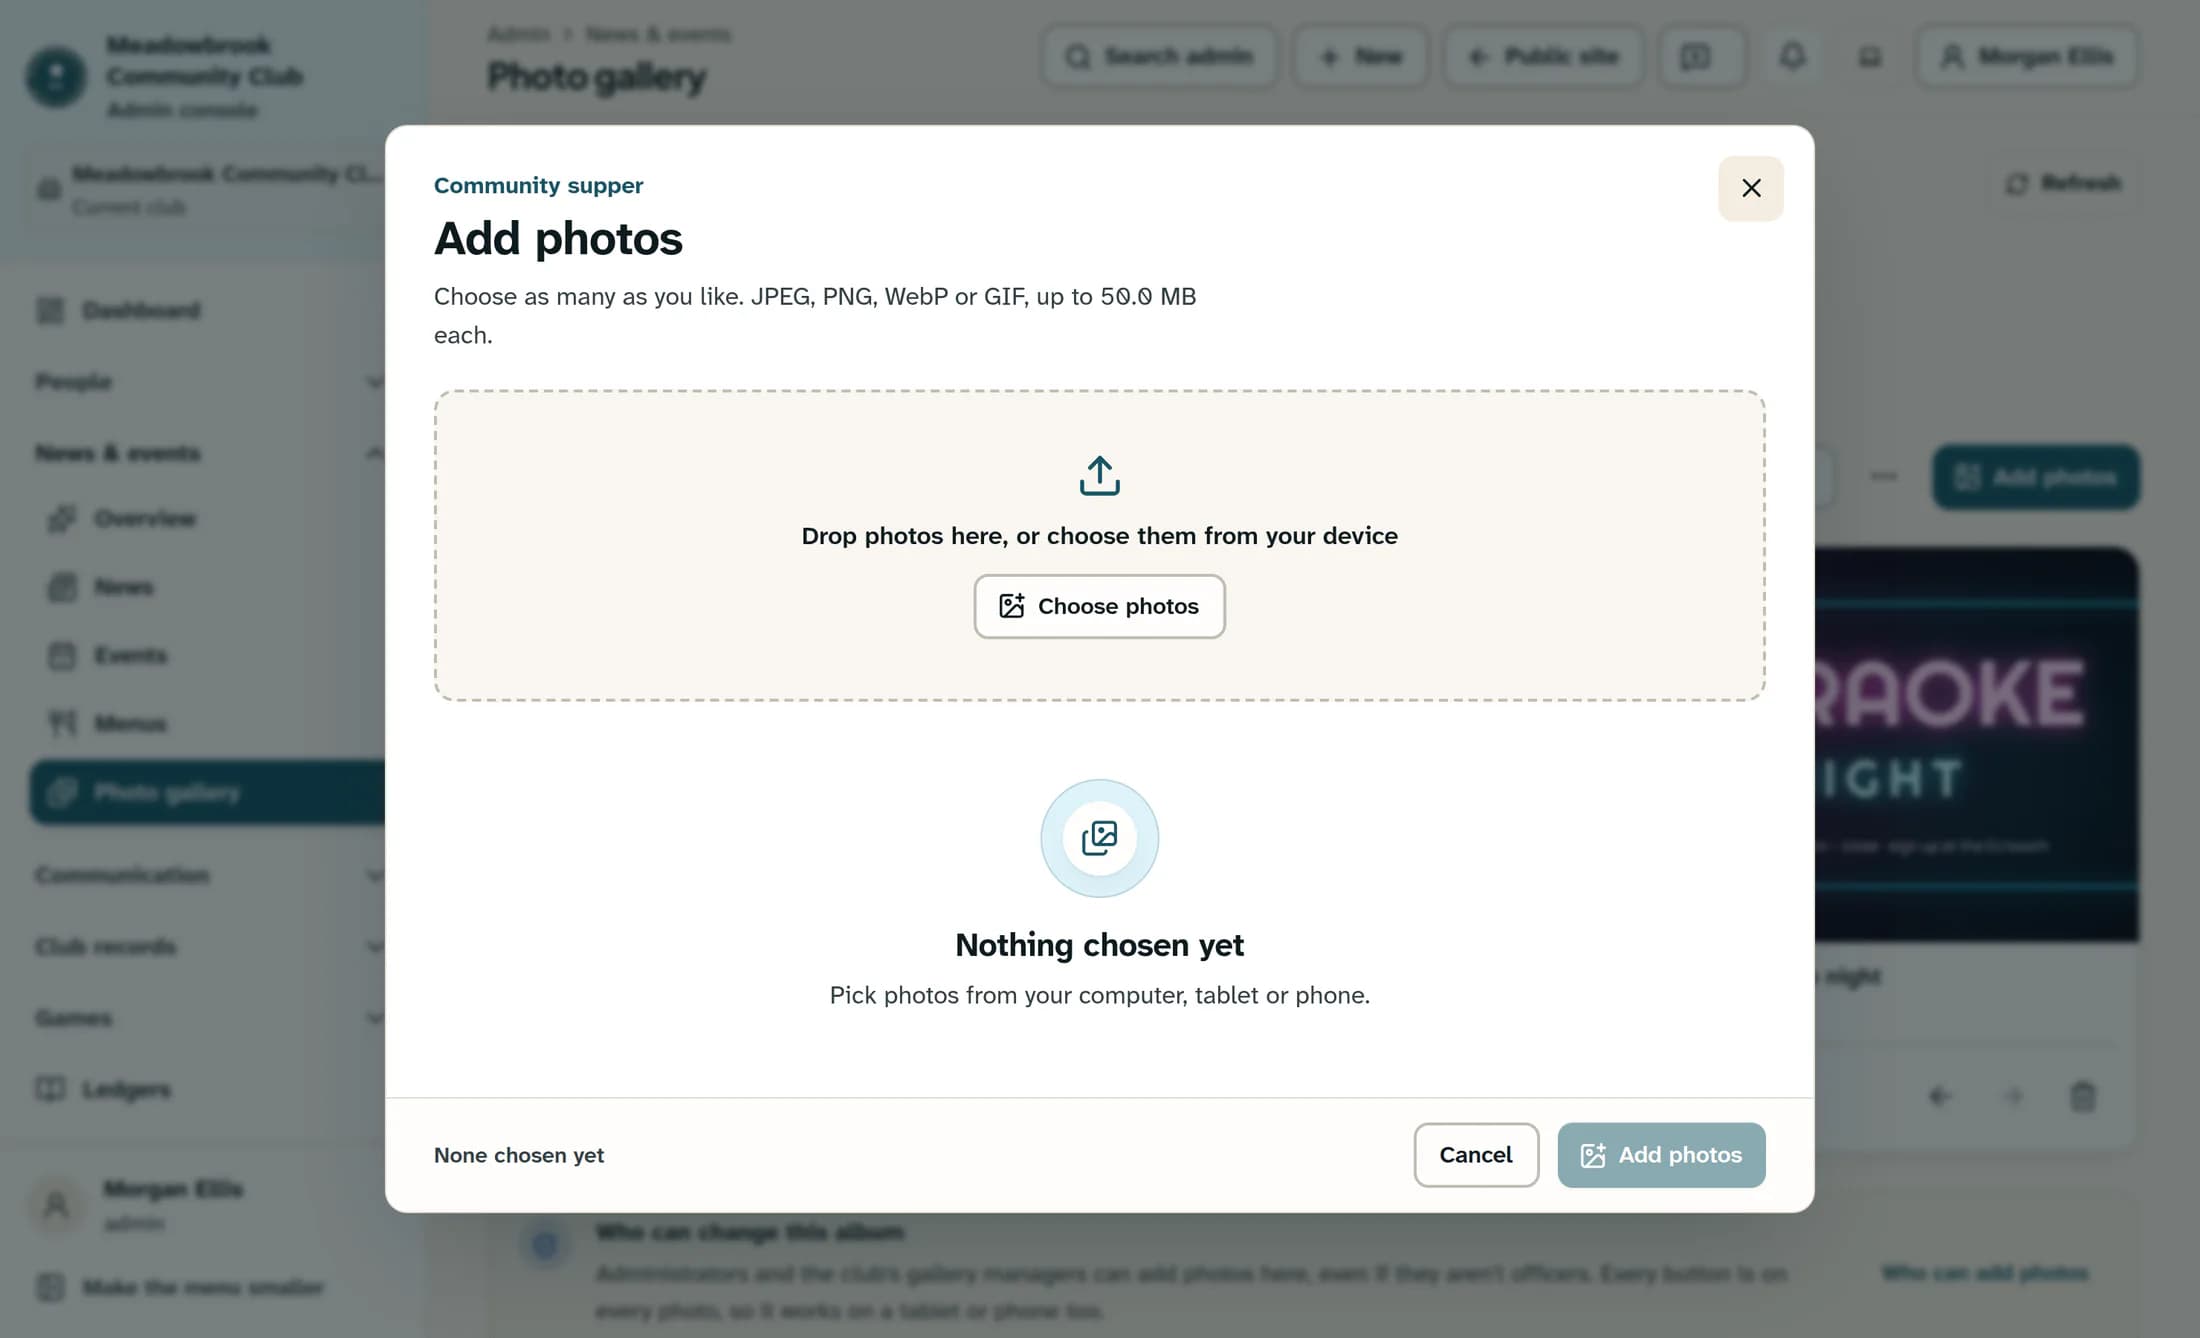
In the Add photos dialog, select Choose photos and choose one or more files from your device. You can also drop files into the area above that button.
Step 4 of 9
Check the selected files
Review the filenames and any warnings before adding them; only valid files count as ready to add. Convert unsupported images to JPEG or PNG, reduce oversized images, and exclude non-image files; use Clear and Choose photos to select a corrected batch if needed.
Step 5 of 9
Add the ready photos
Select the filled add button at the bottom right; its label includes the ready count, such as Add 1 photo or Add 3 photos. Wait for the result, then check the album for the new images and the added confirmation; adding images does not publish a draft album.
Step 6 of 9
Write or change a caption
Under a photo, select Add a caption, or select its existing caption, then enter up to 300 characters and select Save caption. To remove a caption, empty the field and save; leading and trailing spaces are removed. Check the confirmation and the displayed caption, because the editor can close even when saving fails.
Step 7 of 9
Choose the album cover
On the photo you want to represent the album, select Make cover. Check that the photo now shows Cover photo; this saves separately from captions and ordering.
Step 8 of 9
Change the photo order
With at least two photos in the album, use the left-arrow Move earlier or right-arrow Move later button under a photo, one move at a time. The first photo cannot move earlier and the last cannot move later. Check the numbered positions after each move; if an error appears, inspect the reloaded order before retrying because some positions may already have saved.
Step 9 of 9
Permanently remove a photo
Select the trash-can Remove photo button under the image and check the photo and album named in Remove this photo?. Select Remove the photo only when you are sure: this permanently removes the photo and attempts to delete its stored file, with no undo. Check the album and its cover afterwards; if an error remains, inspect the result before retrying, ask a club administrator about file cleanup, and choose another cover if needed.
If something needs attention
Check your album
Confirm the new images, captions, cover and order in the intended album. After a removal, confirm the remaining photos and cover before leaving.