
On this page
Before you begin
Step 1 of 6
Open Navigation Builder
In your club’s Club Website Designer, select Navigation in the left toolbar. The Navigation Builder has page link settings and a separate primary menu editor. Each has its own publish action.
Step 2 of 6
Set a page’s navigation details
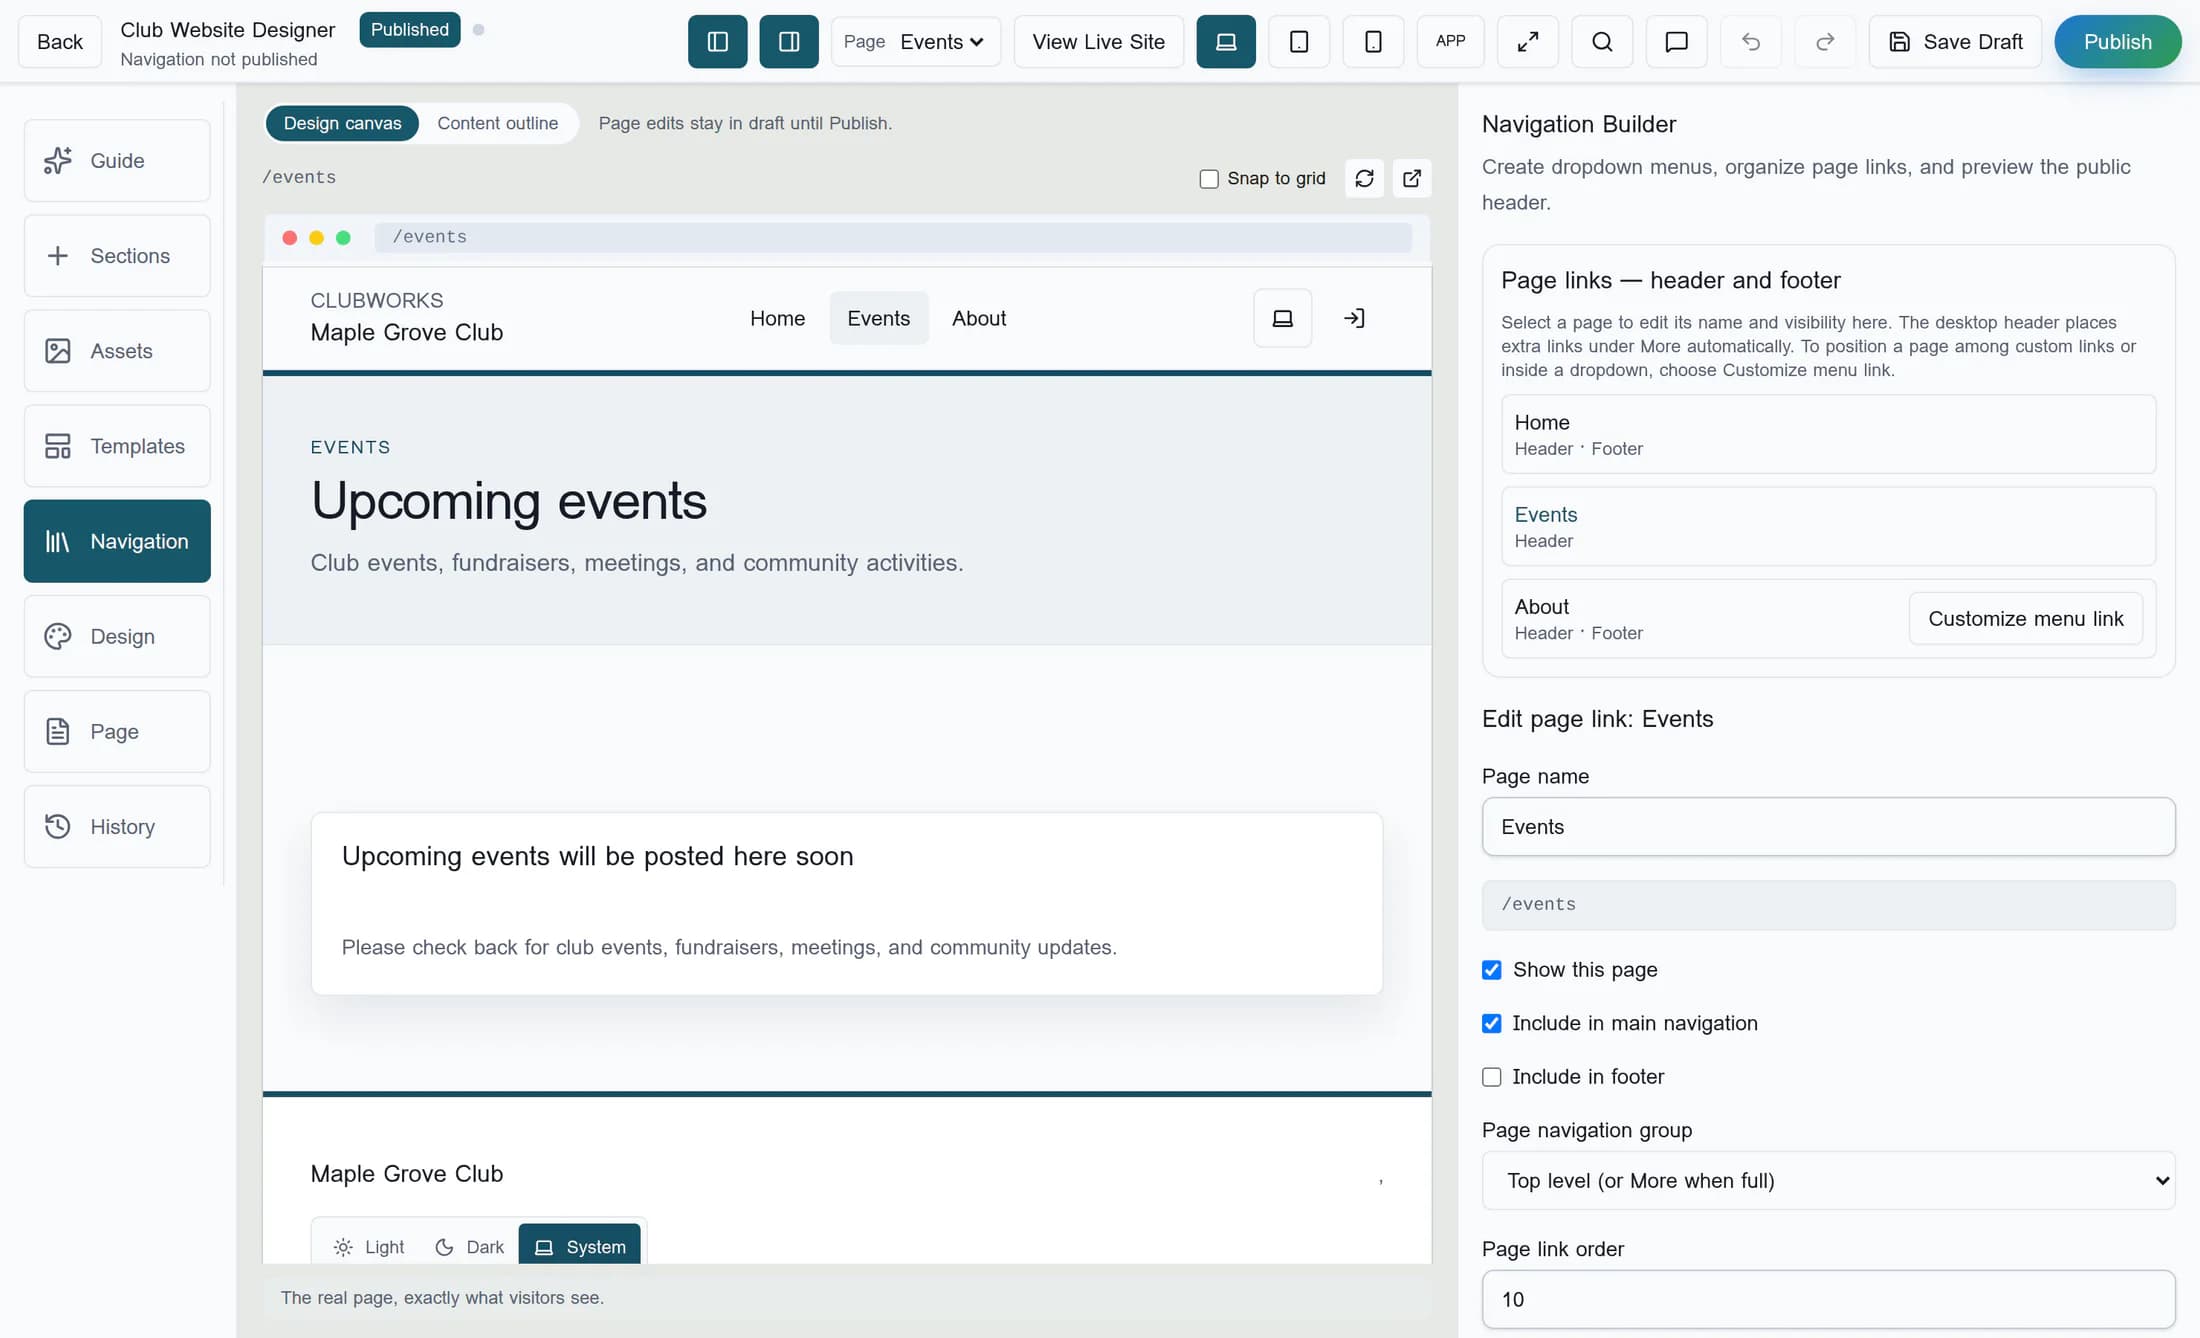
Under Page links — header and footer, select a page. Edit Page name and, for an eligible custom page, its address. Built-in pages have fixed addresses. Choose Show this page, Include in main navigation, and Include in footer as needed. For a linked club page, Page navigation group selects a group or Top level (or More when full). Set Page link order to a whole number to adjust the page’s position. These are page draft changes: select the page and use the toolbar Publish to apply them. A custom menu link keeps its own label and position.
Step 3 of 6
Add and edit menu links
To position an eligible page among custom links or in a dropdown, choose Customize menu link beside it. Or choose Add Page Link, expand the new row, and enter a Menu label. Choose a Link type, select a page under Choose a page, or enter a Link address such as
/eventsorhttps://example.com. You can turn Enabled, Members only, and New tab on or off. Members-only links are hidden from public visitors.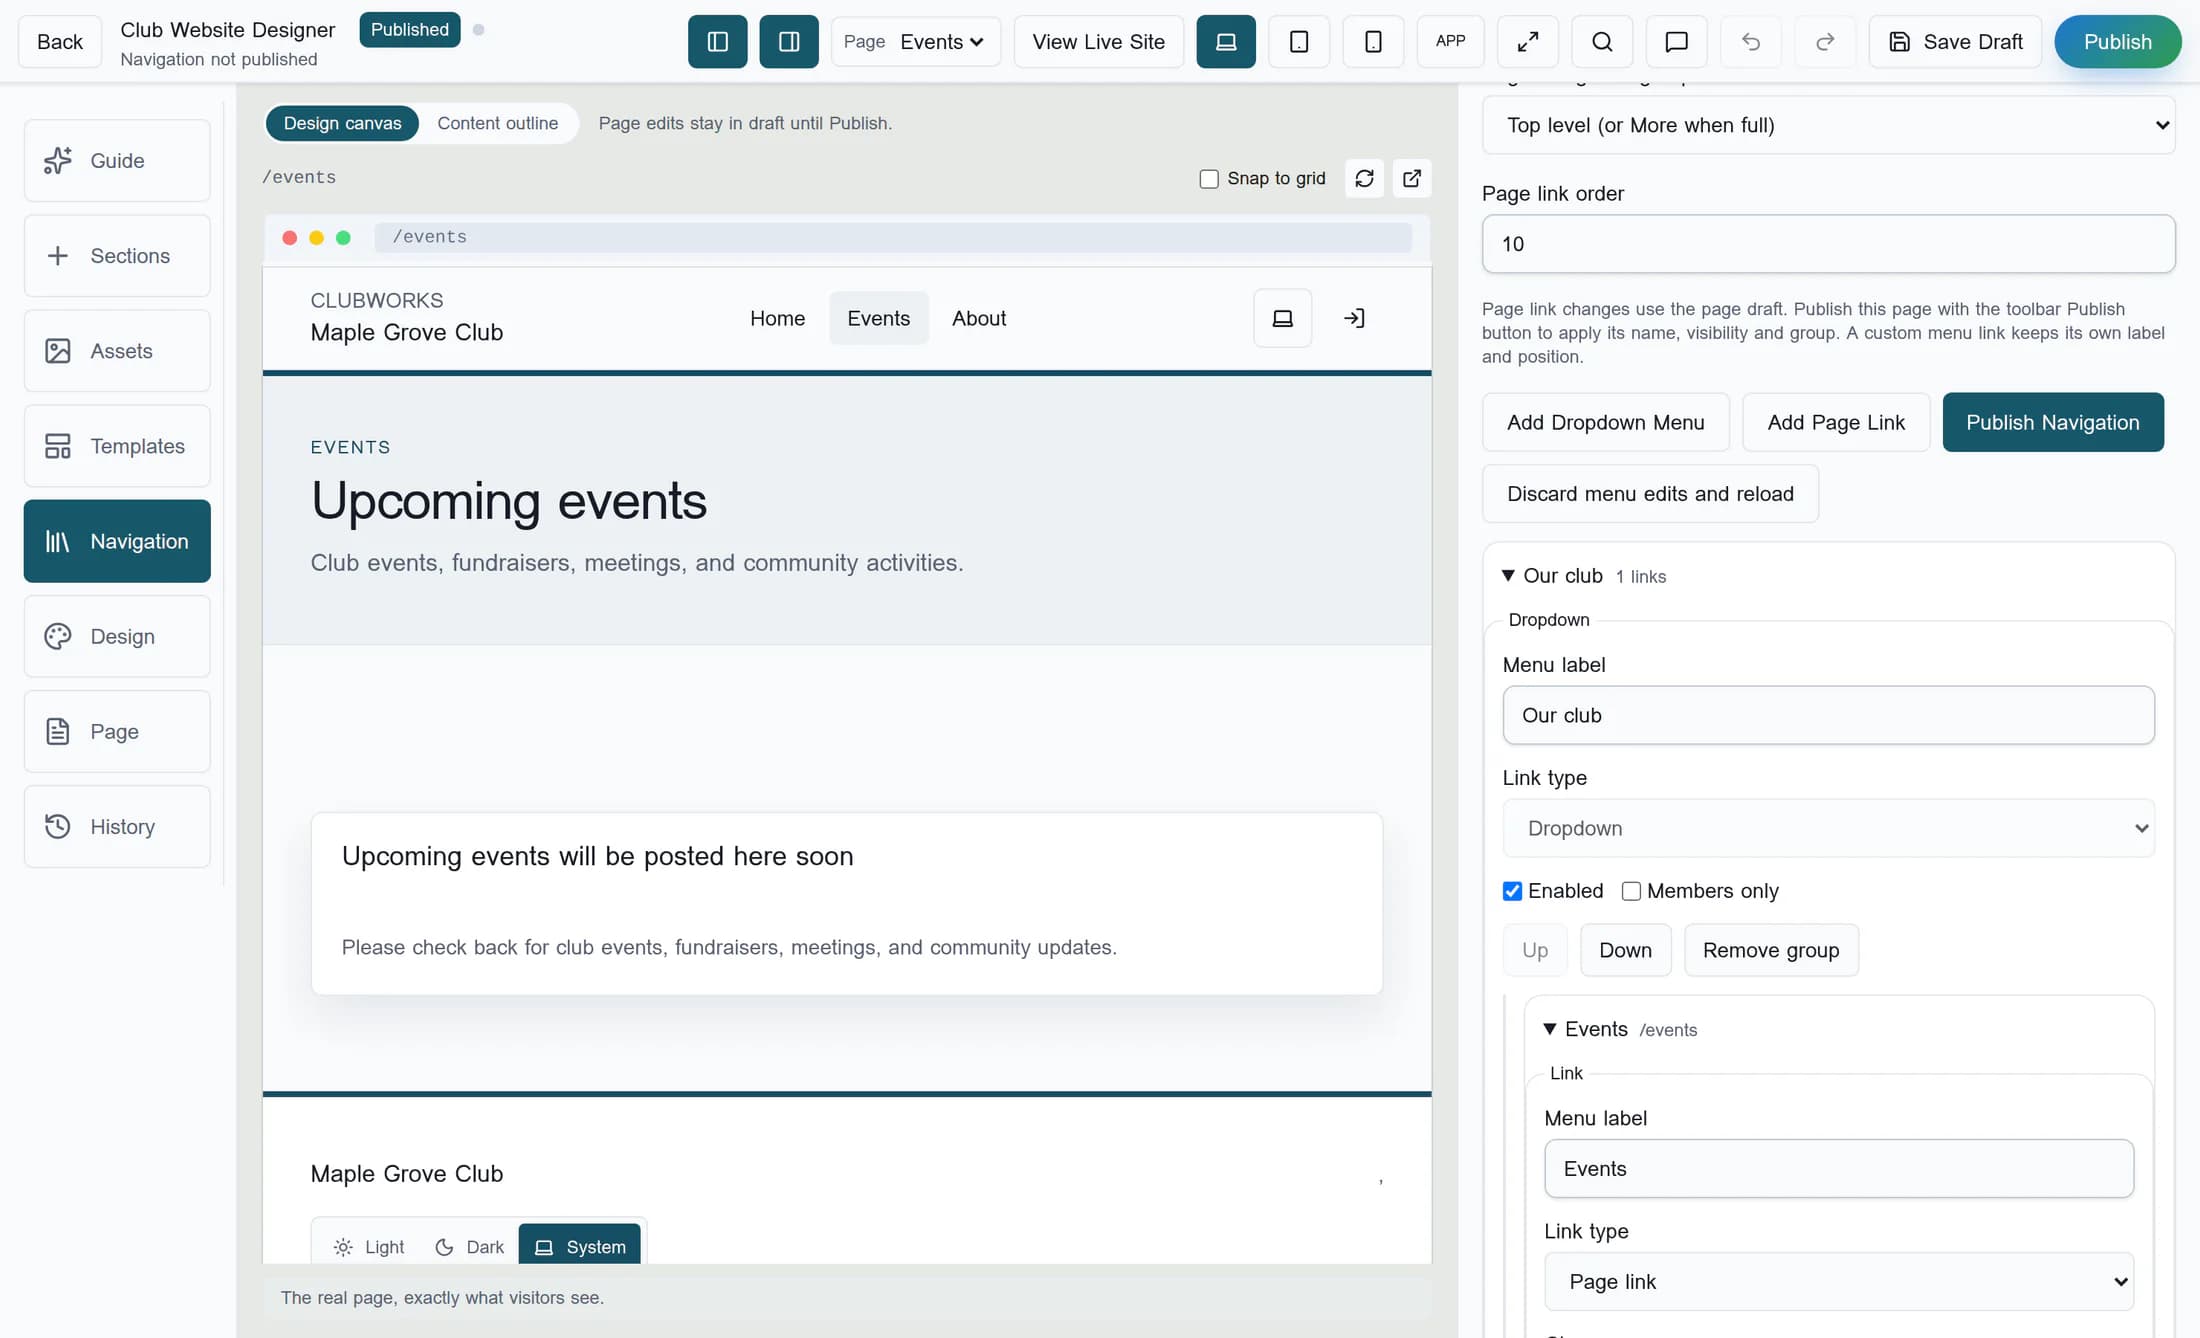
Step 4 of 6
Group, order, or remove links
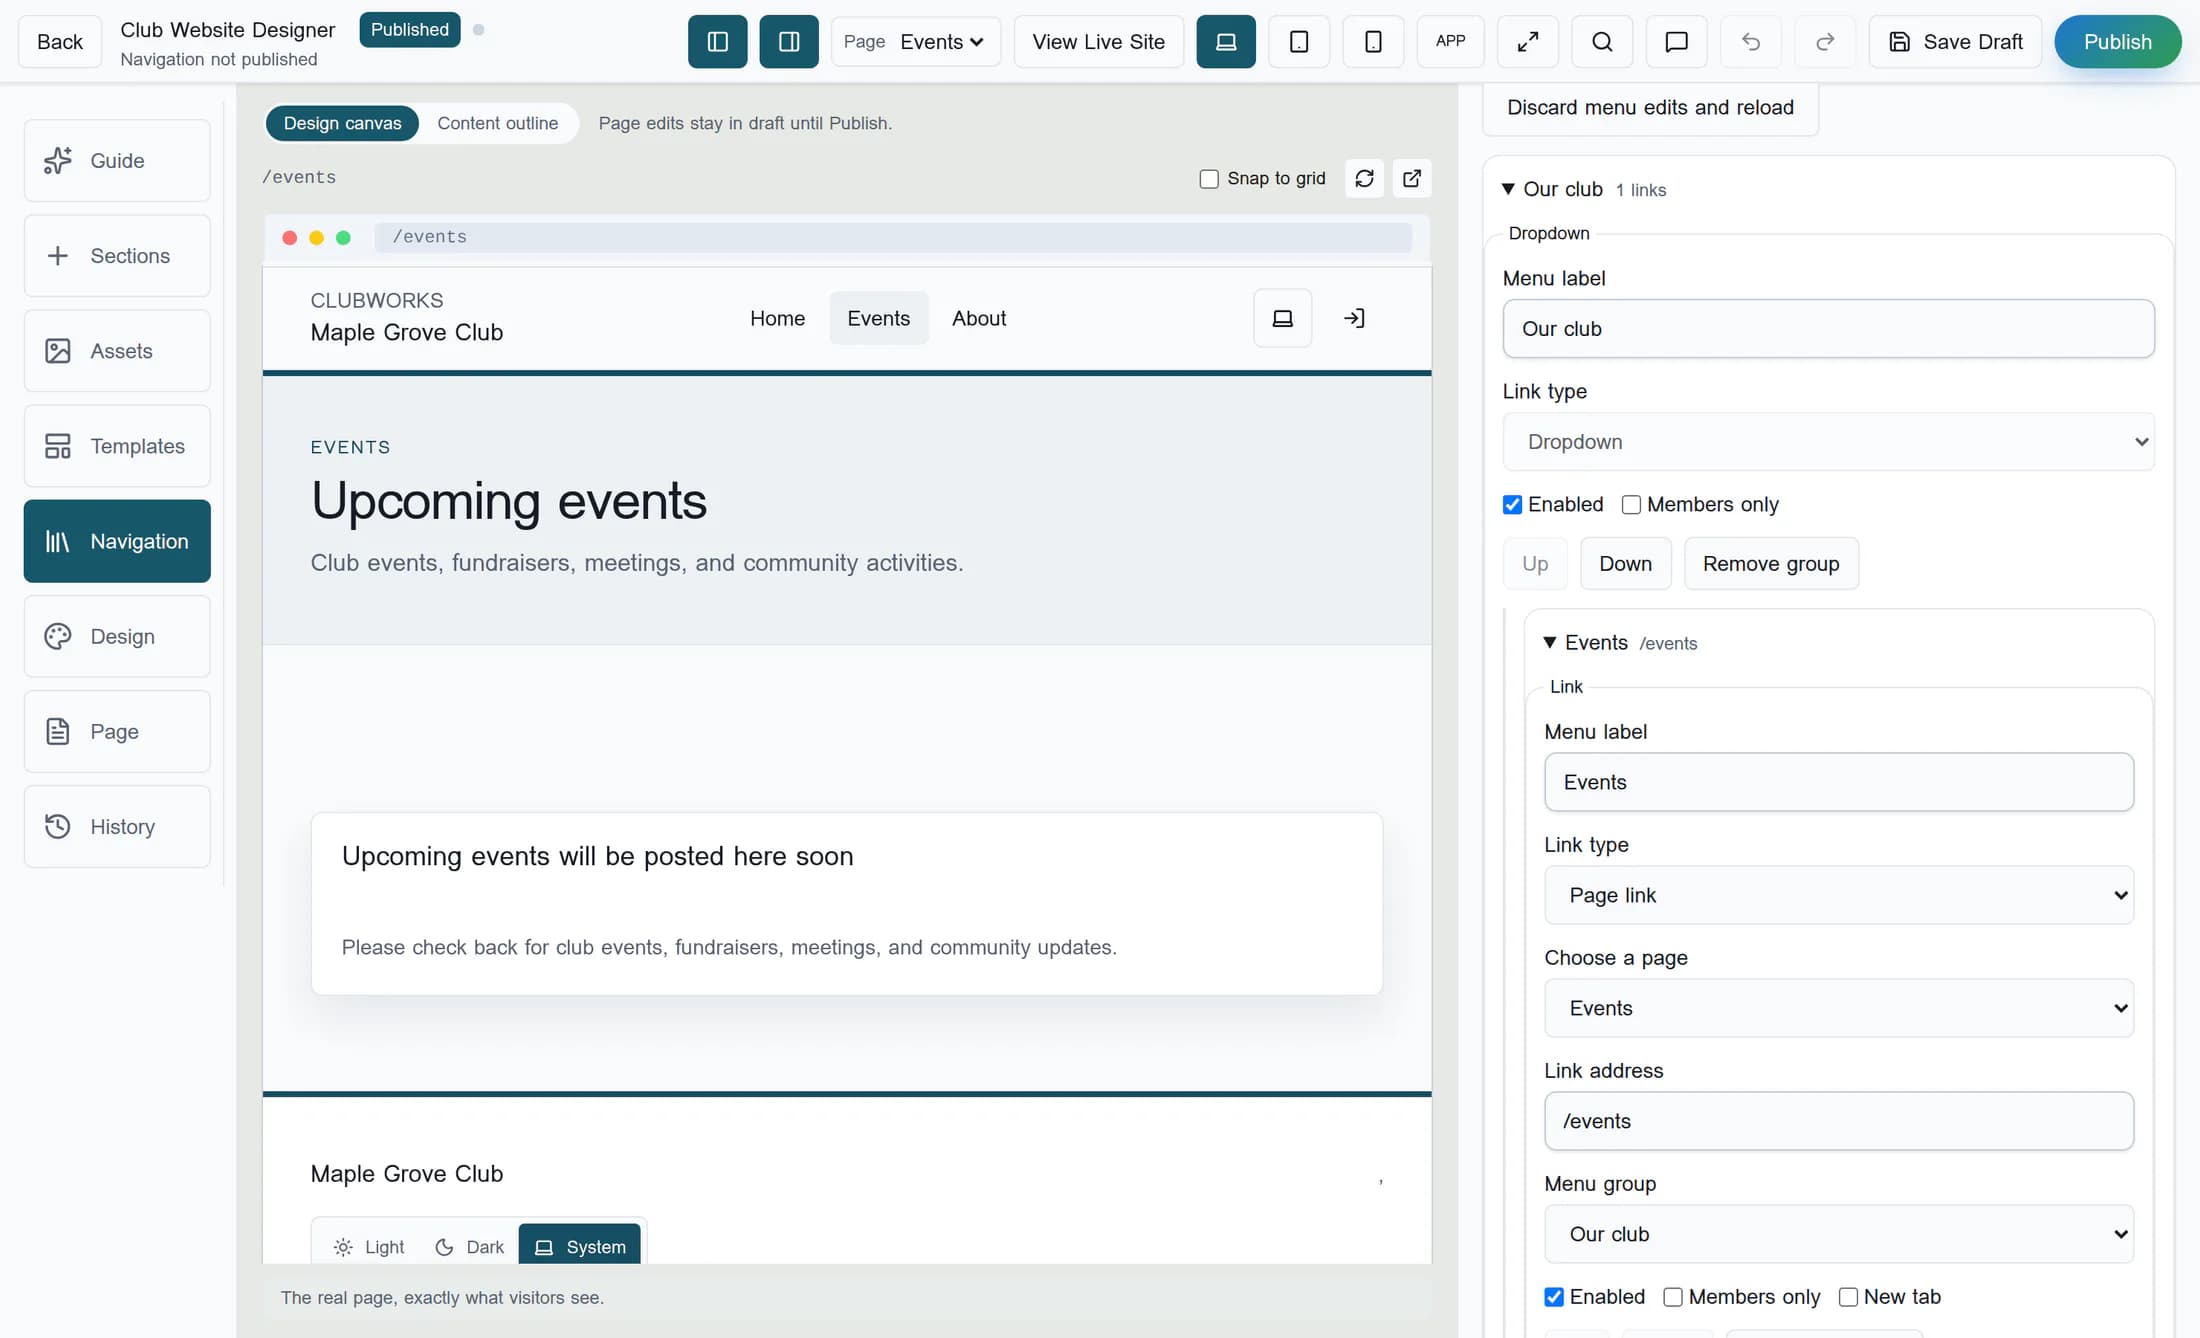
Choose Add Dropdown Menu, expand the new group, and give it a Menu label. Expand a link and choose that group under Menu group; choose Top level to move it out. Use Up and Down within the same level to reorder items. Dropdowns cannot be nested. To remove an item, expand it and select Remove link, Use page default, or Remove group, as shown. Removing a group returns its links to the top level; using the page default removes the custom menu item, not the page.
Step 5 of 6
Publish or discard menu edits
Menu edits are staged separately from page drafts. Select Publish Navigation to save the menu as one change and apply it. To abandon unpublished menu edits, select Discard menu edits and reload. This reloads the saved menu and discards those edits. The desktop header can place extra links under More automatically.
Step 6 of 6
Resolve a problem before retrying
If a validation message appears, give every menu item a label, use a valid address for each link, and keep links inside a top-level dropdown. The menu allows up to 200 items. If navigation publication cannot be confirmed, the editor keeps your edits on screen; check the live site, then use Discard menu edits and reload to review the saved menu before recreating any needed changes and retrying. Reloading discards your staged menu edits. Another editor’s changes can cause a conflict, so compare the saved menu before retrying. For a page draft conflict, review Your draft and Server draft, then choose Save my draft against this version or Use server draft; Export my draft first is available if you need a copy.
You’re all set
Publish each changed page and publish the separate menu when you’re ready. Check the live website to see the resulting navigation.