
On this page
- Before you start
- Open the schedule and add a shift
- Choose who is working
- Set the time and repeat options
- For overnight or open-ended shifts
- Review coverage warnings
- Save and check the draft shifts
- Reopen a shift to verify it
- Finish the coverage plan
- Publish when the drafts are ready
- If a shift does not save as expected
- Summary
Before you start
Step 1 of 3
Open the schedule and add a shift
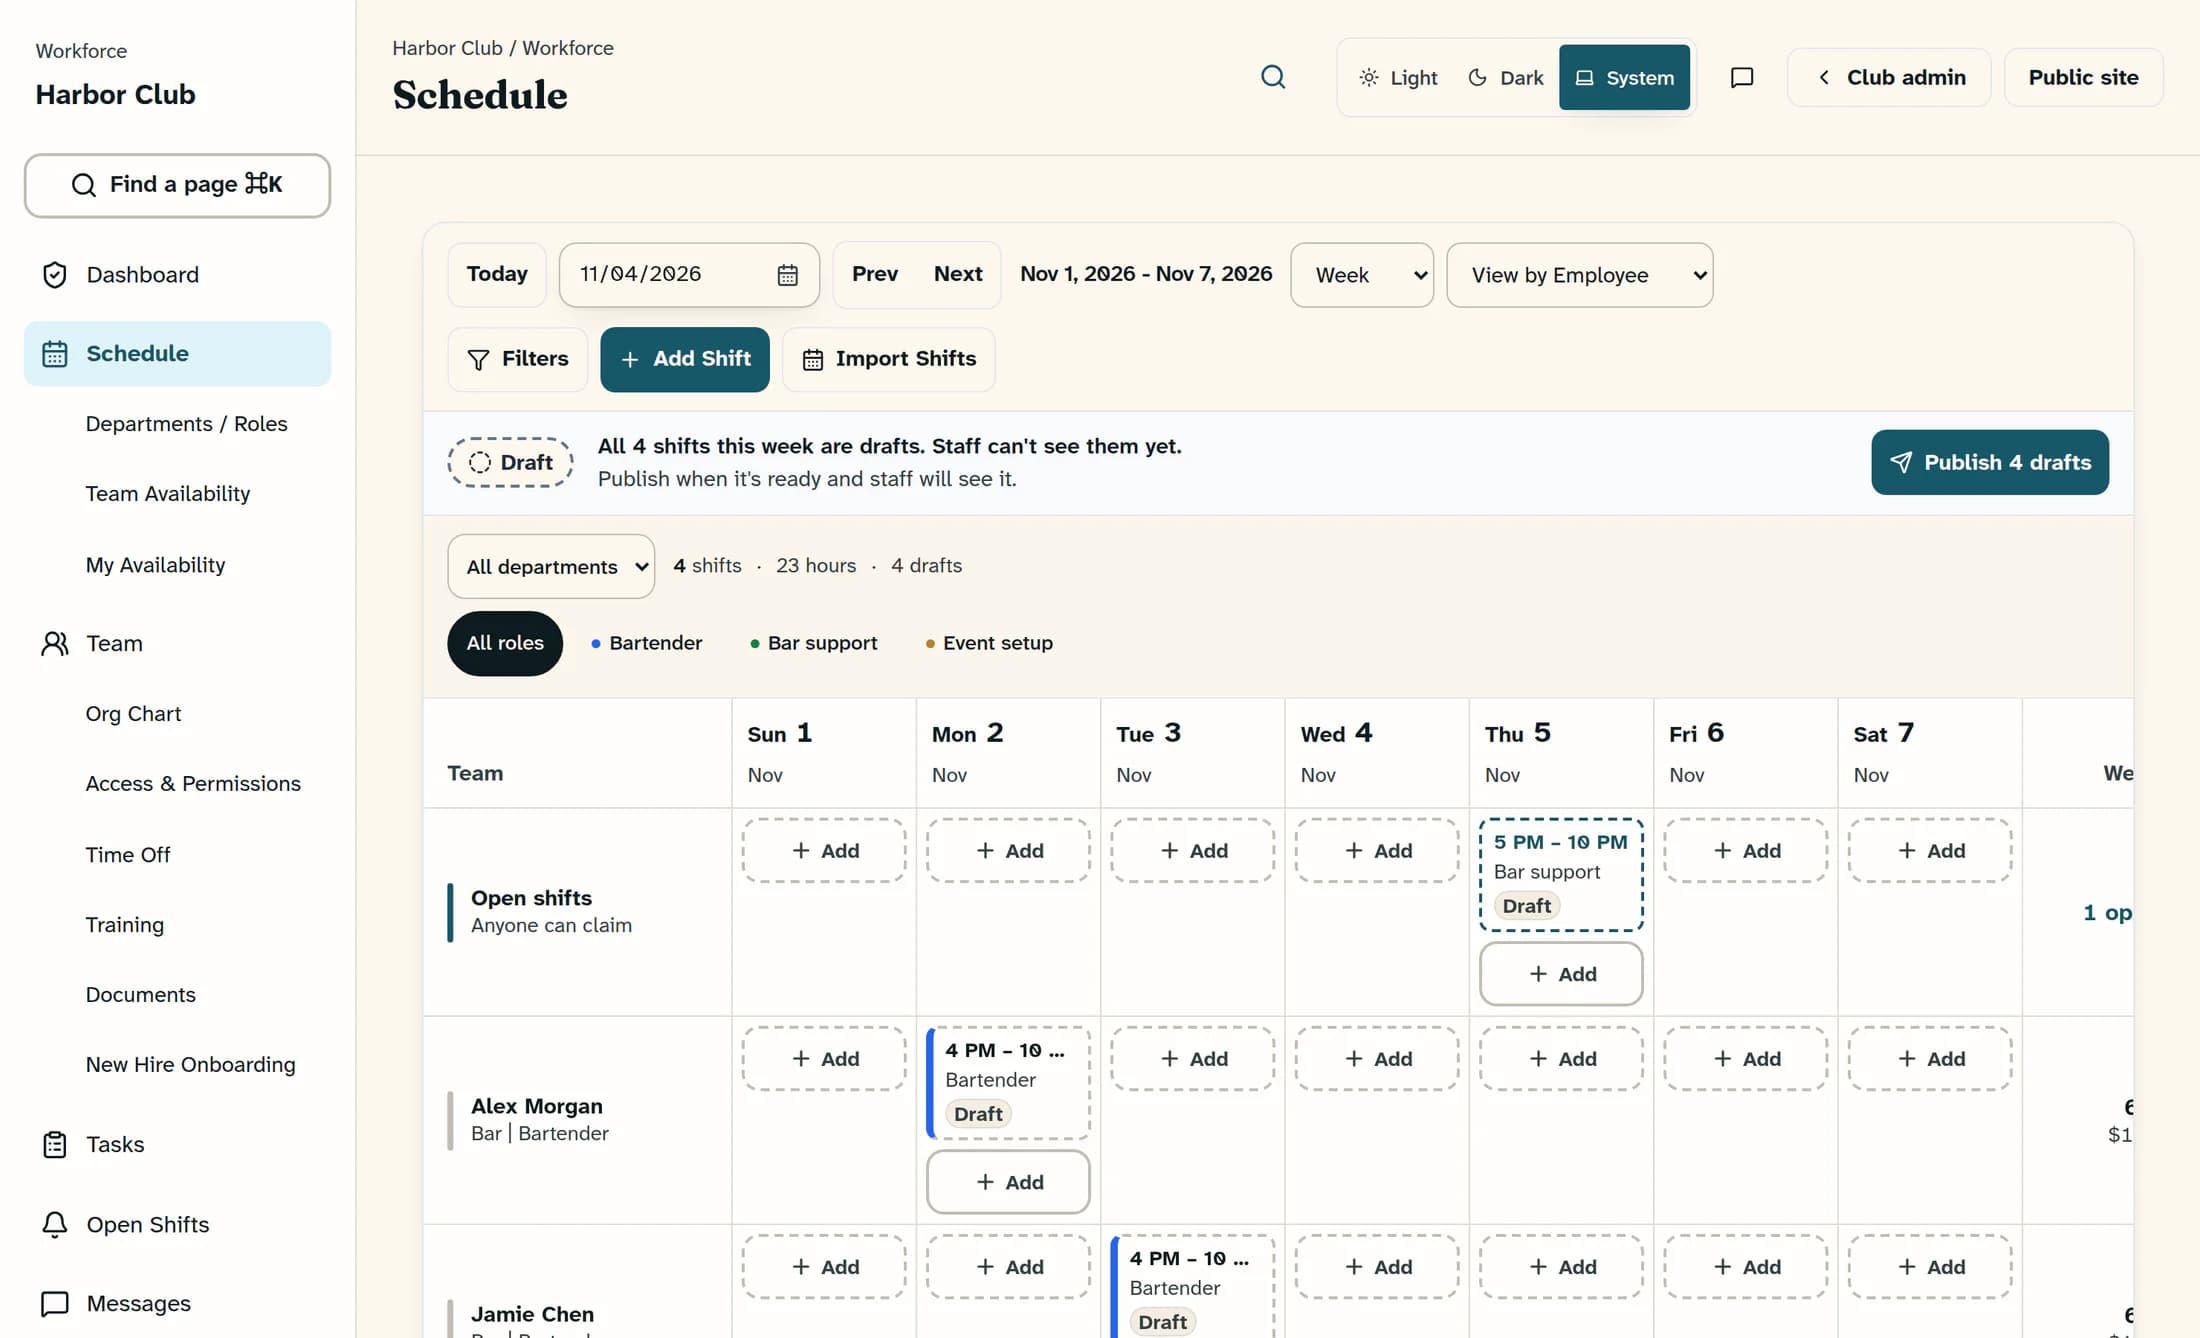
Open Schedule, then choose Day, Week, Month or Agenda in Schedule view and move to the intended date using the date control, Today, Prev or Next. Check the department and role filters, or use Filters, so you know which coverage you are reviewing; then choose Add Shift.
Step 2 of 3
Choose who is working
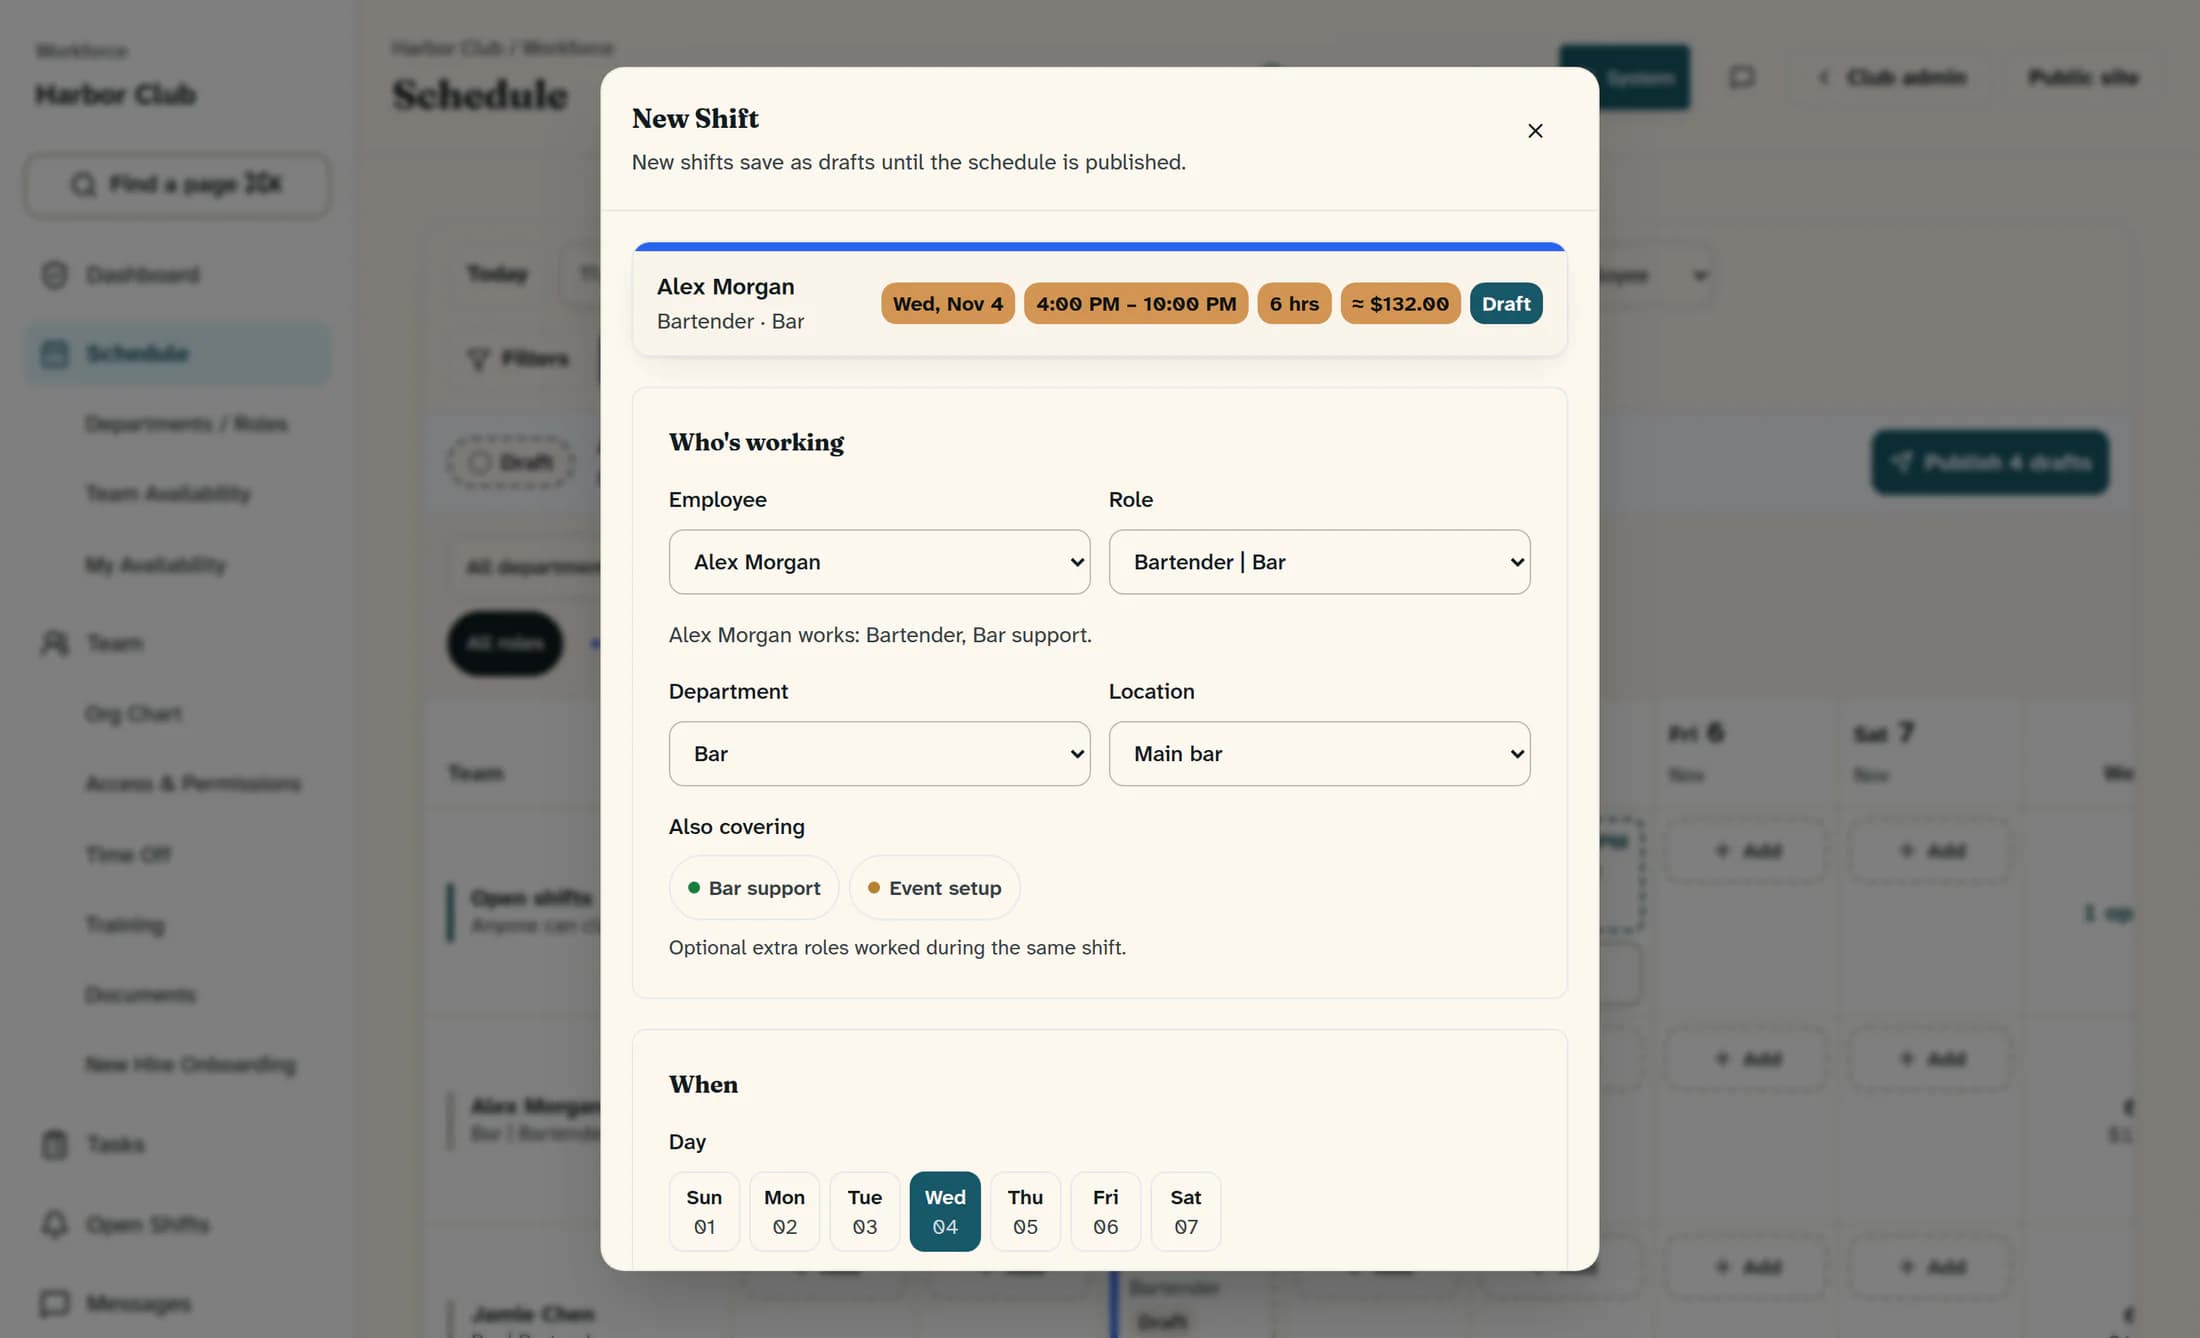
In New Shift, use Employee under Who's working to choose a person, or choose Open Shift — anyone can claim for an unassigned shift. Choose Role and check Department, because changing either can change the other; add Location and any Also covering roles if needed.
Step 3 of 3
Set the time and repeat options
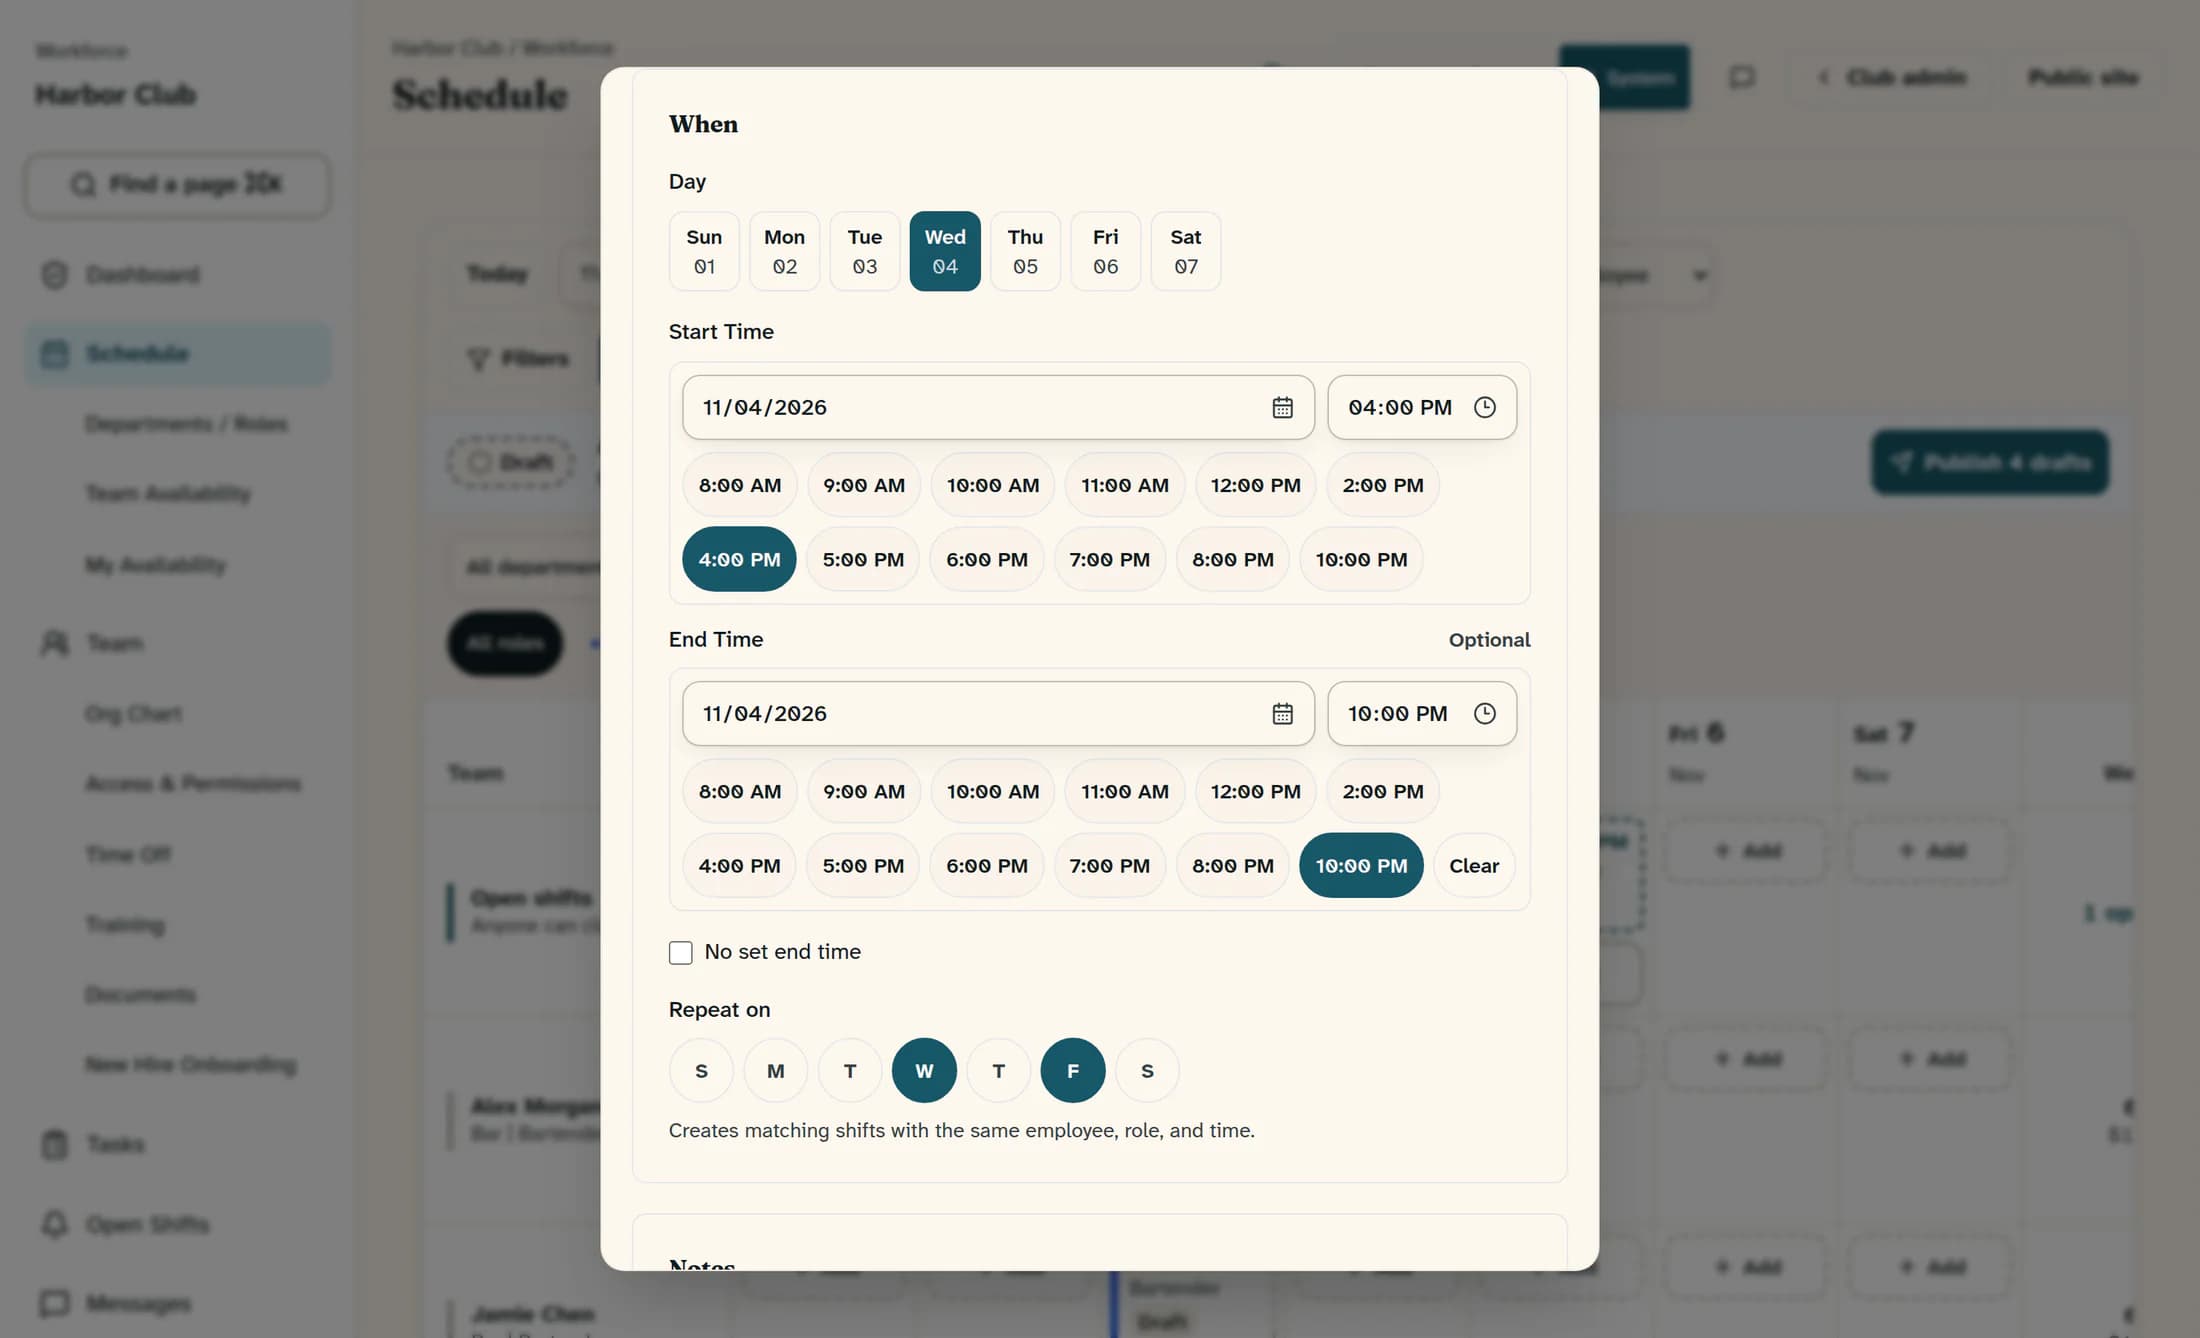
Scroll through When to choose Day and check Start Time and End Time, including their dates and the duration in the shift summary. For a new shift, use Repeat on to add matching days and enter any Notes; finish reviewing the form before choosing Add Shift.
For overnight or open-ended shifts
For an overnight shift, set the End Time date to the following day so it is later than the start. If there is no fixed end, select No set end time and choose the open-ended label; moving the start or choosing a different day moves a fixed end with it, so recheck both dates and the duration before saving.
Review coverage warnings
Read any overlap, time-off, unavailability, weekly-hours or role warnings before saving. Some are advisory and still allow saving, so resolve the coverage plan rather than assuming every warning blocks the form; open-ended overlap checks assume four hours, while time-off and unavailability checks use the start time, so review the full expected shift.
Save and check the draft shifts
Choose Add Shift once and wait for the saved-draft count and the schedule to update. Repeat days create separate draft rows with the same person, role and duration; check every intended date, the number of shifts, the assignment and the start and end times.
Reopen a shift to verify it
Open the saved shift on the calendar and check Employee, Role, Department, Location, dates, times and Notes in Edit Shift. Confirm that it is a draft; if you only needed to inspect it, close the dialog without submitting another change.
Finish the coverage plan
Continue adding shifts for the remaining people, roles and dates, including unassigned coverage where needed. Review the date range, department and role filters, and any open shifts; clearing a filter changes what you see, while your scheduling permissions still limit what you can change.
Publish when the drafts are ready
Saving new drafts does not publish them or send assignment notifications. When the coverage is ready, follow How to publish an employee schedule to review the publication scope and make the intended shifts visible to employees.
If a shift does not save as expected
Summary
You’ve built draft shifts, checked their details and reviewed the coverage plan. Publish the intended drafts as a separate step when you are ready for employees to see them.